
You know the feeling. You drive past a sign that reads future homesite staked into a meadow that has been quietly minding its own business for forty years, and your stomach drops a little. There is goldenrod in there. There is wild bergamot. There is, almost certainly, a patch of butterfly weed you would have paid forty dollars for at the spring sale. By June it will all be a foundation pour and a strip of fresh sod.
I often hear the sentiment expressed: the urge to rescue native flowers from public mow zones is strong. There’s a thrill in carrying a trowel just in case, but the fear of getting into trouble often holds people back.
Native plant rescue is the answer to that exact tension. Done correctly, it is one of the most affordable, most rewarding, and most legitimate ways to fill a yard with strict-native species the local nursery never even orders. Done sloppily, it is a trespassing ticket, a $200 spade snapped on a tree root, and forty dead seedlings in a wheelbarrow by Friday. This guide walks through the legal rescue process step by step, so the goldenrod ends up in your front bed instead of under a slab of concrete.
FREE: Wildlife Garden Starter Guide
Get our 12-page PDF with the 25 best plants for pollinators, simple habitat tips, and a printable checklist — all 100% free.
No spam. Read our Privacy Policy.The Sunday morning ritual that turned roadside yearning into actual rescues
For a lot of suburban gardeners, the rescue urge starts the same way: a slow drive past a flagged lot, the slow realization that the orange ribbons are not survey markers but a doomed plant inventory, and that uneasy feeling of being too polite to do anything about it. You go home. You water the four-dollar coneflower from Lowe’s. You feel a little ridiculous.
The shift happens the morning you understand that those plants are going to die regardless. The bulldozer is already booked. The clearing crew has the work order. Whatever does not get dug up by a person with a trowel will be ground into mulch by a person with a forty-thousand-pound machine. From the plant’s point of view there is no version of this story where staying put ends well.
That reframe is the engine of the rescue movement. It is also why every formal plant rescue group in North America operates the same way: they identify sites that are already condemned, they get permission, and they pull as much living material out of the ground as a few volunteers can carry. The Native Plant Rescue Squad in Tennessee, the Native Plant Rescue Project in Central Texas, and the Georgia Native Plant Society have rescued tens of thousands of plants this way over the last decade. Wild Ones chapters across the Midwest run smaller versions on weekends in spring and fall.
None of those groups dig in road ditches at dawn with a styrofoam cup. They knock on doors. They sign waivers. They show up in safety vests. And the reason they can do that openly is that they understand the part most weekend rescuers skip: the legal one.
Why “guerrilla digging” gets you fined, ticketed, or worse than the law most people assume
Here is the version of the law no one Googles before they pull onto the shoulder. On any private property in the United States, removing plants without the owner’s written permission is trespassing. It does not matter that the property is about to be cleared. It does not matter that the plants are about to be killed. The legal status of the goldenrod is unchanged until the bulldozer actually destroys it. You do not have to harm the property in any other way to be charged.
State and local rules layer on top of that. According to the U.S. Forest Service’s published guidance on rare plant protection, removing plants from federal land is prohibited under the Endangered Species Act, even if the species in front of you is not the listed one. Because identifying a federally listed plant in the field is harder than most weekend gardeners assume. State parks, county parks, and many regional preserves have their own ordinances banning any plant removal. Roadside right-of-ways, which look like nobody owns them, are usually owned by your state department of transportation, and they do prosecute when they catch people digging.
The exceptions are narrower than they look. Private property with documented written permission from the legal owner is the cleanest case. Some states allow homeowners to dig on their own property without restriction. A handful of conservation districts run formal salvage programs on land where development is already permitted and a salvage permit has been issued to the volunteer organization. That is essentially the entire list. The truck-stop ditch and the abandoned-looking field you have been eyeing all spring are almost certainly not on it.
None of this is meant to lecture. The point is that the legal path is short, surprisingly easy, and exists for almost every doomed lot you have noticed driving home from work. Skipping it is the part that makes a rescue feel sketchy. Following it is what turns a styrofoam cup into a real plant collection.
The 30-minute permission script that opens almost any construction gate
The hardest part of getting permission is that almost nobody asks. Developers and builders are accustomed to people complaining about their projects, not volunteering to take dying plants off their hands at no cost. When you approach the right person the right way, you are usually a relief, not an interruption.
Start with the sign at the lot. Most flagged construction sites in the United States are required to post the developer’s name, the permit number, and a phone number. That phone number reaches a project manager or site supervisor, not a corporate office. Call during business hours, identify yourself as a local gardener (not as an activist or environmentalist. Those words make insurance teams nervous), and use a script close to this:
“Hi, I noticed the lot at [address] is going to be cleared soon. I’m a homeowner in the area and I’d like to ask permission to dig up some of the wildflowers and small native plants for my own yard before clearing starts. I’d come during a time that doesn’t interfere with your work, sign anything you need me to sign about liability, and I wouldn’t take anything other than plants. Would that be possible?”
Project managers say yes more often than gardeners expect, especially when you offer two things they care about: a hold-harmless waiver, and a clear time window. A hold-harmless waiver is a one-page form that says you accept all responsibility for any injury to yourself on their site. The Georgia Native Plant Society uses one. So does the Native Plant Society of Texas. Search “plant rescue hold-harmless agreement template” and you will find versions you can adapt; print three copies and bring them to the call back. The clear time window is just naming a date and a two-hour block, so the manager knows when their site is and is not your problem.
If the phone number on the sign goes to voicemail, drive to the site office (most have a portable trailer on site within two weeks of work starting) and ask in person. If neither works, the building permit on file at city hall lists the property owner. They are the legal authority, and a polite letter to that owner. Written, not emailed. Gets a written reply about half the time.
Get the permission in writing. A text message screenshot counts. An email from a company address counts. A signed waiver counts most of all. Carry that paper in your back pocket on rescue day. If a sheriff rolls up. Which has happened to friends of this site more than once. The paper ends the conversation in under a minute.
The rescue-day kit and the one tool every first-timer forgets in the garage
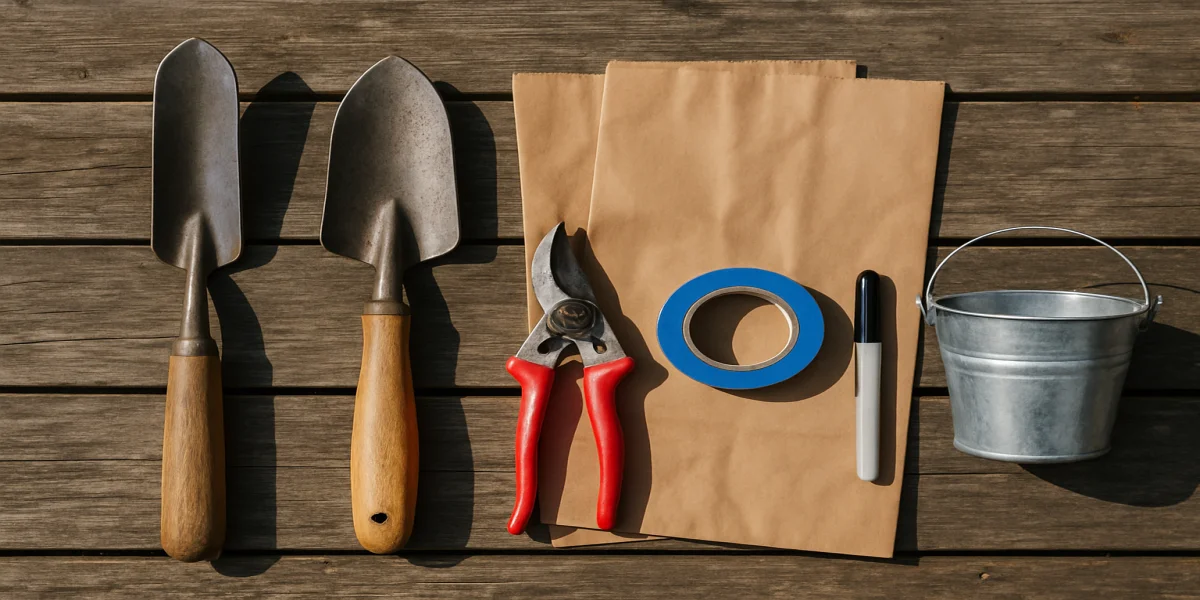
A real rescue is not a romantic afternoon with a hand trowel. It is closer to a weekend yard cleanup, except the goal is to keep things alive instead of bag them for the curb. The kit looks like this:
- Narrow transplanting spade. Not a shovel. The narrow blade slips under root balls without slicing through them. A cheap one from the hardware store works for one season; a Lesche or A.M. Leonard model lasts a decade.
- Hand trowel and a pair of pruners. The pruners are for cutting off the top growth of anything that will not fit in your car otherwise.
- Ten to twenty plastic grocery bags, doubled. Trugs and buckets are nice, but they get heavy and they do not nest in your trunk. Doubled grocery bags hold a quart of soil and a small plant comfortably and stack three deep.
- One five-gallon bucket of water. You will use it. Every plant goes into damp soil within twenty minutes of being lifted, or its survival rate drops noticeably.
- An old bedsheet or cheap tarp for your trunk. The plants are going to drop dirt and seed pods all over your car. Plan for it.
- Sunscreen, gloves, long pants, sturdy boots, and a hat. Construction sites are not pollinator gardens. There is broken glass, exposed rebar, fire-ant mounds, and poison ivy living in the same square mile as the milkweed.
- Your written permission and a phone with a charged battery.
The tool nobody brings the first time, and learns to bring the second: a roll of blue painter’s tape and a permanent marker. You will dig up plants you do not recognize. You will think you will remember which one is which. You will not. Tape a square of painter’s tape to each bag, label it with what you think the plant is, and add the date. Three weeks later, when the plant pushes its first new leaf in your holding bed, you will know what you saved.
Which natives transplant well from a doomed lot and which sulk for two full seasons
Not every plant in a meadow is rescue material. Mature shrubs with deep, established root systems often will not survive a hand-dug transplant. Trees over four feet tall almost never do. Knowing what to leave behind is what separates a successful rescue from a wheelbarrow of expensive compost.
Plants that transplant well, in the order most rescuers recommend grabbing them:
- Spring ephemerals while they are still dormant or just emerging. Bloodroot, mayapple, Virginia bluebells, trillium (only where state law allows; some are protected). These plants spend most of their life as a rhizome an inch under the soil, and they handle the move surprisingly well if you keep the rhizome wet.
- Perennial wildflowers under three years old. Coneflower, black-eyed Susan, mountain mint, wild bergamot, asters, goldenrod. The root systems are still small enough to lift in one piece.
- Sedges and short native grasses, Pennsylvania sedge, little bluestem clumps under a foot tall. These are basically guaranteed to live if you keep the root ball intact.
- Ferns in shaded sites, especially Christmas fern and lady fern. Ferns are forgiving as long as you transplant them into similar shade.
- Native shrub seedlings under two feet tall. Viburnum, native azalea, spicebush, serviceberry. Anything taller has a taproot that will resent being severed.
Plants to leave for the bulldozer (or take only if you are feeling experimental):
- Mature trees of any kind. The root spread is wider than the canopy. You cannot reasonably dig it.
- Anything with a deep taproot more than two seasons old. Butterfly weed, baptisia, prairie dock. Counterintuitive, but true. They are easier to grow from collected seed than transplanted as adults.
- Anything in active bloom. Flowering plants are pouring energy into reproduction, not roots. The transplant shock is brutal. If you must take one, prune off every flower before lifting it.
- Anything you cannot identify with confidence. Construction sites grow plenty of invasives too. The last thing you want is to drive home with a Bradford pear seedling and plant it in your yard on purpose. If the leaves look familiar but you are not sure, take a moment to verify the species against your county’s native plant list before you commit a hole in your bed to it.
If the site has any rare or state-listed plants. Pink lady’s slipper, ginseng, federally listed wildflowers. Leave them alone or coordinate with your state native plant society first. Even with the landowner’s permission, federal protection on listed species follows the plant, not the property line. The U.S. Fish and Wildlife Service’s endangered species program publishes the official list, and roughly 940 plant species are currently federally listed as threatened or endangered.
The root ball, the time of day, and the watering window that actually decide survival
The single biggest difference between a successful rescue and a row of dead seedlings is not which plants you took. It is how you treated the roots in the ninety minutes between lifting and planting.
The Cornell horticulture program and a half-dozen extension offices all teach the same survival rules for transplanted perennials, and rescue work follows them exactly:
Time of day. Dig in the early morning or in the last two hours before sunset. The midday window is where transplant shock comes from. A plant lifted at noon under bright sun loses water faster than its damaged roots can replace, and that water deficit is what kills it three days later in your bed. Cool, overcast days are perfect for rescue work; bright, hot, breezy days are the worst possible conditions.
Root ball size. Smaller than you think. The Native Plant Society of Northern American (NANPS) field guidance is explicit: a large root ball is rarely necessary, and it is extremely difficult to transport. For most herbaceous perennials under three years old, a six-inch-deep, eight-inch-wide root ball is plenty. For shrub seedlings under two feet, twelve inches deep and twelve inches wide. Going bigger does not help the plant; it just means you cannot fit five rescued plants in your car when you could have fit fifteen.
Moisture during transport. Every grocery bag gets a half-cup of water poured directly onto the soil before it leaves the site. The roots stay wet, the soil clings to them, and the bag becomes a temporary nursery for the drive home. Do not stack bags more than three deep. The bottom plants get crushed.
The receiving hole. Dig your holes at home before you go to the rescue site. This is the rule everyone breaks once and never again. A plant out of the ground for four hours has lost most of its first-week survival odds. A plant out of the ground for thirty minutes still has all of them. Pre-dig at least one extra hole more than you plan to bring back; you will always come home with one more plant than you expected.
The water-in. Plant, then water deeply enough that water pools at the surface for fifteen seconds. That fills the air gaps around the roots. Then do not water again for two days, even if the soil looks dry on top. Overwatering rescued plants suffocates them; underwatering withers them. Two-day cycles for the first three weeks is what most experienced rescuers settle on.
Shade for the first week. Anything you transplanted in spring is going to face full sun within days. Lay a piece of row-cover fabric or a section of old window screen over it for the first week. Recovery rates double when transplanted plants get partial shade for seven days. After two weeks, lift the cover and let them face the season.
If you do these five things, an honest survival rate for spring-rescued perennials sits somewhere between 70 and 85 percent. If you skip them. Dig at noon, no water in the bag, plant whenever you get around to it. Survival drops below 30 percent. The plants do not care that you meant well. The roots react to physics.
How to handle HOA pushback and “what is going on at your house” neighbor energy
It’s funny how no one talks about the awkwardness of coming home with sixty seedlings stuffed into grocery bags, planting them in a 200-square-foot flower bed, and noticing the curtains across the street twitching. I get where that fear comes from; nobody wants to be seen as the person who has what someone in my neighborhood bluntly called ‘a screw loose.’ And, of course, the HOA letter shows up forty-eight hours later, inquiring about the disturbance at your house.
This is not actually about the plants. It is about visibility. A yard that looks like an ongoing project reads as a project. A yard that looks like a finished landscape reads as intentional. The same forty rescued seedlings can read as either, depending on how you frame them. The five HOA-safe design patterns for native gardens are the same ones experienced rescue-bed builders fall back on for exactly this reason.
A few specific moves that consistently work:
- Plant the rescues in a defined bed with a hard edge. A bed cut with a clean line. Using a half-moon edger, brick, or steel edging. Signals “design,” even before the plants fill in. A bed with a fuzzy line into the lawn reads as overgrowth.
- Mulch heavily on day one. Two inches of shredded hardwood or leaf mulch hides bare soil between rescued seedlings and signals care. The same plants in mulch look intentional; in bare soil, they look forgotten.
- Add one obvious “garden object” per bed. A small sign, a bird bath, a low boulder, a hand-painted wood marker. One non-plant object per bed tells passersby that someone is tending the space.
- Keep the lawn edge sharp for the first six weeks. Native conversions get judged by the edges. A meadow with a precisely mowed border reads “wildlife garden.” The same meadow with a ragged edge reads “the lawn mower is broken.”
- If your HOA requires plant lists, give them one. Most HOAs that allow native plants at all want documentation, not perfection. A typed list of botanical names, Echinacea purpurea, Rudbeckia hirta, Solidago speciosa. Sent to the architectural committee in advance is rarely refused. The Latin names alone do most of the work; they sound like landscape design rather than ecological rebellion.
And for neighbors, the most disarming thing you can say when someone asks what is going on at your house: “I rescued these from a lot that’s getting cleared on Maple Street. The county said they were going to be bulldozed Tuesday.” That is a story everyone understands. Rescue energy is universally legible in a way that “I’m restoring native pollinator habitat” is not.
The holding bed where rescued plants earn their permanent spot
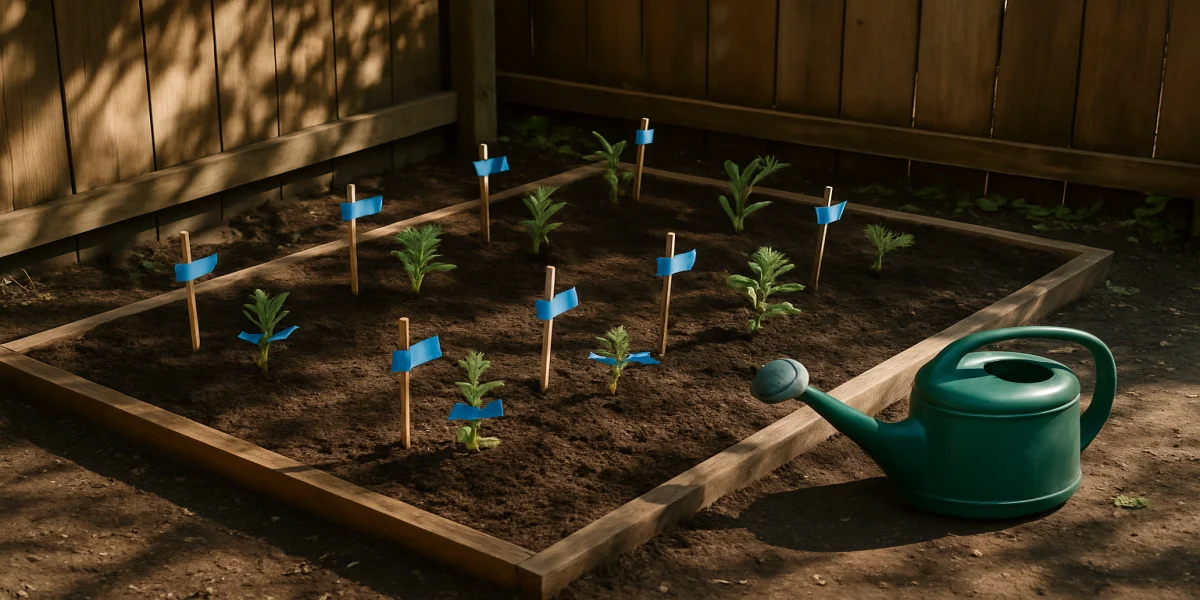
Here is the trick experienced rescuers learn in their second season: rescued plants do not go straight into their final home. They go into a holding bed first.
A holding bed is a small, prepared rectangle. Four feet by six feet is plenty for most home gardens. Set in part shade, with rich loose soil and easy access to a hose. Rescued plants get planted there on rescue day, close together, in rows, like a vegetable garden. They live in the holding bed for two to twelve months. Then, once you can see what survived, what is recognizable, and what is actually thriving, you transplant the keepers into your real garden beds in fall or the following spring.
Why this matters. About a quarter of any rescue lot is going to be plants you cannot identify until they bloom. Another quarter will be plants that survive but never quite recover. The remaining half are the keepers. Putting all of them in their permanent spot on day one means you spend the next year staring at gaps where the failures were. Putting them in a holding bed means your real beds get only the survivors, in fall, when transplant shock is at its lowest.
The holding bed also makes the social part easier. A row of unknown seedlings in a small back-corner bed reads as a vegetable patch, not a wildflower mess. Nobody calls the HOA on a vegetable patch.
What changes the first time a rescued goldenrod blooms in your front yard
The math of plant rescue is uncomfortable in the best possible way. A single afternoon at a doomed lot, with permission, can produce thirty to fifty mature plants that would have cost six to twelve dollars apiece at a native nursery. That is somewhere between $200 and $600 of plant material, in your yard, free, in one Saturday. If rescue is not an option in your area, the cheap-and-free sources for native plants ranked by real cost are the next-best route on dollars per square foot.
The slower payoff is the one that ends up mattering more. You watch the plants bloom in your bed the next spring. You realize the goldenrod that the county was about to grind into mulch is now the centerpiece of a flower bed feeding three species of native bee. The Xerces Society notes that roughly 70 percent of native bee species nest in the ground, and goldenrod is one of the late-season nectar sources keeping them fueled through September. You start noticing other lots. The orange ribbons, the survey stakes, the developer signs. And the noticing turns into the kind of attention that does not belong to many other parts of suburban life. You stop feeling helpless about the construction. You start feeling useful.
The next step, if you want one, is to find your local native plant society chapter and ask whether they organize coordinated rescues. Most do, at least once or twice a year. Volunteers split the haul. Veterans teach you which plants travel well in your specific region. Liability forms get handled in advance. You meet other people who keep grocery bags and a transplanting spade in their trunk for exactly the same reasons you do. They are very easy to like.
For the days when there is no organized rescue and the lot down the road is going to be cleared on Tuesday: now you have the script, the kit, the species list, the survival rules, the HOA defense, and the holding bed. The styrofoam cup can stay in the garage.
Frequently asked questions about rescuing native plants
Is it ever legal to dig plants from a roadside or public ditch?
Almost never without a permit. State departments of transportation own most road rights-of-way, and digging there is treated as removing public property. A few states do issue salvage permits for specific projects, usually to non-profits. Call your state DOT before you dig anything from a ditch, no matter how doomed it looks.
What time of year is best for plant rescue?
Late fall through early spring, while plants are dormant or just emerging. Dormant plants handle root disturbance with the least shock. Spring rescues work well for ephemerals and small perennials, summer rescues are the riskiest, and fall rescues offer the best long-term survival because new roots establish before the next summer’s heat.
How many plants can a single person realistically rescue in one trip?
For most weekend rescuers working alone with a sedan or SUV, thirty to fifty perennials is a full day and a full trunk. With a friend and a pickup, double that. Beyond fifty plants you are running into a logistics problem. Water, transport, and pre-dug holes. More than a digging problem.
Do rescued plants count as “native to my yard” if they came from forty miles away?
Generally yes, if they came from the same eco-region. Plants from your county or an adjacent one are essentially local genetics. Plants from across the state are still native species but not local provenance, which matters for some pollinator relationships. For most home gardens, anything from within a 100-mile radius is functionally local.
What if the developer says no?
You stop and you move on. The number of doomed lots in any given growing season is far larger than any one person can rescue from. Burning a relationship with one developer can close doors with the others in the area, who tend to know each other. A polite “thanks anyway, please reach out if anything changes” leaves the door open, and sometimes they do circle back a month later.
Can I sell rescued plants at a fundraiser or plant swap?
Almost never. Every formal rescue program in North America forbids selling rescued plants because it would, in their words, violate the trust of the landowners who allowed the rescue. Gifts to neighbors and trades at non-commercial swaps are usually fine. Sales. Even for charity. Are not.
Do I need insurance to do a plant rescue?
For an individual rescuer with the property owner’s written permission and a hold-harmless waiver, no. For an organized group rescue with multiple volunteers, yes. Most native plant societies carry event-day liability insurance for this exact reason. A solo rescuer is essentially an invited guest of the property owner.
For a step-by-step guide on what to do with rescued plants once they arrive. Including which species combine well in foolproof beds. See our breakdown of the foolproof native plant garden recipe by USDA zone. For more on the legal framework around rare native plants, the U.S. Forest Service maintains a summary of laws and regulations protecting endangered plants that is worth a careful read before any rescue.
Related reading
Want More Wildlife Garden Tips?
Join 5,000+ nature lovers getting our weekly tips on creating wildlife-friendly gardens.
No spam, unsubscribe anytime. Privacy Policy
Emma Harrington
Emma Harrington is a wildlife habitat researcher and content editor with a passion for backyard conservation. She has spent over a decade translating ecological science into practical tips anyone can follow — from selecting native plants to building wildlife-friendly habitats. Her work focuses on helping homeowners transform ordinary yards into thriving ecosystems for bees, butterflies, hummingbirds, and other beneficial wildlife.