If you’ve ever picked up a budget drip irrigation kit at a big-box store, brought it home, and spent an afternoon wrestling with tubing that refuses to lie flat, you already know the trade-off that gardeners quietly face: the cheap kits are genuinely cheap, but they fight you. The more expensive systems flex into place. How much is that difference worth?
This guide compares the actual performance of budget drip lines (around $30 to $50) with premium systems (around $100 to $200) across the things that matter for a native plant garden: tubing flexibility, emitter variety, fitting reliability, and long-term durability. You’ll see specific products in each tier, honest failure modes from real users, and three installation tricks that make budget kits much easier to work with. Along with a practical note on when drip irrigation is actually useful for native plants at all.
Native plants are a slightly unusual case for drip irrigation because most of them are drought-tolerant once established. That changes the math on how much to invest. The goal here is to help you pick the level of system that matches both your yard and how long you’ll actually keep it running. Without spending more than you need, or suffering through an installation that wastes a weekend.
FREE: Wildlife Garden Starter Guide
Get our 12-page PDF with the 25 best plants for pollinators, simple habitat tips, and a printable checklist — all 100% free.
No spam. Read our Privacy Policy.The installation problem with budget drip irrigation
A handful of experiences from gardeners who bought budget drip kits, all describing the same basic friction:
“It doesn’t lie flat on the mulch like the softer stuff does either, as the plastic has a ‘memory.’”
“It did not want to uncurl from the way it was rolled up, even when I cut it into smaller lengths.”
“They are way stiffer than the Flantor tubes, so I need to use my hairdryer to heat them before forcing them over the barb.”
“In order to get enough water to the large pots, I have to almost flood my smaller pots. This particular kit does not have different sized nozzle tips.”
And a note about timer issues that anyone who has dealt with early-morning watering complaints will recognize:
“The timer decided it was a stand-up comedian, mistaking 3 AM for prime watering time.”
There are two distinct problems here. The first is physical. Budget polyethylene tubing is stiff, has a memory from being coiled during shipping, and often requires heat to install onto barb fittings. The second is functional. Most budget kits come with a single emitter flow rate, which means every plant on the line gets the same amount of water whether it’s a small container or a three-gallon shrub.
Neither problem is a dealbreaker. Both are real, and they matter more than the price difference suggests. Especially when you factor in the install time the stiff tubing actually costs.
What drip irrigation is really for in a native garden
Before looking at specific systems, it’s worth setting an expectation about how much drip irrigation a native planting actually needs.
Native perennials have a two-phase water relationship:
- First year: They need consistent moisture to establish roots. Without it, 30–70% typically die.
- Year two onward: Most natives are drought-tolerant. Many. Liatris, butterfly milkweed, salvia. Are actively harmed by regular watering.
A native gardener put the point plainly:
“Native species like Liatris, Salvia, and Butterfly Milkweed really don’t like wet feet.”
And the establishment-year recommendation:
“Make sure to keep them well watered in the weeks right after you plant. You can taper down the watering frequency after that as they establish good roots.”
The practical implication is that drip irrigation for native gardens is largely a year-one tool. You might run it hard during the establishment season, then dial it back or remove sections entirely as the plants take root. That changes how much to invest. A $300 premium system that gets fully used for one year and then partially dismantled is probably overkill, while a $35 budget kit that costs you twenty hours of installation frustration isn’t a bargain either.
The question becomes: for roughly 8–12 weeks of heavy use, then occasional supplemental use, what’s the right tool?
Budget drip systems ($30–50)
The Raindrip R560DP Kit
The most widely reviewed budget kit. Runs about $35 and includes everything needed for a watering system of around 20 plants: main tubing, microtubing, emitters, stakes, and fittings.
A common experience:
“The kit has everything that you need to set up a watering system for 20 plants. The hose is a bit stiff, but otherwise I am very satisfied. The price is incredible, I had no idea that I could have an automatic watering system for my garden for only $35.”
The trade-offs:
“It only comes with .5 gal/hr tips.”
“I worry about the plastic hose connectors popping off.”
Raindrip works best when every plant on the line needs roughly the same amount of water (for example, 20 similar-sized containers). It struggles with mixed setups where some plants need much more or less flow. The stiff tubing is real, but manageable with a hairdryer or a few hours of sun exposure before installation.
Flantor (and similar cheap Amazon kits)
Softer tubing than Raindrip, which makes installation significantly easier. The trade-off is pressure tolerance:
“My Flantor pipes are soft and can be directly pushed in.”
“My water pressure is higher so my original Flantor pipes (designed for <20 psi systems) pop open sometimes, and my current solution is to bury them in the earth.”
For gravity-fed systems (a rain barrel, for example) or low-pressure setups, Flantor-style kits work well. For standard municipal water pressure (50+ psi), the tubing and fittings tend to fail. If you don’t know your home’s water pressure, a $10 gauge that threads onto an outdoor spigot will tell you in about thirty seconds.
Generic off-brand polyethylene
Unbranded kits from Amazon in the $20–35 range. Cheapest option; also the one with the most complaints:
“It is cheap, semi-rigid plastic. It doesn’t lie flat on the mulch. The loops and coils that stand proud of the mulch are serious trip hazards.”
An extension volunteer I trust pointed out the reasons some end up choosing off-brand lines despite their initial intentions.
“I was pushed to purchase off-brand merchandise for irrigation in my rose garden after the name brand product I was using for years got too expensive to buy when I expanded my garden space.”
This is a reasonable use case. Someone who already has a premium system and is extending it to a secondary area where the cheaper lines can be buried or hidden. As a primary system for a front-yard native planting, the physical presentation (stiff loops, trip hazards) usually makes it a poor fit.
Premium drip systems ($100–250)
Gardeners who have upgraded from budget to premium tend to describe the same improvements. The core one is tubing behavior:
“Soft rubber hose that will easily take any shape or direction you lie it in.”
That one property. Tubing that doesn’t fight the installer. Changes an installation that takes three hours into one that takes ninety minutes, and it eliminates the trip-hazard problem entirely.
Three specific premium options worth considering.
Rain Bird Patio Bug Kit
Typically $110–140. Uses softer, UV-stabilized tubing and includes variable-flow emitters (0.5, 1.0, 2.0 gallons per hour), which solves the mixed-container problem that Raindrip has. Five-year warranty on fittings. Tubing stays flexible across temperature ranges, so the same kit works in winter storage and summer heat without the “plastic memory” issue.
Widely available at home and garden retailers. Good fit for residential systems of 20–50 plants with varied sizes.
Dig Corporation modular kits
Usually $90–160 depending on configuration. Dig is common among landscape professionals and native plant nurseries. The approach uses a main line with individual spaghetti-tube “drippers” branching to each plant, meaning every plant gets its own dedicated flow rate without sharing main-line pressure.
The design is more modular than a kit-in-a-box system. You buy the parts you need and build a custom layout, which takes slightly more planning but produces a much better-tuned result.
Netafim Techline (for larger projects)
$200–400 for a residential-sized project. Used commercially by landscape contractors and by some larger native plant nurseries. Netafim’s pressure-compensating emitters maintain consistent flow even across elevation changes, which matters for sloped yards.
For most residential native plantings, Netafim is more system than the situation warrants. It’s worth knowing about mainly for anyone irrigating a 2,000+ square foot native meadow, which is a niche case.
Three tricks that make budget kits easier to install
If you’re going with a budget kit anyway. Which is a perfectly reasonable choice for a small first-year planting. Three techniques from the community make the installation significantly less frustrating.
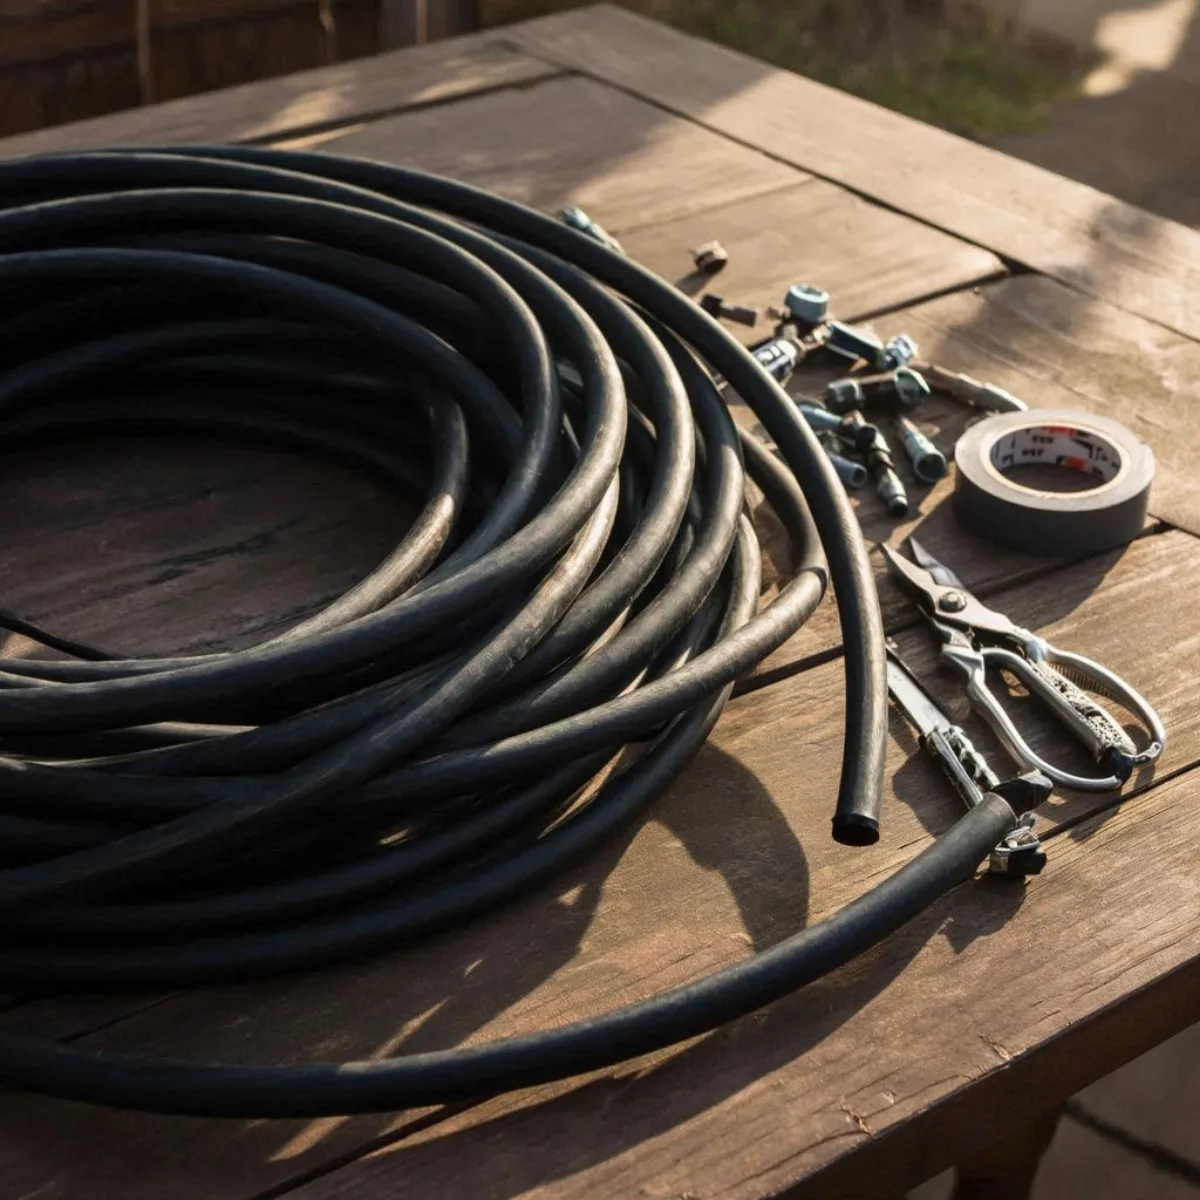
The hairdryer approach
The most common trick:
“I need to use my hairdryer to heat them before forcing them over the barb. I suggest either preparing them indoors first or connecting a power cable to your work site.”
Heat the end of a tubing section with a hairdryer on high for 20–30 seconds. The plastic becomes pliable for about 15 seconds. Just long enough to push the fitting in. The result: no wrestling, no cracked fittings, no frustration.
If you’re pre-fitting lengths of tubing indoors before carrying them outside, a single hairdryer session can knock out an entire install.
The propane lighter trick (faster but trickier)
A more compact alternative:
“I use a propane lighter to soften it before I push the ends on. You only need to hold it in the flame a couple seconds. Too long and the tubing gets too soft.”
Faster than the hairdryer. No electricity needed. But easier to overdo. A one- to two-second touch is usually enough. If the tubing starts to blister or smoke, it’s been in the flame too long and that section should be cut off.
The sun-bake approach
The laziest of the three, and often the best for a weekend project:
“Some people reported that leaving the hose in the hot sun makes it more flexible and easier to work with.”
Lay the coil in full sun for 4–6 hours on a warm day before installation. The plastic’s memory relaxes, the tubing uncoils naturally, and installation afterward is dramatically easier. If you can set up the day before. Tubing outside in the sun, kit components laid out, coffee ready. The install itself becomes the easy part.
A practical look at emitters and flow rates
One detail that distinguishes budget from premium kits more than any other: emitter variety.
A garden with mixed plant sizes. Small containers, medium perennials, large shrubs. Needs different amounts of water per plant. Budget kits usually give you one flow rate (often 0.5 gallons per hour). Premium kits typically offer a range (0.5, 1.0, 2.0, 4.0 gallons per hour), and higher-end systems include pressure-compensating emitters that maintain flow even across elevation changes.
The practical effect: with a single-rate budget kit, you often end up overwatering small pots to get enough water to the large ones, or underwatering large plants to avoid drowning the small. With variable emitters, each plant gets what it actually needs, and the whole system uses less water overall.
A common workaround, if you stay with a budget kit, is to run multiple short lines at different durations rather than one long line. A small-pot zone gets 10 minutes; a large-shrub zone gets 25 minutes. It’s not as clean as variable emitters, but it’s workable.
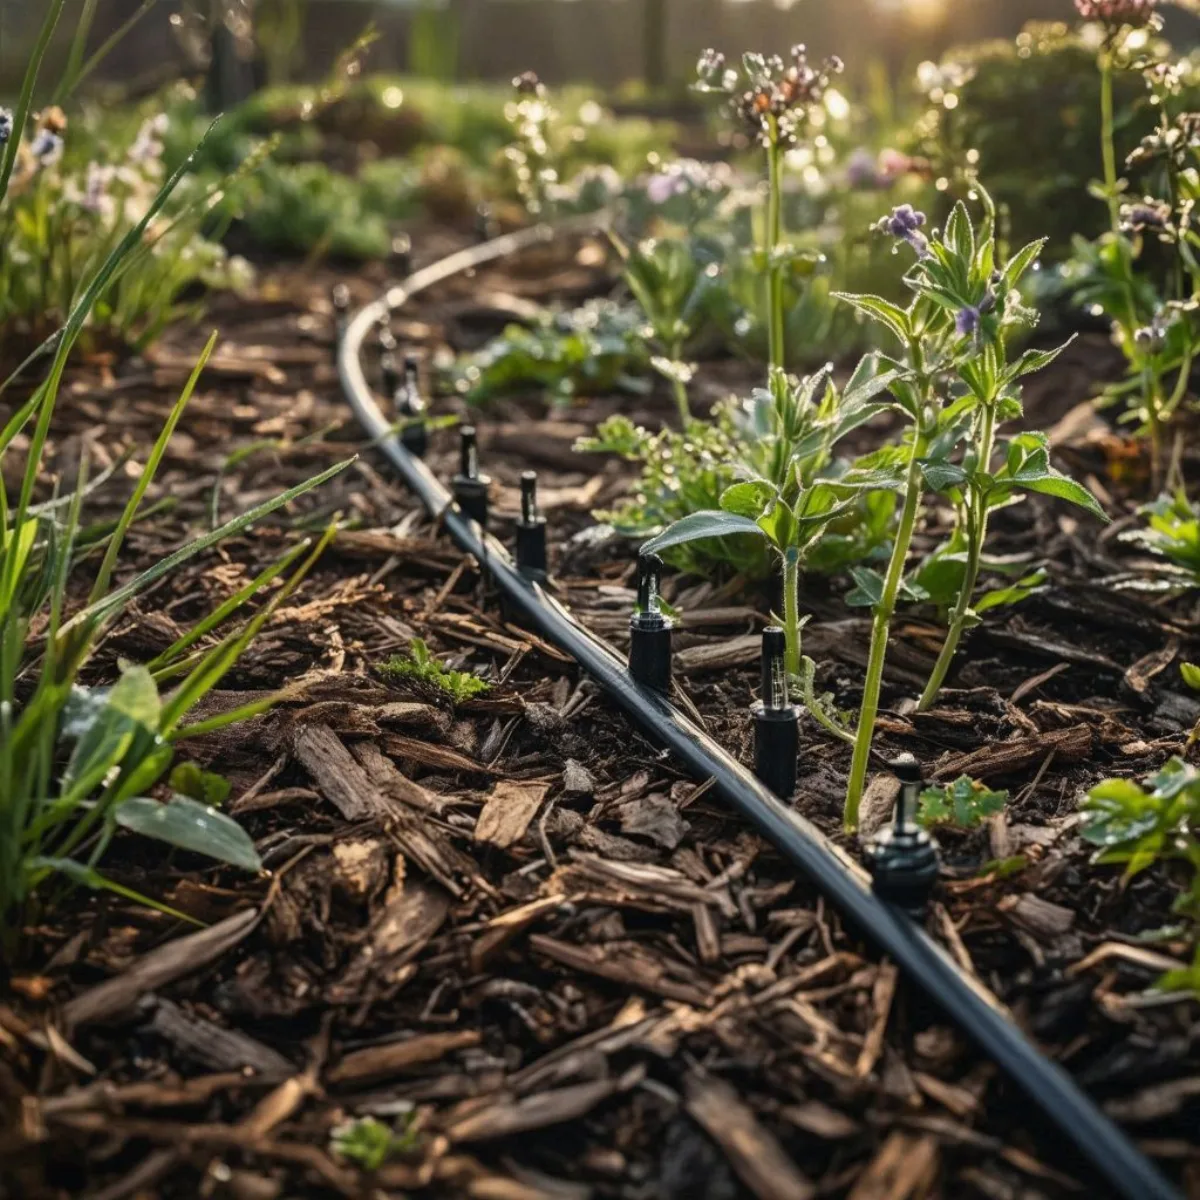
A simple layout that works for most native gardens
For a typical residential native planting, a practical system looks something like this:
- A main line running around the perimeter of the bed, roughly a half-inch polyethylene tube.
- Individual spaghetti emitters branching from the main line to each new plant in year one.
- A filter and pressure regulator at the spigot (most kits include one; if yours doesn’t, add one for about $15).
- A simple timer at the spigot for automatic morning watering.
In year two, the emitters can come off the established natives entirely. Or stay on as a backup for extended droughts. The main line stays in place and serves as infrastructure for the next round of new plantings.
This approach keeps the cost modest (buy premium tubing once, replace emitters as needed) and matches the actual watering profile of a native garden over time. A $120 premium main-line system with $30 of replaceable emitters per year tends to work better over five seasons than a new $35 budget kit every year or two.
When drip irrigation isn’t the right answer
One more consideration worth raising: for some native gardens, drip irrigation isn’t the right tool at all.
In low-rainfall regions with established drought-tolerant plantings, a drip system can actually encourage shallow roots that make the plants less resilient. The same gardener who shared the note about “wet feet” also mentioned:
“During extended drought, 1 deep soaking per week encourages roots to chase water deeper into cooler moister soil.”
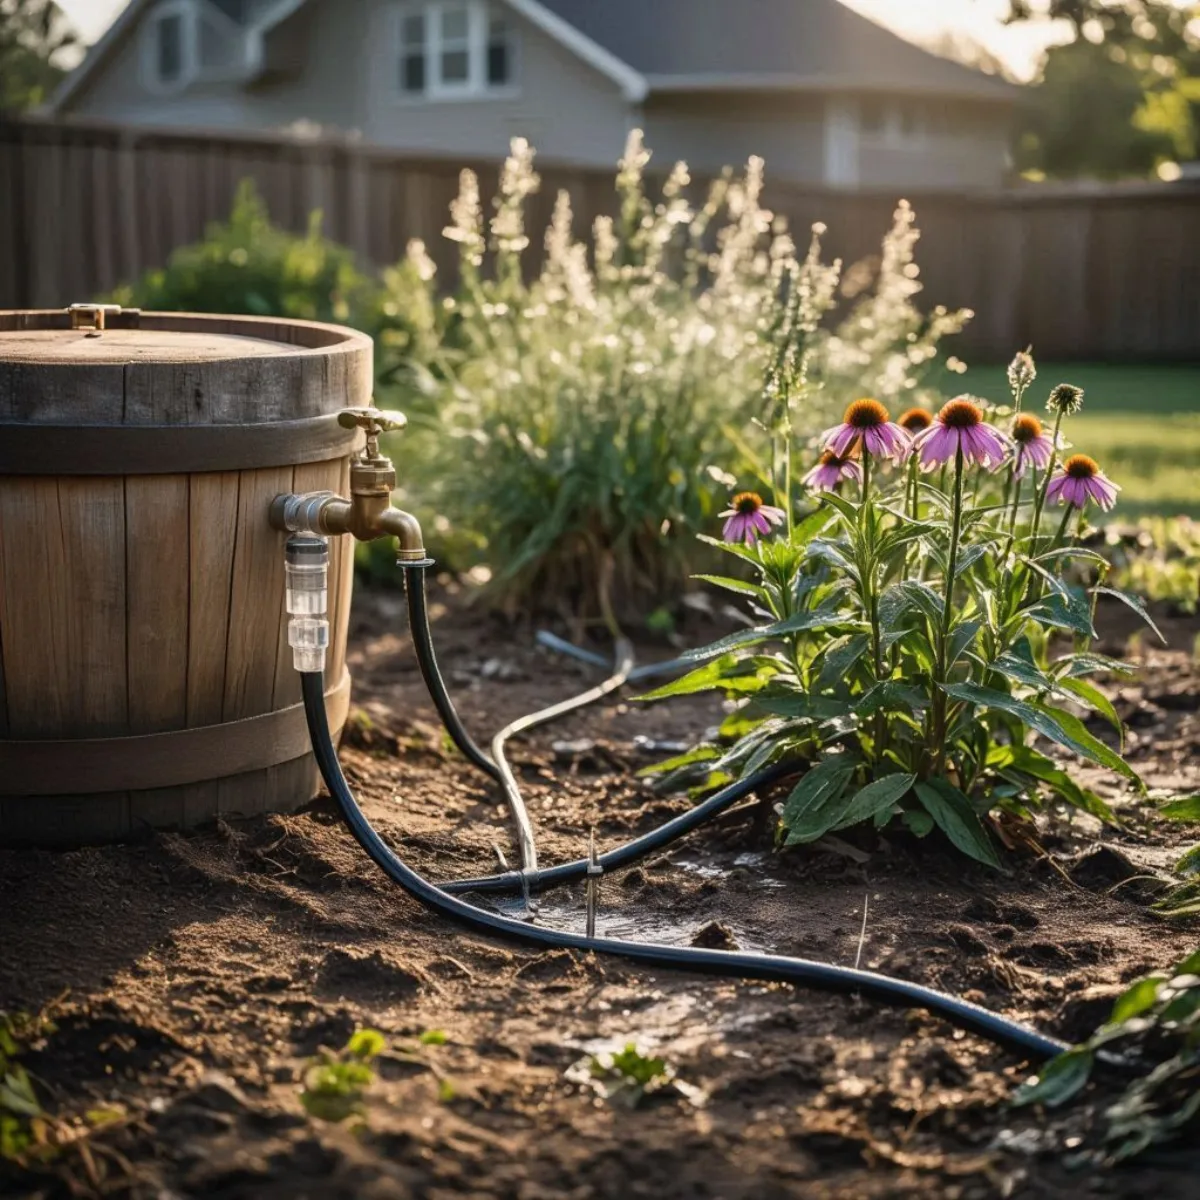
That’s often better done with a slow hose at the base of the plants, once or twice during a drought, than with an automatic drip system running on a timer. A rain barrel with a gravity-fed drip line is another option for gardeners trying to reduce municipal water use. A 55-gallon barrel can provide meaningful water for about 500 square feet of drought-tolerant plants during a two-week dry spell.
In other words: drip irrigation is genuinely useful for native plant establishment, but it’s not always the long-term answer. Matching the system to the actual watering need, rather than installing the largest system you can afford, tends to produce the best results.
FAQ
How can I add a sustainable water source for my meadow?
For most established meadow-style plantings, additional irrigation isn’t needed in normal years. In severe drought areas, a rain barrel (55-gallon capacity, around $80–120) with a gravity-fed drip line is a low-cost, zero-electricity option. It stores water from normal rainfall and distributes it slowly during dry spells, which is often enough for drought-tolerant natives on a small residential site.
When planting, how much should I water?
A thorough soak at planting (about a gallon per plug), then roughly an inch of water per week for 6–8 weeks. After that, let the weather do most of the work unless you’re in a multi-week drought. Deep weekly watering is almost always better than daily light watering. It encourages the roots to grow down toward moisture.
I planted wildflower seeds five days ago and have been watering every evening. Are these the first sprouts?
Almost certainly not. Wildflower seeds typically take 14–30 days to germinate, and many native species require cold stratification before they’ll come up at all. What’s visible that quickly is usually weed seed from the existing soil reacting to the daily water. Shifting from daily light watering to a deep soak once or twice a week tends to work better for the seeds you actually want.
How do I water containers with drip irrigation?
For uniform-sized containers (20 identical pots, for example), a basic Raindrip-style kit works well. For mixed sizes, a Rain Bird kit with variable-flow emitters is a better fit. The same main line can deliver 0.5 gal/hr to small pots and 2.0 gal/hr to large ones. If you’re on a budget, a workable compromise is to group similar-sized containers on the same line and run separate zones for different sizes.
Do I water containers in winter when the plants are dormant?
In zones 5 through 7, the typical approach is to bring native perennial containers into an unheated garage for winter and skip watering entirely until spring. In zones 8 through 10 where containers stay outdoors, a deep watering once every 3–4 weeks during dry dormant periods is usually enough.
The honest answer to the budget-versus-premium question depends more on how long you plan to use the system than on how much you want to spend. For a one-time, year-one establishment run on a small planting, a $35 Raindrip kit with a hairdryer install gets the job done and doesn’t leave behind an expensive unused system. For a larger garden you plan to irrigate seasonally for many years, the premium systems pay back the extra cost in install time saved and fewer replacements.
Whichever direction you go, one Saturday of planning and prep. Laying tubing in the sun, sketching the layout, pressure-testing the fittings. Saves more frustration than any trick during installation itself.
If this guide was useful, feel free to pass it along to a friend who’s about to install their first drip system. A little advance notice about the stiff tubing tends to make the whole weekend go better.
Related reading on animalhabitats.online:
- The Foolproof Native Plant Garden Recipe by USDA Zone
- How to Cold Stratify Native Seeds
- Curb Appeal for Native Gardens: 5 Design Patterns That Survive Your HOA
Want More Wildlife Garden Tips?
Join 5,000+ nature lovers getting our weekly tips on creating wildlife-friendly gardens.
No spam, unsubscribe anytime. Privacy Policy
Emma Harrington
Emma Harrington is a wildlife habitat researcher and content editor with a passion for backyard conservation. She has spent over a decade translating ecological science into practical tips anyone can follow — from selecting native plants to building wildlife-friendly habitats. Her work focuses on helping homeowners transform ordinary yards into thriving ecosystems for bees, butterflies, hummingbirds, and other beneficial wildlife.