Have you ever planted a small patch of native wildflowers in your front yard and then worried about how it would look to your neighbors. Or received a polite-but-firm letter from the HOA asking you to “tidy things up”? If so, you’re dealing with one of the quietest tensions in suburban gardening. It comes up often in native plant communities, and there are well-established ways to handle it.
This guide walks through five design patterns that experienced native gardeners use to make the same pollinator-friendly plants read as an intentional aesthetic choice rather than an abandoned project. You’ll see the specific moves. A clean mowed edge, a habitat certification sign, a simple pathway, a handful of compact cultivars. That tend to shift how a garden is perceived by neighbors and HOA boards. Each pattern is small enough to install in a weekend.
The goal here isn’t to hide the ecological purpose of a native garden. It’s to add the visual signals of care and design that most HOAs are actually responding to when they flag a yard. With a few deliberate touches, the same milkweed and bluestem that prompted complaints tend to become the most admired plants on the street.
FREE: Wildlife Garden Starter Guide
Get our 12-page PDF with the 25 best plants for pollinators, simple habitat tips, and a printable checklist — all 100% free.
No spam. Read our Privacy Policy.Why native gardens sometimes read as unkempt
A handful of real experiences from native gardeners, all describing the same pattern:
“Want to get rid of the bushes as neighbors mentioned them being a rat nest.”
“A candidate for my HOA’s board responds to a homeowners post requesting more flexibility for clover and other lawn alternatives.”
“I tried to make sure there is some color/greenery in every season so the neighbors don’t get irritated at the ‘mess.’”
And one that captures the broader context:
“Many municipalities across North America have bylaws that essentially force owners to conform to a more traditional lawn or ornamental garden. Many native plants are seen as weeds, and people have had their native gardens mowed by their municipality when they ignored infraction notices triggered by a complaining neighbour.”
The important thing to notice is that the concern isn’t usually about the plants themselves. Monarchs on milkweed are almost universally admired — even with eastern monarch populations down roughly 80% over the past two decades according to Xerces Society monitoring, the visual is recognizable and beloved. Purple coneflowers look like perennials you’d buy at a nursery. What triggers a complaint is usually something quieter. The garden reads as a lack of decision rather than a choice. That’s a visual signal problem, and it’s solvable.
A native plant bed that looks like it “just grew that way” tends to invite objection. The same bed, with a couple of visual markers of intention, tends to be admired. The five patterns that follow are the markers that have been shown to work.
What “intentionality” looks like in a garden
The concept is simple enough once you see it. Native plants, by their nature, grow more freely and with more seasonal variation than the tightly managed ornamentals most suburbs are used to. A meadow garden in mid-summer is lush; in late fall, it’s brown and standing; in February, it’s cut back to stubble. That seasonal range can read as neglect if nothing else in the design signals that it’s deliberate.
Gardeners who have successfully navigated HOA concerns tend to share a piece of advice:
“This is why most of us make sure we set up our gardens to look intentional and many of us put signs out that inform our neighbours what we’re trying to do.”
The design patterns below are the concrete ways that “intentionality” shows up visually. None of them require changing what you plant. All of them change how the planting is perceived.
Five design patterns for HOA-friendly native gardens
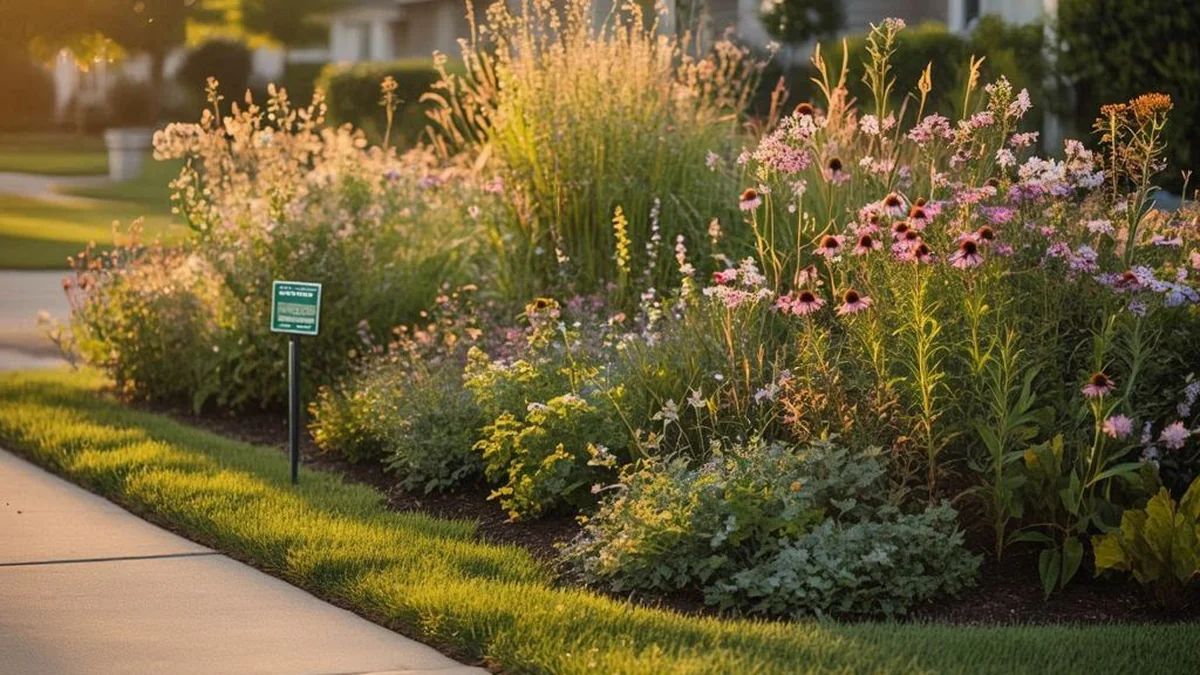
A clean mowed edge (the border buffer)
This is the single highest-return pattern, and it costs nothing. A strip of clean, shorter-mowed lawn. Somewhere between 12 and 24 inches wide. Between your native planting and any public edge (sidewalk, driveway, or neighbor’s property) communicates “the garden ends here, on purpose.”
A Central Iowa gardener who converted her hellstrip described how the buffer worked in practice:
“The 1-ft buffer on each side prevents most plants from flopping into the sidewalk and road, and keeping plants below 4 ft helps prevent flopping over too much.”
The buffer does two things at once. Visually, it creates a crisp line that reads as “this is managed.” Functionally, it stops the native plants from physically spilling into public space, which is often the technical trigger for an ordinance complaint.
In practice, a 12-inch strip, mowed every week or two during growing season, and kept at 3 to 4 inches tall, does most of the work. The bed inside the strip can be as wild and natural as the plants want to be.
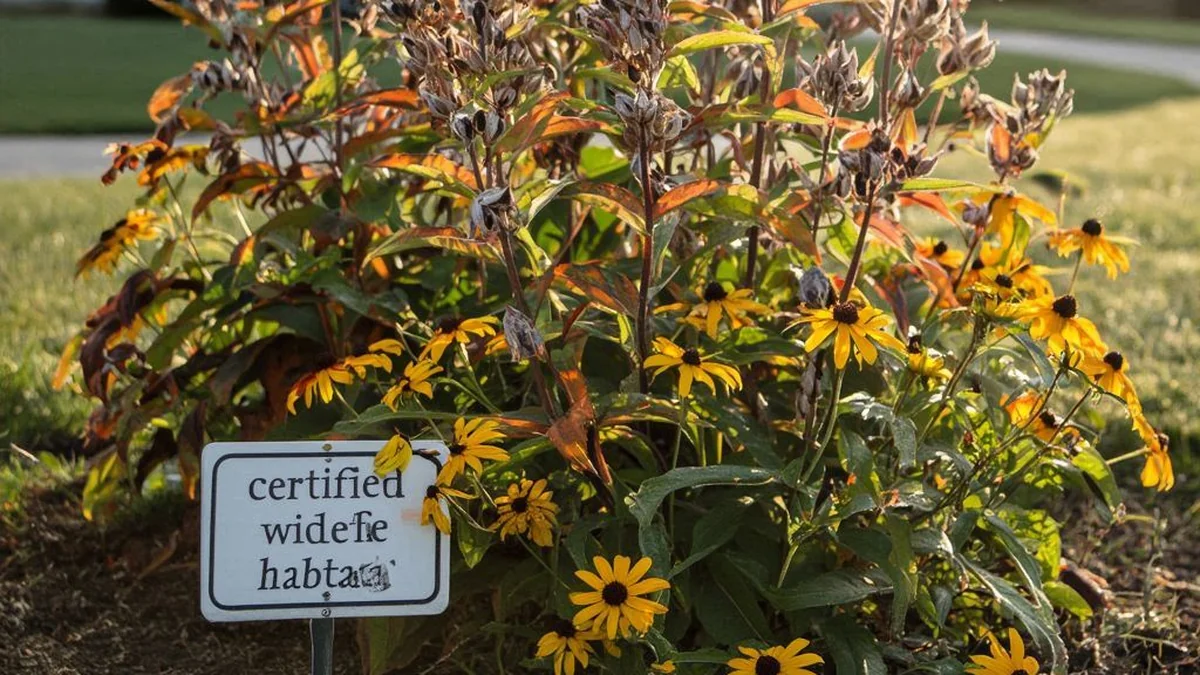
A habitat certification sign
A small yard sign. The kind that identifies your yard as a Certified Wildlife Habitat, a Monarch Waystation, or part of the Homegrown National Park network. Has a notable effect on how a garden is perceived. It reframes the whole space from “this homeowner gave up on the yard” to “this homeowner is participating in a deliberate ecological program.”
A nursery owner I talked to last spring shared their adopted gardening routine, which has proven effective over time.
“I put my meadow sign next to it, since we’ve been having some construction on the house and the guys STILL trample through the yard.”
And another observation from the broader community:
“Portland, Oregon and its surrounding areas are sort of keeping track with the backyard habitat certification program. It’s a great program, popular, and records yards that have been nativified to three different certification levels.”
The National Wildlife Federation’s Certified Wildlife Habitat program is the most widely recognized nationally, and it’s straightforward to apply for. The application is a checklist of five habitat features (food, water, cover, nesting sites, sustainable practices), and the certification is $25 one-time. The sign arrives in about four weeks. For Portland-area gardeners, the Backyard Habitat Certification Program is an excellent regional option.
Placement matters. The sign is most effective when it’s visible from the street, placed near a corner or at the most trafficked sidewalk edge, and sized large enough to read from ten or fifteen feet away.
A defined pathway through the bed
A garden you can walk into reads as tended. A garden with no visible point of entry reads as abandoned. Adding even a simple path is one of the most effective ways to shift that reading.
A gardener shared a design approach that works:
“If you do multiple patches like this, you can run a brick or flagstone path between them to have street access without the risk of grass invading from it.”
A commenter responded to a successful example:
“This is so pretty because it is intentional, not just letting invasives take over and calling it no lawn. I’m sure this was a lot of work to enact. I really love the paths.”
The path doesn’t have to be elaborate. A series of flagstones, a strip of salvaged brick, broken concrete from a demolished patio, or wood rounds set into the soil all work. The key measurements are that it’s wide enough to actually walk on (18 to 24 inches) and visible as a deliberate element from the street. A path hidden in the middle of the bed doesn’t communicate the same thing.
Salvaged materials are often free, Craigslist, Freecycle, and Facebook Marketplace are full of listings for used brick and broken concrete. Setting them is a weekend project.
Structural backbone plants (clumping grasses and compact cultivars)
A common complaint about native gardens is that the plants flop over or spill into paths by late summer. That’s often less about the species themselves and more about how densely the supporting structure was planted. A few structural plants. Clumping grasses, especially. Hold the rest of the bed upright.
A gardener explained the role:
“Adding clumping grasses in between the plants would greatly help with winter interest and for additional support.”
And a follow-up comment:
“They also serve the function of supporting your perennials and preventing weeds from growing between the flowers.”
Three plants worth considering as a structural backbone, all of which tend to stay compact and upright rather than sprawling:
Little Bluestem ‘Standing Ovation’ (Schizachyrium scoparium). A gardener noted: “Little bluestem would work here. The Standing Ovation cultivar remains upright for me throughout winter.” It grows to 3–4 feet, turns copper-orange in fall, and holds its structure through winter, which extends the bed’s visual season considerably.
Vernonia ‘Iron Butterfly’ (compact ironweed). Most ironweeds are tall and aggressive; this cultivar is the exception. From a community recommendation: “When you think about planting for the fall, be careful here. And make sure you get those with clumping compact habits. One that I absolutely love and I think would fit here is the Vernonia lettermannii ‘Iron Butterfly’. Make sure you get this cultivar. The others are aggressive and very tall!” It reaches 2–3 feet with late-summer purple blooms.
Maryland golden aster (Chrysopsis mariana). A low-growing aster described briefly: “Maryland golden aster stays small, bright yellow fall flowers and does well in sun and shade.” It provides late-season yellow color when much of the garden is fading.
Placed throughout the bed rather than clustered in one spot, these three act as the visible structure that holds the looser flowering perennials in place. If you want to confirm a cultivar is genuinely native to your county before planting, our guide on verifying a plant’s true native range walks through the BONAP and county-level checks.
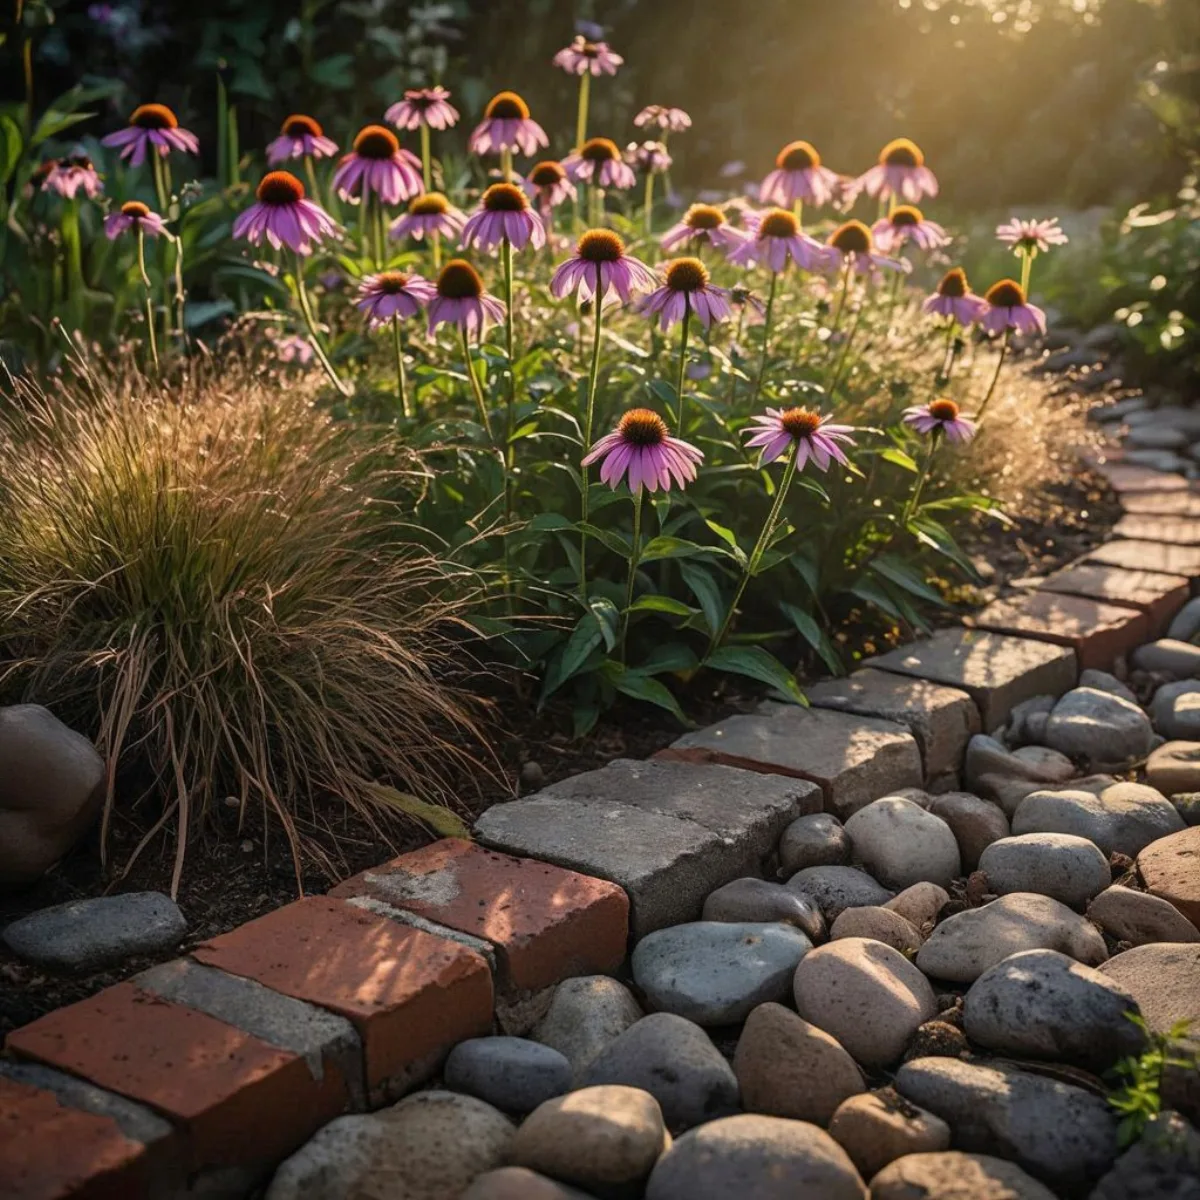
A clear physical edge
Every well-designed native bed has a clear, physical termination. Not just a mowed strip, but an actual material transition between the bed and the surrounding space. This might be the single most important signal of intentionality available.
A gardener’s description:
“I dug up all the sod and treat it like a regular flower bed, including a barrier of rocks at the end to keep the grass from encroaching too much.”
Another shared the rationale for a public-facing bed:
“In a public area like that, clear borders are important for the reasons you say, as well as preventing trampling and making it look deliberate. Pavers or retaining wall blocks can be good as borders.”
A few common material options:
| Material | Approximate cost | Visual impact |
|---|---|---|
| Salvaged brick | Often free | Warm, traditional look |
| River cobbles / basalt | $50–150 depending on quantity | Natural, modern |
| Cor-ten steel edging | $150–400 | Crisp, professional |
| Flagstone laid flat | $100–200 | Doubles as mowing strip |
The key requirement is that the edge is visible from about twenty feet away. An underground black plastic edge, while functional, doesn’t communicate the same thing visually. The whole purpose of the edge in this context is that it’s read as a decision.
Even fifteen linear feet of material along the most visible bed face tends to be enough to change perception.
How the patterns work together
None of the five patterns require doing all of them at once. A practical order of installation, based on return per hour of effort:
- Mow a clean buffer strip around the bed. Free, immediate effect, one Saturday.
- Apply for a habitat certification sign. About $25 and four weeks of lead time.
- Add a physical edge along the most visible face of the bed, $0 to $150 depending on material.
- Add compact structural plants as you refresh or expand the bed.
- Install a pathway when the bed is large enough to justify one.
Most native gardeners who have successfully defused HOA concerns say the first three changes alone (buffer + sign + edge) resolved about 80% of the tension. That’s typically a single weekend of work and about $80 in materials.
Dealing with active complaints
A neighbor framed the situation this way once: Sometimes gardeners only realize the best design guidance after receiving a letter from an HOA. The community’s collective experiences indicate that a calm, documented approach usually yields better results than either capitulation or conflict.
I came across a recent situation where an HOA initially wanted natives removed from a property, but after some research, they changed their stance. It turned out that the city was fine with the native plants but requested a few changes, primarily trimming some of the taller varieties that could obstruct sightlines.
The useful preparation is usually a small folder: a copy of the certification documentation (NWF Certified Wildlife Habitat paperwork, Monarch Watch registration, or similar), a photograph of the garden with the clean edge and signage visible, and. If available. A copy of any city or state ordinance that permits native plant gardens. Several states, including Minnesota, Maryland, and Florida, now have laws that specifically protect native landscapes. A quick search for “native plant ordinance [state]” often turns up helpful documentation.
In most cases, presenting this kind of documentation resolves the conflict without escalation. Many HOAs, once they see that the garden is part of a formal program rather than an individual’s experiment, back down entirely.
A quick note on rights-of-way
One point worth raising before you plant anything near the street:
“Make sure you check that you are allowed to do that if you are in a city. Sometimes those strips are owned by them.”
The strip between the sidewalk and the street. The hellstrip or boulevard. Is often owned by the municipality rather than the homeowner, which means planting there can technically require permission. Many cities have approved native-plant lists for hellstrips and actively encourage their use; others have restrictions. A call or email to the public works department usually resolves the question in a few minutes, and getting written permission where needed is worth the small effort.
Frequently asked questions
Do native gardens actually attract rats?
In general, no. Native plantings don’t attract rats any more than lawns do. Lawns actually produce more food sources (seeds, grubs) and require more moisture than a diverse native bed — Audubon’s native plants database documents how native beds support roughly 3 to 4 times more songbird activity than equivalent turfgrass, with no corresponding rise in rodents. The “rat nest” complaint is almost always about how a yard looks rather than what’s actually living in it. Keeping the bed structured, pruned back in late winter, and free of food waste prevents any real issue.
Can I install these patterns if I’m renting?
Most of them, yes. A small pathway, a certification sign, structural plants in containers, and a physical edge along a bed you’ve planted can all be installed without property modifications. A mowed buffer obviously only works if you have access to mow. For renters with a lease requirement to maintain lawn, the container-based approach from our Native Plant Garden Recipe guide is often the best path.
How long before neighbors stop noticing the garden “looks different”?
Usually a full growing season. In year one, a new native bed often looks sparse because the plants follow the classic sleep, creep, leap pattern — putting roughly 80% of their energy into roots before any visible top growth. By mid-year two, the bed starts filling in. By year three, the same garden that triggered a complaint often becomes the one neighbors compliment or ask about. Signage and clean edging shorten that perception shift considerably.
Is it worth applying for formal certification?
For most gardeners in an HOA context, yes. The certification itself is inexpensive ($25 for NWF Certified Wildlife Habitat), the sign is widely recognized, and the paperwork provides useful documentation if questions arise. Beyond the HOA benefits, many people find that the certification process itself. The habitat checklist. Is a useful framework for thinking about what their garden actually provides.
What about neighbors who specifically object to “weedy” plants?
A conversation is often more effective than a confrontation. Most neighbors who object to a wild-looking yard respond well when a homeowner takes the time to explain what they’re doing and show the certification paperwork. A small gesture. Offering to split a plant, sharing seeds, or inviting them to see a monarch on the milkweed. Often changes the whole dynamic. Not always, but more often than you’d expect.
A native plant garden and a well-maintained yard aren’t opposing concepts. With a clean edge, a visible sign of intent, and a few structural choices, the same milkweed and bluestem that read as “messy” to an unfamiliar eye tend to read as “considered” to the same eye a season later. The plants themselves don’t change. The framing around them does.
If you’re in the early stages of a native planting and HOA concerns are on your mind, the single best first step is usually the mowed buffer. It costs nothing, takes a Saturday, and signals more than almost any other change. The rest of the patterns layer in over time.
If this guide was useful, feel free to share it with someone who’s hesitating to plant natives because of neighborhood concerns. The conversation around intentional design is often the thing that helps.
Related reading on animalhabitats.online:
- The Foolproof Native Plant Garden Recipe by USDA Zone
- How to Get Your Backyard Certified as a Wildlife Habitat (NWF Guide)
- How to Cold Stratify Native Seeds
Want More Wildlife Garden Tips?
Join 5,000+ nature lovers getting our weekly tips on creating wildlife-friendly gardens.
No spam, unsubscribe anytime. Privacy Policy
Emma Harrington
Emma Harrington is a wildlife habitat researcher and content editor with a passion for backyard conservation. She has spent over a decade translating ecological science into practical tips anyone can follow — from selecting native plants to building wildlife-friendly habitats. Her work focuses on helping homeowners transform ordinary yards into thriving ecosystems for bees, butterflies, hummingbirds, and other beneficial wildlife.