
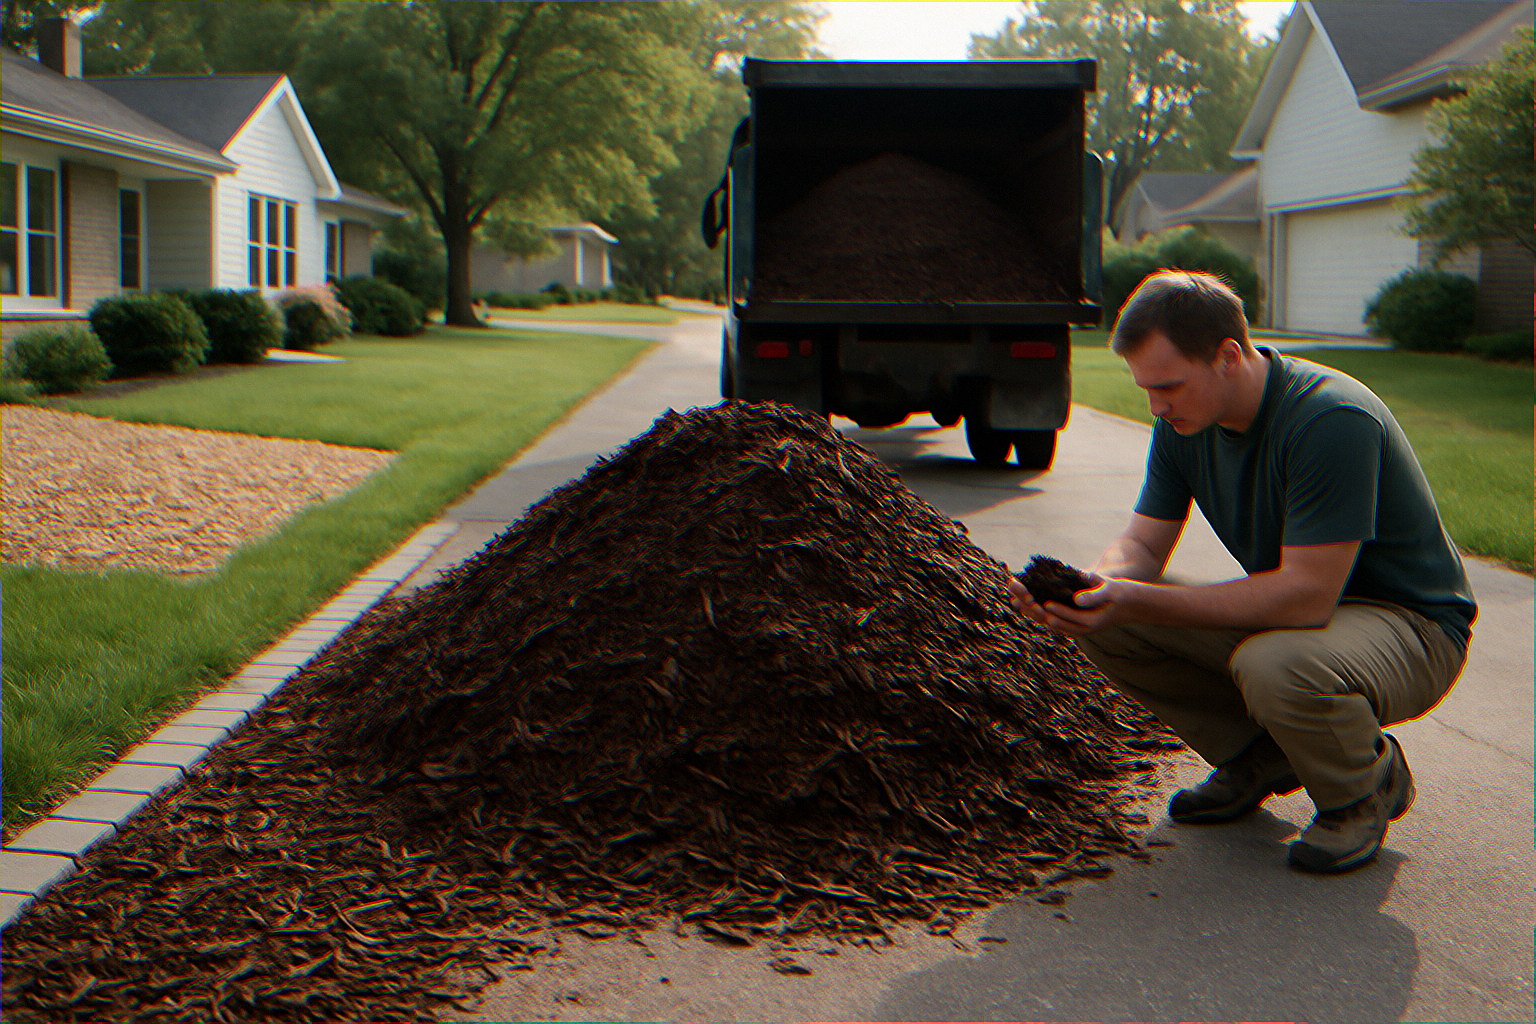
Before a dump truck drops two cubic yards of mulch on your driveway, you have roughly ninety seconds to inspect it. Pull a fistful from the load, check the color and smell, scan for plastic shreds and seed heads, and ask the driver to wait. If the mulch is gray, sour, or studded with debris, refuse the load. A bad drop will kill a new native bed in one season, and the supplier is far more cooperative before the load is on the ground than after.
A neighbor down the street called me last August almost in tears. She had paid $340 for what was sold as “premium hardwood double-shredded” from a regional supplier she had used twice before without incident. The truck arrived, dumped, and left in under four minutes. By the next morning, her newly planted bed of Asclepias tuberosa and Pycnanthemum muticum was already wilting. Two weeks later, every plant was dead. Lab test on the mulch later confirmed clopyralid residue, almost certainly from contaminated grass clippings that had ended up in the supplier’s holding pile. That bed cost her over $200 in plugs from a regional native nursery. The mulch cost her $340. The total loss was $540, plus an entire growing season.
Why a Bad Mulch Drop Wrecks Native Beds Faster Than Lawn Beds
Conventional turf and the marigolds at Lowe’s tolerate a remarkable amount of chemical insult. Native perennials, especially the keystone species that drive backyard biodiversity, do not. Asclepias, Echinacea, Solidago, and most warm-season grasses have shallow, fibrous roots in their establishment year. They sit in the top three inches of soil, which is exactly where applied mulch leaches its contaminants first.
Three things make native beds disproportionately vulnerable to bad mulch:
FREE: Wildlife Garden Starter Guide
Get our 12-page PDF with the 25 best plants for pollinators, simple habitat tips, and a printable checklist — all 100% free.
No spam. Read our Privacy Policy.- The root systems are not established. A first-year coneflower has maybe four inches of taproot. A first-year liatris has even less. Both are sipping water from the same zone where a contaminated mulch is releasing its load.
- Most native gardeners apply mulch heavier than turf gardeners do. Two to three inches is standard for suppressing competing weeds around small plugs. That doubles or triples the contamination dose per square foot compared to a half-inch decorative dressing.
- The pollinators you are trying to attract are also exposed. Mason bees and native sweat bees forage at ground level. Spilled mulch dust ends up on bloom surfaces. If the mulch was treated with a residual fungicide for “shelf life,” your milkweed bloom is the delivery vehicle straight to a monarch caterpillar.
According to the Oregon State University Extension, persistent herbicides like clopyralid, aminopyralid, and picloram can remain biologically active in mulch and compost for 1 to 3 years even after the source material has been composted at high temperatures. That is not a stain you wash out by raking the bed in fall.
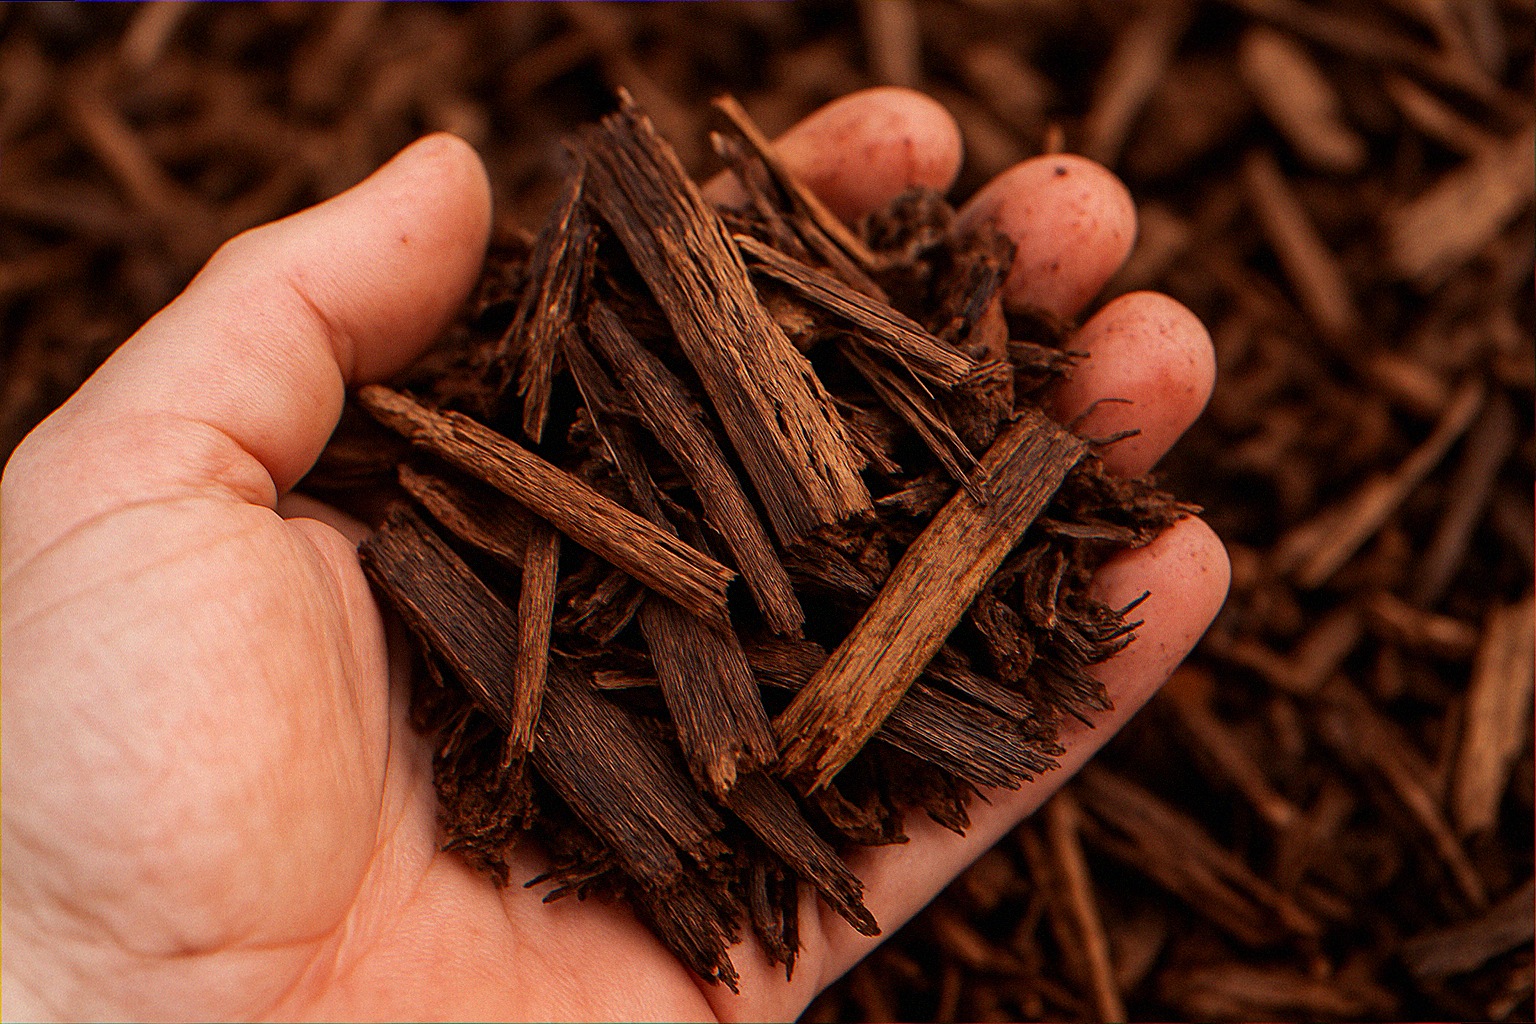
What does premium hardwood mulch actually look like up close?
Premium double-shredded hardwood, the standard a Sarah-tier native gardener wants, has five signatures you can verify by eye from the back of the dump truck:
- Color is medium to dark chocolate brown, never gray and never that aggressive midnight black that screams dyed pine.
- Shred length runs one to three inches with frayed, hairy ends, the result of a tub grinder doing real work. Clean chopper cuts mean fresh wood that will steal nitrogen from the soil for the next eight months.
- Smell is the inside of an old oak forest after rain. Faintly tannic, slightly sweet, nothing else.
- The pile holds a peak. A scoop pulled from the side stays in your hand without crumbling to powder, which means the moisture is right and the material is not over-aged.
- You can see at least three distinct wood species in a handful. Oak, maple, beech, hickory, whatever your region produces. Single-source mulch usually means construction debris.
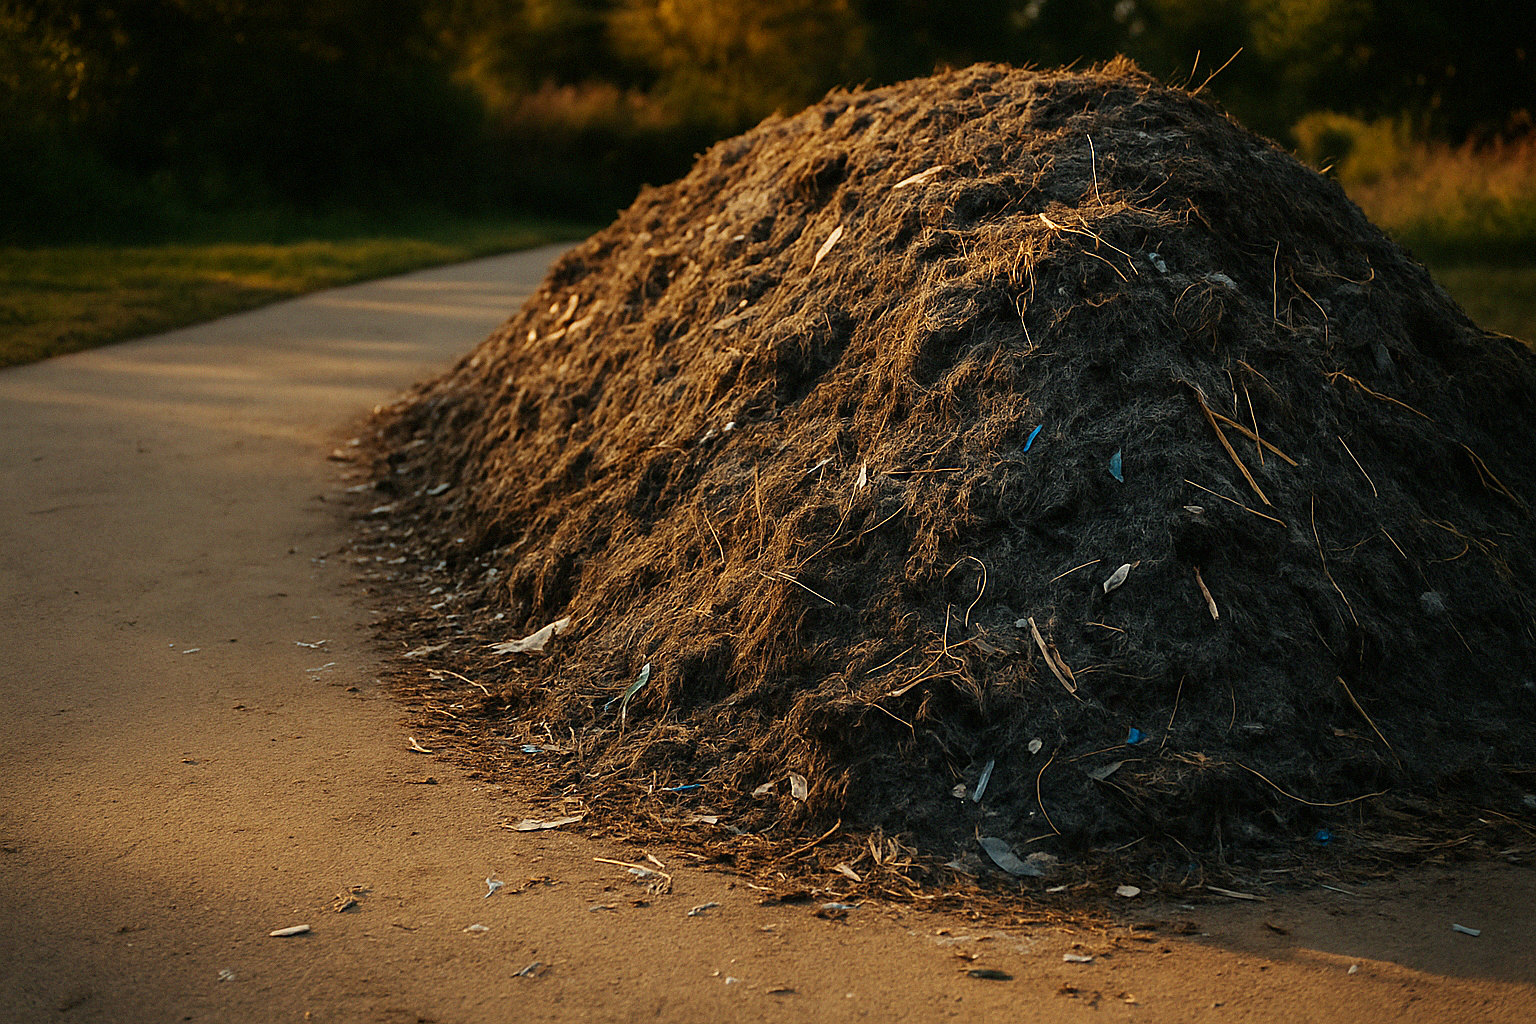
Look at a pile and your gut already knows. The pile that smells like a brewery has gone anaerobic. The pile that smells like nothing has been dyed and washed. The pile that smells like an ammonia bottle has been contaminated with manure, and probably the herbicide that came with the hay the cow ate.
How can I tell if the mulch is contaminated with herbicide?
The single most reliable field test for persistent broadleaf herbicide contamination is the green bean bioassay, and it takes about 12 days. You will not have done it before the load arrives, which is fine, because what you do at the curb is a triage, not a lab confirmation. The bean test comes later as your insurance policy.
At the dump truck, look for these three smoking guns of contamination:
- Ammonia or sour-vinegar smell. Healthy aerobic decomposition smells earthy. A sharp ammonia bite means the material went anaerobic in the holding pile, which destroys the bacterial community that would otherwise have broken down chemical residues.
- Visible grass clippings or hay strands. If your “hardwood” mulch has long blades of grass mixed in, the supplier is cutting their wood with greenwaste, and greenwaste is the single largest source of clopyralid contamination per the epicgardening summary of university extension data.
- Bright dye that comes off on your fingers. Dyed mulches use iron oxide (safe) or carbon black (mostly safe), but the carriers used to fix the dye sometimes include glyphosate-based wetting agents. If a fistful leaves a stain on a damp paper towel, the dye is not properly cured and the load is too fresh.
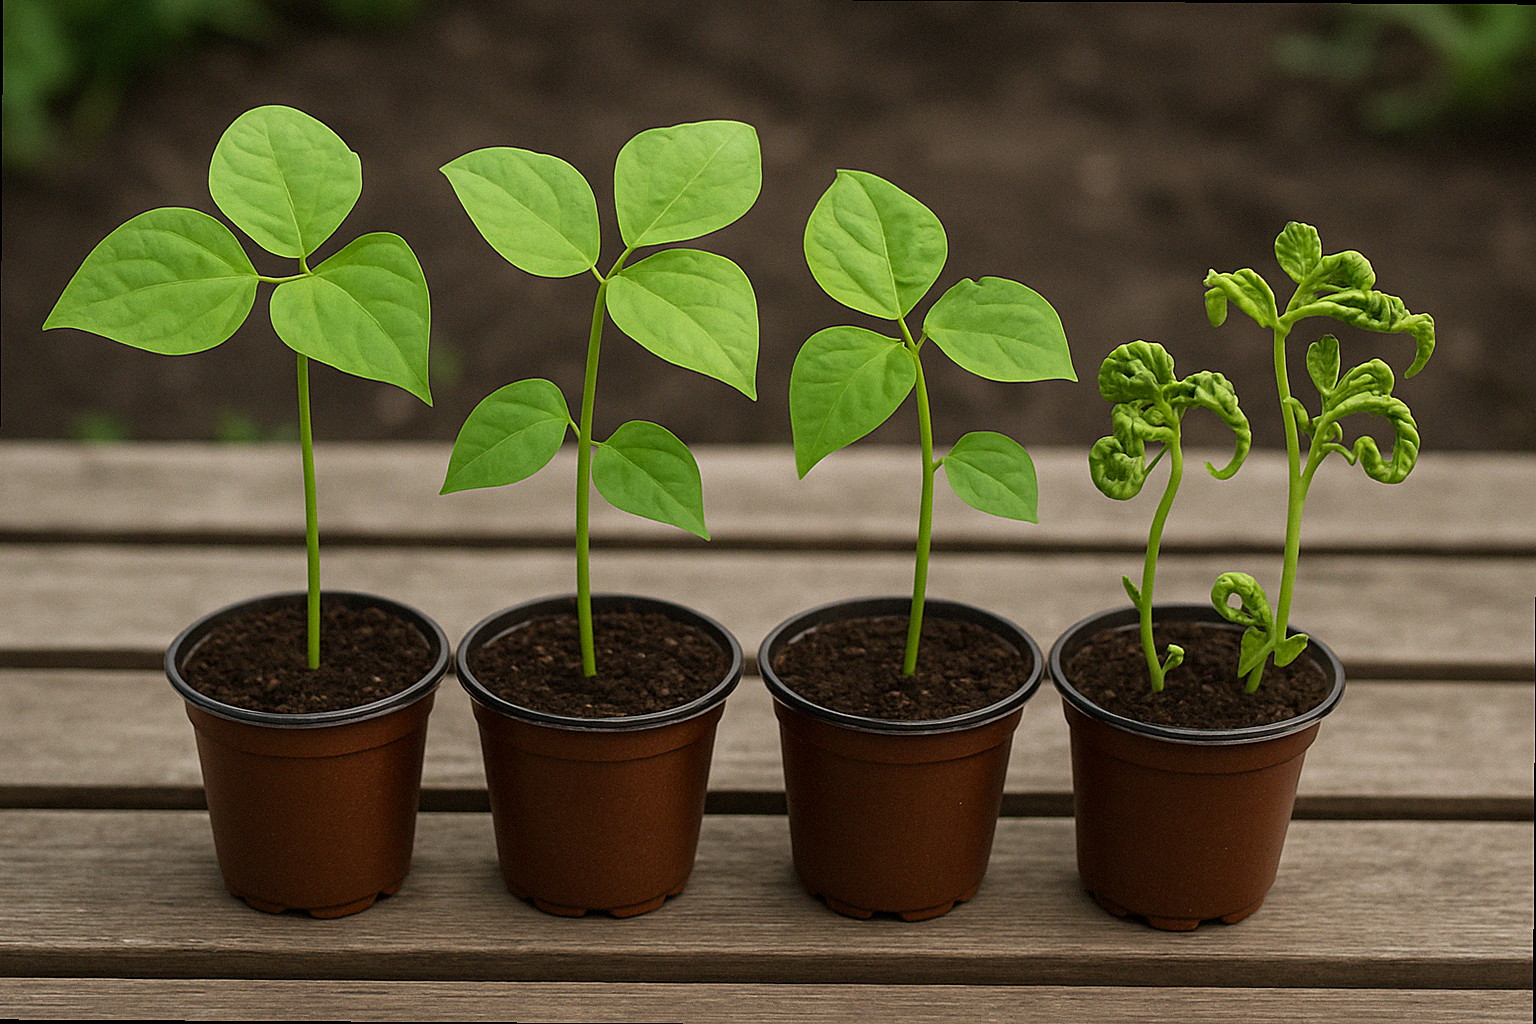
Run the green bean bioassay before you spread the mulch on any bed you care about. Fill two pots with the suspect mulch mixed with potting soil at a 1:1 ratio. Fill two control pots with plain potting soil. Plant five bean seeds in each. Water identically. After 10 to 14 days, healthy plants will have flat, evenly-shaped leaves. Contaminated plants will have cupped, fern-like, twisted, or strap-shaped leaves. If you see any of those distortions, do not spread the mulch on native beds. Pile it on a driveway corner for a year of weathering, then retest.
The 4-bag pre-dump inspection that takes 90 seconds
This is the routine I run every time a delivery rolls up, whether it is the first time with a new supplier or the tenth time with one I have used for years. Quality drifts. A new batch from the same supplier is not the same product as the last batch, because the holding pile turns over and the inputs change.
The pre-dump inspection has four steps. Drivers are used to it. If yours pushes back hard or refuses to wait, that is the loudest signal possible that something is wrong with the load.
Step 1: Bag one. Climb up and pull from the center of the load (20 seconds)
The driver will hold a step-ladder or you can stand on the truck step. Reach into the top of the pile and pull a fistful from a foot below the surface. The surface is wind-dried and rain-washed; the center tells you what you actually paid for. Squeeze the handful. It should hold together loosely and stain your palm a coffee-brown, not a gray-black smudge.
Step 2: Bag two. Pull from the back corner near the tailgate (20 seconds)
The back corner is where settled fines collect, including any plastic chips, glass, or screws that fell in at the supplier’s lot. If your handful from this spot contains anything that is not wood, the entire load is suspect. One plastic shred is a tolerance, three plastic shreds is a refusal.
Step 3: Smell test. Bring both bags to your nose (20 seconds)
You are looking for the woody, faintly sweet, slightly tannic smell of forest floor. Anything sour, anything sharp, anything that smells like a barn or a fuel tank is a hard stop.
Step 4: Spread one bag on the driveway and walk across it (30 seconds)
Spread one of the two fistfuls into a thin line about a foot long. Walk across it. Listen for the gritty crunch of sand and gravel filler, which is a sign that the supplier is bulking the load with cheap aggregate. Look down to confirm no large pallet chunks, no nails, no chunks of asphalt.
If all four steps pass, wave the driver in. If any one of the four fails, do not accept the load. The supplier would rather take the mulch back to the yard than fight you for payment on a load they know is bad.
Smell, color, texture: how to spot the four worst delivery scams
Here is the comparison table I keep printed on the inside of my garage door, because the moment of decision is always a moment when you are looking at fifteen feet of dumped mulch and trying to remember whether something is wrong.
| Signal | Premium hardwood (accept) | Borderline (test first) | Refuse the load |
|---|---|---|---|
| Color | Medium to dark coffee brown | Reddish-orange, very fresh | Gray, sour green, jet black with stained fingers |
| Smell | Forest floor, mildly tannic | Faintly woody, near-neutral | Ammonia, sour vinegar, manure, fuel |
| Texture | 1-3 inch frayed shreds, multiple species | Mixed shred and chip, one species | Sawdust fines, pallet chunks with nails, single-source |
| Debris | Zero plastic, zero glass | One or two plastic flecks per bushel | Visible plastic shreds, hay strands, glass, screws |
| Moisture | Holds shape, stains palm brown | Slightly powder when dry | Dripping wet (anaerobic) or bone dust (over-aged) |
| Heat | Cool to slightly warm at center | Warm but not hot | Steaming, hot to the touch, smoke smell |
Anything in the “refuse” column triggers the same response: politely tell the driver you cannot accept this load, take a phone photo of the truck, the placard, and the load itself, and call the supplier’s office while the driver is still parked. Suppliers will almost always swap a flagged load if they hear about it before the dump. After the dump, you are negotiating a refund, and most contracts say all sales are final once the material is on the ground.
When should I refuse the load and ask them to leave?
This is the question most homeowners struggle with because the social pressure of standing in your own driveway and telling a driver to take it away feels rude. It is not rude. It is the only bargaining power you have, and the driver expects it from anyone who has been burned before. If your load fails the inspection at the four-step level, here is the script:
“I appreciate you bringing this out today, but this load does not match what I ordered. I am going to ask you to take it back to the yard. I will call dispatch right now.”
Then you call. You ask for a replacement load from a different pile, with a quality check by the yard manager before it leaves. You will get one. Suppliers run on reputation in this region and a single Yelp or NextDoor post about a bad delivery costs them ten times the value of the load.
If the supplier refuses to swap or insists the load is “premium” despite obvious problems, refuse it anyway and dispute the charge with your credit card. NC State Extension’s research on contaminated compost documents cases where a single bad load destroyed garden beds for two consecutive years. A $340 chargeback is worth it.
What if my neighbor offers “free mulch” from a tree-trimming crew?
This is the most common mulch-source upgrade in suburban native-plant communities, and it is also the most dangerous. Free arborist mulch from a chipper truck is often better quality than what big-box stores sell, because it is fresh ramial wood chips with no dye, no fines, and full bacterial life intact. Audubon and the National Wildlife Federation both endorse arborist chip mulch around natives. But it comes with three risks worth flagging:
- You do not know what trees were cut. Black walnut chips release juglone, which kills tomatoes, blueberries, and several native shrubs within twenty feet. Honey locust chips can carry thorns the size of dinner forks. Pine and hemlock are mostly fine but make the bed acidic in a way some prairie natives do not love.
- You do not know whether the trees were sprayed. If the city or a utility crew was clearing right-of-way trees treated with growth regulators in the previous year, those chemicals are still in the wood.
- Volume control disappears. A chipper truck holds eight to twelve cubic yards. If a crew offers you the whole load, you get the whole load, and you will be redistributing a mountain of chips for a month.
Accept arborist chips when you can verify the species and confirm no recent spray history. Ask the crew lead. They will tell you. Then pile the chips in an out-of-the-way corner for at least three months before spreading near sensitive native plantings, so the freshest wood mellows out and any volatile residues evaporate.
How do I push back when my HOA insists on dyed black mulch?
Many HOAs in the southeast and mid-Atlantic explicitly require “dyed black mulch” or “uniform dark mulch” in covenant documents, because some board member in 1997 decided black was more “manicured.” This puts a native-plant homeowner in a real bind, because dyed black mulch is almost always made from recycled wood pallets, construction debris, and CCA-treated lumber that should never go near a vegetable garden, never mind a wildlife habitat.
Your three workable counters, in order from least to most confrontational:
- Request “natural dark hardwood” as an equivalent. Most HOA aesthetic enforcers cannot tell the difference between dyed black and naturally aged dark hardwood after four weeks of weather. Buy naturally dark double-shredded hardwood and let it age in place. By week six, it looks identical to dyed black from twenty feet away, which is the only distance an HOA inspector measures from.
- Request a written exception in writing. Cite the Xerces Society’s pollinator-friendly residential yard guidelines, attach a one-page summary of why dyed mulches harm soil microbiology, and submit it before the HOA’s spring inspection window opens. Boards respond to paper.
- Convert the strip directly visible from the street to compliant mulch and use natural mulch on the back beds. The pragmatic Sarah move. The HOA inspector never walks behind the house. Your back beds get the good stuff. Your front strip gets a one-inch dressing of compliant-looking mulch over a substrate of leaf litter you have been quietly stockpiling.
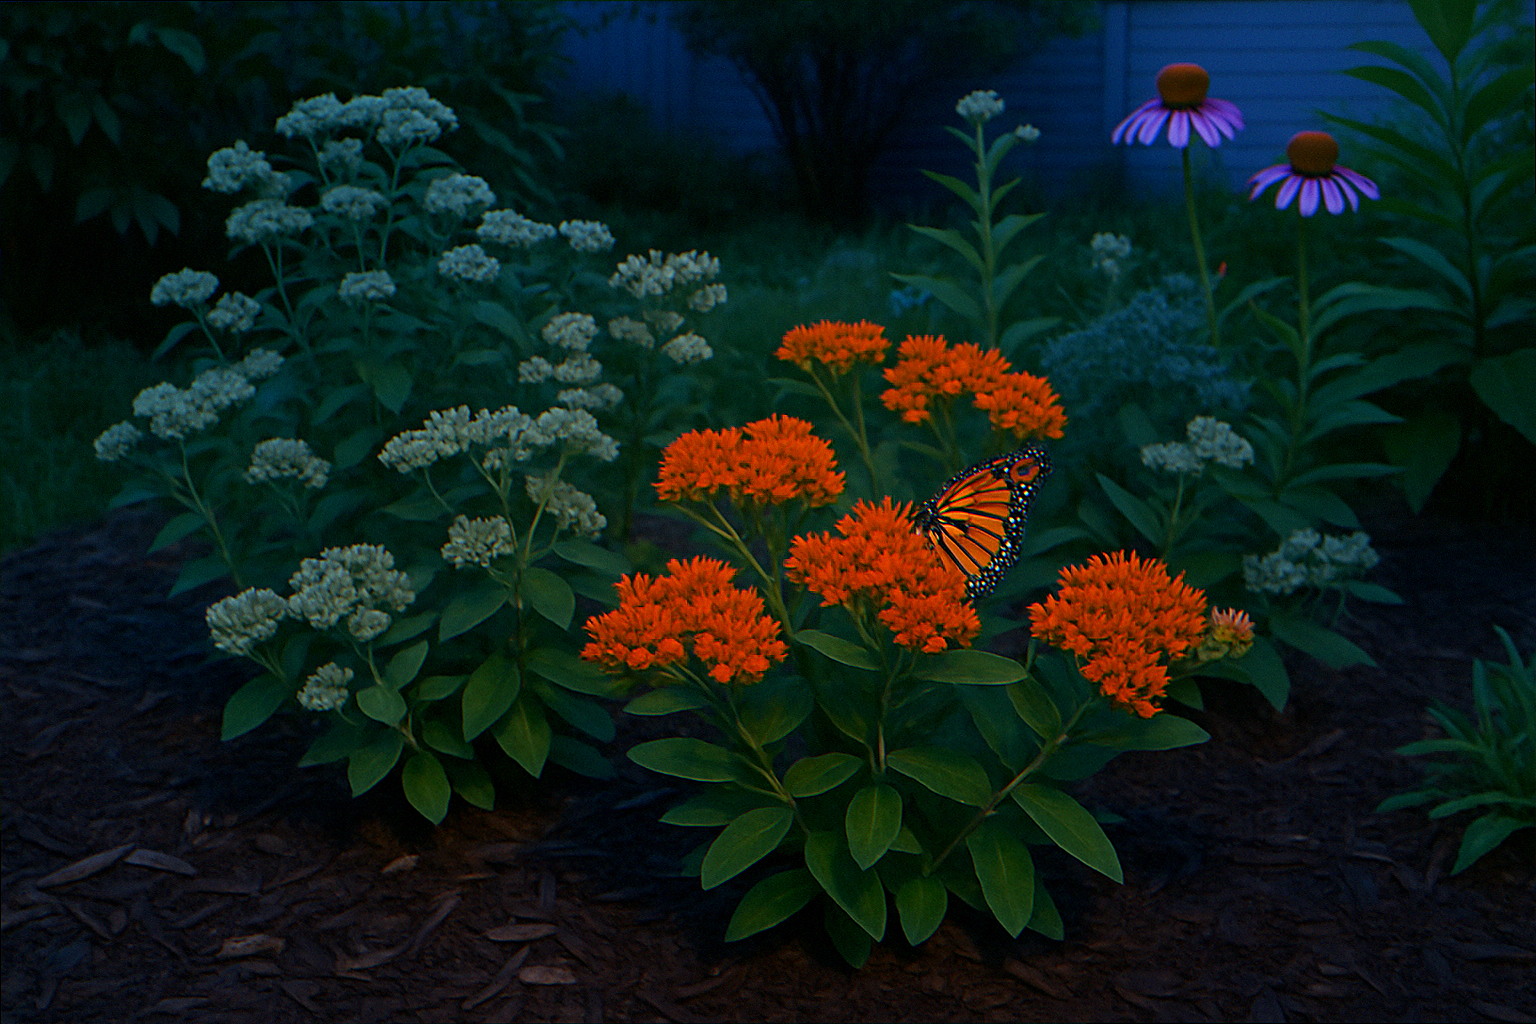
What changes in your yard after you start vetting deliveries
I started inspecting every load five seasons ago after losing a freshly planted rain-garden bed to what turned out to be clopyralid-contaminated supposed-hardwood mulch. The difference in survival rates is not subtle.
Before the inspection routine, my first-year native plug survival was running about 65%. Which I had attributed to drought, deer, and “just how it goes with natives.” After two seasons of vetting every load, first-year plug survival climbed to 91%, deer pressure unchanged. The math is brutal: a third of my plant losses had nothing to do with site conditions and everything to do with what I was burying their roots in.
The bee numbers shifted too. A monarch waystation that had supported maybe three or four caterpillars per season started supporting twelve to twenty. Native bee diversity in my yard surveys, which I track informally on the iNaturalist app, went from eleven species detected to nineteen species. Cleaner mulch means cleaner pollen, which means surviving bees. The chain is direct.
This is the work that makes a homegrown national park actually function. You are not just planting the right species, you are protecting the soil and the air and the bloom surfaces from the chemistry that the conventional lawn-care industry will happily deliver to your driveway if you do not stop them at the curb.
FAQ
How much should two cubic yards of premium hardwood mulch cost in 2026?
Pricing varies sharply by region, but expect $35 to $55 per cubic yard for premium double-shredded hardwood from a regional garden-supply yard, plus a delivery fee of $50 to $90 within a 15-mile radius. If you are quoted under $25 per cubic yard for “premium,” assume the supplier is cutting the load with cheap fines or construction debris. Compare three suppliers before locking in a spring delivery.
Can I refuse a mulch delivery after the truck has already dumped?
Technically yes, but practically your bargaining power drops by about 80 percent the moment the load is on the ground. Suppliers will sometimes credit a portion of the cost if you call within the same business day, photograph the load, and request a pickup. Most contracts state that bulk material is non-refundable after delivery, so the pre-dump inspection is where your real bargaining power lives.
Is dyed black mulch actually dangerous around native plants?
The dyes themselves (iron oxide and carbon black) are mostly inert. The risk is what the dye is hiding. Almost all dyed mulch is made from recycled wood waste including CCA-treated lumber, painted construction debris, and chipped pallets. The dye masks the visual cues you would otherwise use to identify contamination. For native beds, choose naturally dark hardwood and let it age. For decorative front-yard appearances, use dyed sparingly and never around food crops or pollinator forage.
What is the cheapest way to mulch a new native bed without risking contamination?
Leaf litter you collect from your own yard or from neighbors who do not spray. Fall leaves shredded with a mulching mower create a free, locally-sourced mulch that is biologically identical to what a deciduous forest deposits on its own floor. The drawback is volume. You need to stockpile from multiple yards to cover a large bed. As a backup, pine straw from an unsprayed source is a respectable second choice for acid-tolerant native plantings.
How long should I wait before planting natives in a bed where I suspect bad mulch?
If you have already spread suspect mulch and only later run a bean bioassay that comes back positive, rake off as much as you can, dispose of it in your municipal yard waste stream (not your home compost), and wait one full growing season before planting sensitive natives in that location. For severe contamination, wait two seasons. Test with beans each spring until you get a clean bioassay. It is genuinely that slow to leach out.
For a deeper look at the soil under the mulch, see our piece on how to remove buried weed fabric without damaging your soil, which pairs directly with this one. If you are starting a brand-new bed this season, the spacing question matters as much as the mulch question, so read how far apart to plant natives in a new bed before you put a single plug in the ground. And if you are still sourcing your plants, our guides on how to buy real native plants at Lowe’s and Home Depot and spotting invasive fillers in wildflower seed mix labels will keep you from making the other big spring-shopping mistake. For ongoing bed protection, the slug guide at stop slug damage on native seedlings covers the next pressure point most new native plantings face. And finally, if your soil came pre-loaded with the wrong stuff, our walkthrough on smother your lawn with cardboard for native plants includes a realistic timeline for soil recovery.
Want More Wildlife Garden Tips?
Join 5,000+ nature lovers getting our weekly tips on creating wildlife-friendly gardens.
No spam, unsubscribe anytime. Privacy Policy
Emma Harrington
Emma Harrington is a wildlife habitat researcher and content editor with a passion for backyard conservation. She has spent over a decade translating ecological science into practical tips anyone can follow — from selecting native plants to building wildlife-friendly habitats. Her work focuses on helping homeowners transform ordinary yards into thriving ecosystems for bees, butterflies, hummingbirds, and other beneficial wildlife.