
The corner of my yard was a disaster every spring. Every time it rained more than half an inch, water would pool at the base of my downspout, sit for three days, kill whatever grass was left, and then slowly drain into the street carrying a river of topsoil with it. My neighbors had the same problem. Nobody knew what to do about it. I did. For once. Because I’d been reading about rain gardens.
The problem was every guide I found either gave me a generic list of “moisture-tolerant plants” that included invasive nightmares, or it required an engineering degree to size the thing properly. So I dug in (literally), made a few mistakes, and figured out the recipe that works.
If you are dealing with a soggy low spot, a downspout that dumps water nowhere useful, or the chronic stress of watching your expensive native perennials drown every spring, this is for you. We are going to build a rain garden using native plants. And we are going to do it in a way that looks so intentional your HOA board will think you hired a landscape architect.
FREE: Wildlife Garden Starter Guide
Get our 12-page PDF with the 25 best plants for pollinators, simple habitat tips, and a printable checklist — all 100% free.
No spam. Read our Privacy Policy.What a Rain Garden Actually Does (And Why Native Plants Are Non-Negotiable)
A rain garden is a shallow depression. Typically 4 to 8 inches deep. Positioned to catch stormwater runoff from roofs, driveways, and compacted lawn areas. The water collects, then slowly infiltrates into the soil over 24 to 48 hours. That’s it. No pump. No liner. No complicated plumbing.
What makes or breaks a rain garden is the plants. Generic guides will tell you to plant “moisture-tolerant” species and call it a day. That list almost always includes yellow flag iris (Iris pseudacorus), purple loosestrife (Lythrum salicaria), and sometimes cattails. All of which are invasive in most of the continental United States and will escape your garden into every ditch, pond, and creek within a mile.
Native plants are the only correct answer here, and not because of ecological purism for its own sake. But because native species evolved specifically for your region’s wet-dry cycles. They go dormant when they need to, their roots punch deep into compacted suburban clay, and they do not need fertilizer to bulk up. After year two, a native rain garden mostly maintains itself. If you want to verify a plant is truly native to your county before you buy, do that step first.
The bonus: native rain garden plants are the single most productive wildlife habitat you can install in a suburban yard. Swamp milkweed (Asclepias incarnata) is the only host plant for monarch butterflies in wet conditions. Cardinal flower (Lobelia cardinalis) is the hummingbird magnet your yard has been missing. Joe-Pye weed (Eutrochium purpureum) feeds over 40 species of native bees. You are not just managing stormwater. You are building a functioning ecosystem.
Sizing Your Rain Garden Without a Hydrology Degree
You do not need to be an engineer. Here is the simplified math that works for most suburban lots.
Step 1: Measure your drainage area.
This is the roof section or paved surface that feeds the problem spot. For a standard downspout from a 1,500 sq ft roof section, you are dealing with roughly 900 gallons per inch of rain.
Step 2: Use the 10% rule.
Your rain garden should be roughly 10% of the surface area draining into it. A 1,500 sq ft roof section = a 150 sq ft rain garden. That is about 10 feet wide by 15 feet long. Very manageable.
Step 3: Test your soil.
Dig a hole 6 inches deep. Fill it with water. If it drains completely within 24 hours, you are in good shape. If it takes longer than 48 hours, you have clay. You will need to amend the bottom with a mix of 50% native topsoil, 25% sand, and 25% compost before planting.
Step 4: Pick your location.
- At least 10 feet from your home’s foundation
- Downhill from the water source (downspout, driveway edge)
- Avoid spots over septic fields or underground utilities
- Partial sun to full sun is ideal; shade-tolerant species exist but selection is narrower
The 3-Zone System: Your Rain Garden Blueprint
This is the framework that turns a rain garden from a soggy depression into a designed landscape. Every successful native rain garden has three distinct zones based on how long water sits after a storm.
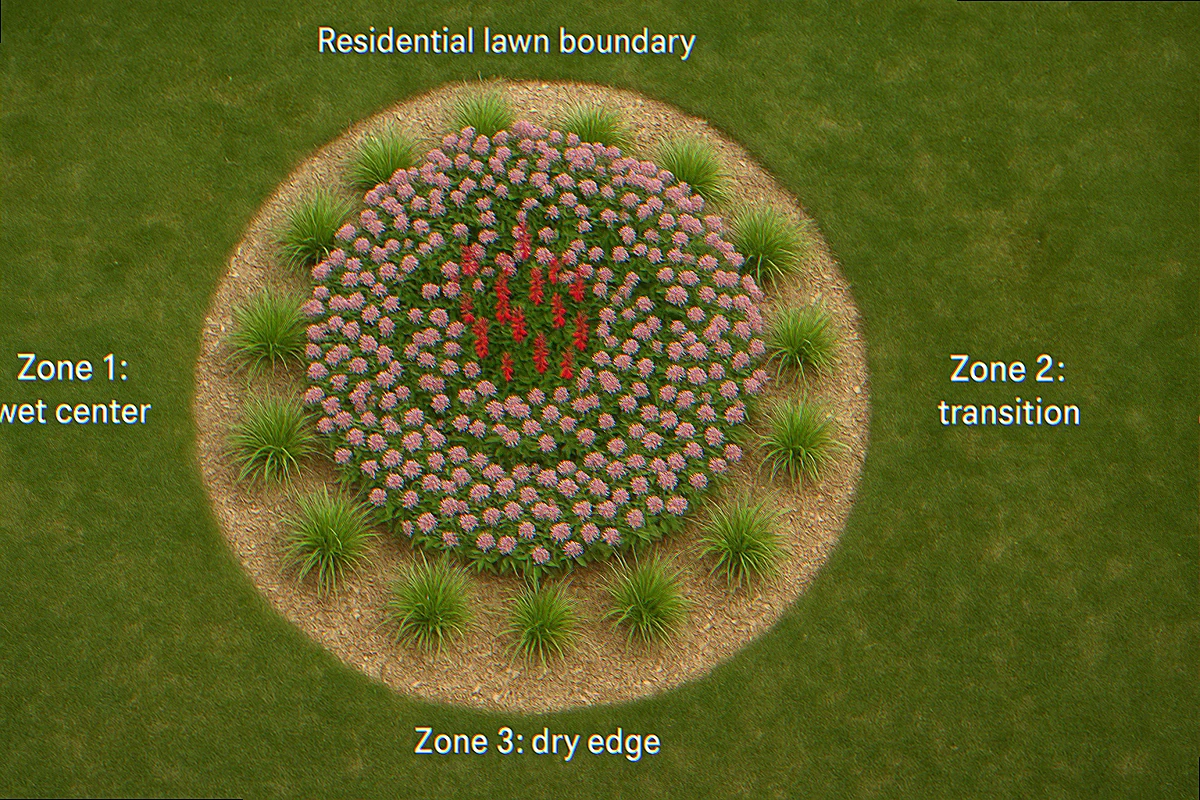
Zone 1, The Wet Bottom (Flooding Tolerance: 24–48 hours)
This is the center basin, the deepest part. Water stands here after every heavy rain. Plants in this zone must handle periodic complete submersion without rotting. Only a handful of natives can do this well.
This zone is typically 20–30% of your total rain garden area.
Zone 2, The Moist Slope (Flooding Tolerance: 12–24 hours)
This is the sloping transition area between the basin and the surrounding grade. It gets wet quickly but drains faster than the center. This is where you get the most species diversity and visual interest. The “prime real estate” of your rain garden.
This zone is typically 40–50% of your total rain garden area.
Zone 3, The Dry Edge (Flooding Tolerance: 0–12 hours)
This is the outer rim that rarely floods but does experience occasional wet conditions. From the street or a neighbor’s yard, this is the zone they see first. Plants here need to look structured and intentional. Not like they washed in from a ditch.
This zone is typically 20–30% of your total rain garden area and is your HOA buffer.
The Native Plant Recipe for Each Zone
Here is the plant recipe I use and recommend. These species are proven performers across USDA hardiness zones 4–8 and are available from both local native nurseries and, for the pragmatists, from Lowe’s, Home Depot, and Amazon in spring.
A note before we start: always cross-reference your specific county on the USDA Plants Database or the BONAP North American Plant Atlas to confirm native range. What is native in Ohio may not be native in Colorado. The recipe below is optimized for the Eastern and Midwestern US. Western and Southeastern readers should substitute accordingly.
Zone 1 Recipe, Wet Basin Plants
1. Blue Flag Iris (Iris versicolor), Zone 4–9
The native iris. True blue-purple blooms in late May. Grows 2–3 feet tall. Spreads slowly via rhizomes (manageable, unlike yellow flag iris which will take over your neighborhood). Confirms native status: USDA PLANTS range map shows it native from Minnesota to Maine and south to Virginia.
Where to buy: Local native nurseries reliably stock this. Avoid big-box stores. They usually carry the invasive Iris pseudacorus (yellow flag iris) mislabeled as “pond iris.” If the flower is yellow, walk away.
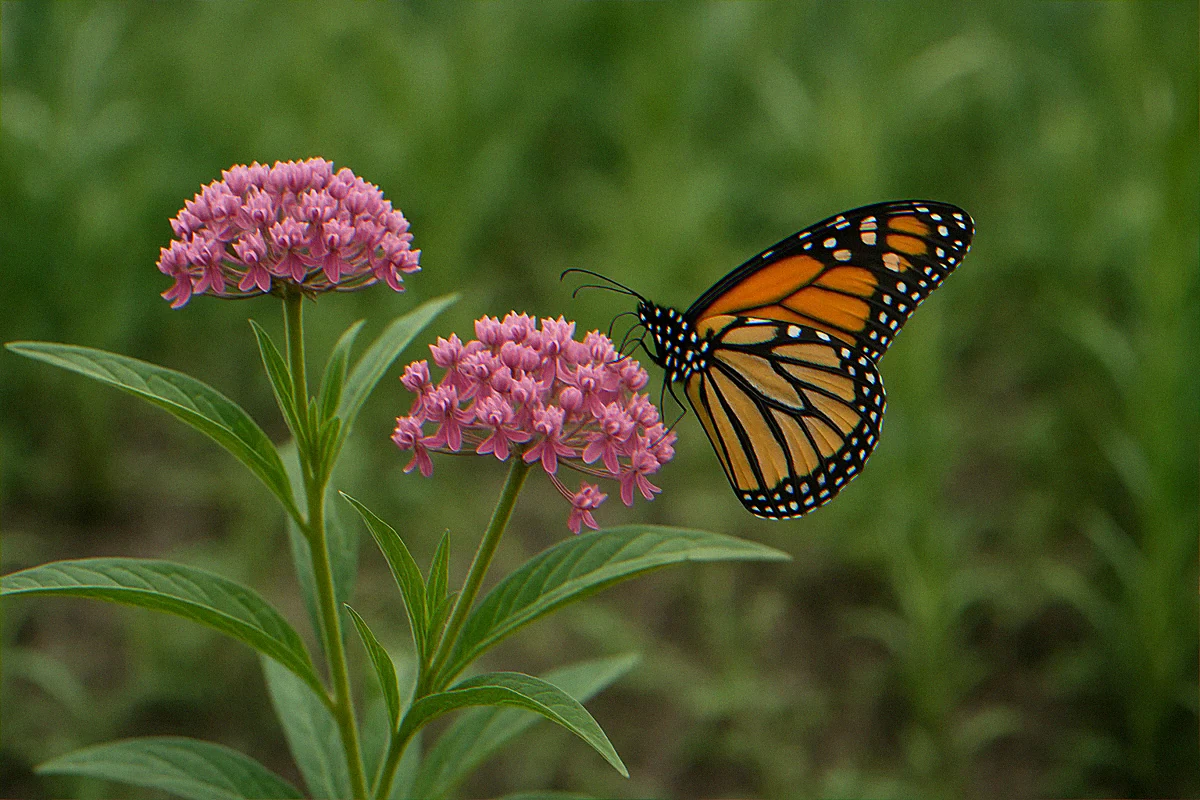
2. Swamp Milkweed (Asclepias incarnata), Zone 3–6
This is the wet-site monarch host plant. Unlike tropical milkweed (the orange-flowered big-box version that should stay in Florida), swamp milkweed goes fully dormant in winter, which is exactly what monarchs need. Pink flowers in July attract giant swallowtails, tiger swallowtails, and every bumblebee in a quarter-mile radius.
Where to buy: Lowe’s and Home Depot carry this in spring. Buy the pink-flowered straight species, not the white ‘Ice Ballet’ cultivar (it performs poorly in wet conditions). Local nurseries will have plugs for $3–5 each.
3. Common Arrowhead (Sagittaria latifolia), Zone 5–11
Arrow-shaped leaves, white blooms in late summer. Ducks eat the tubers. Excellent in the very lowest wet area. Spreads but is easily controlled by pulling.
Zone 2 Recipe, Moist Slope Plants
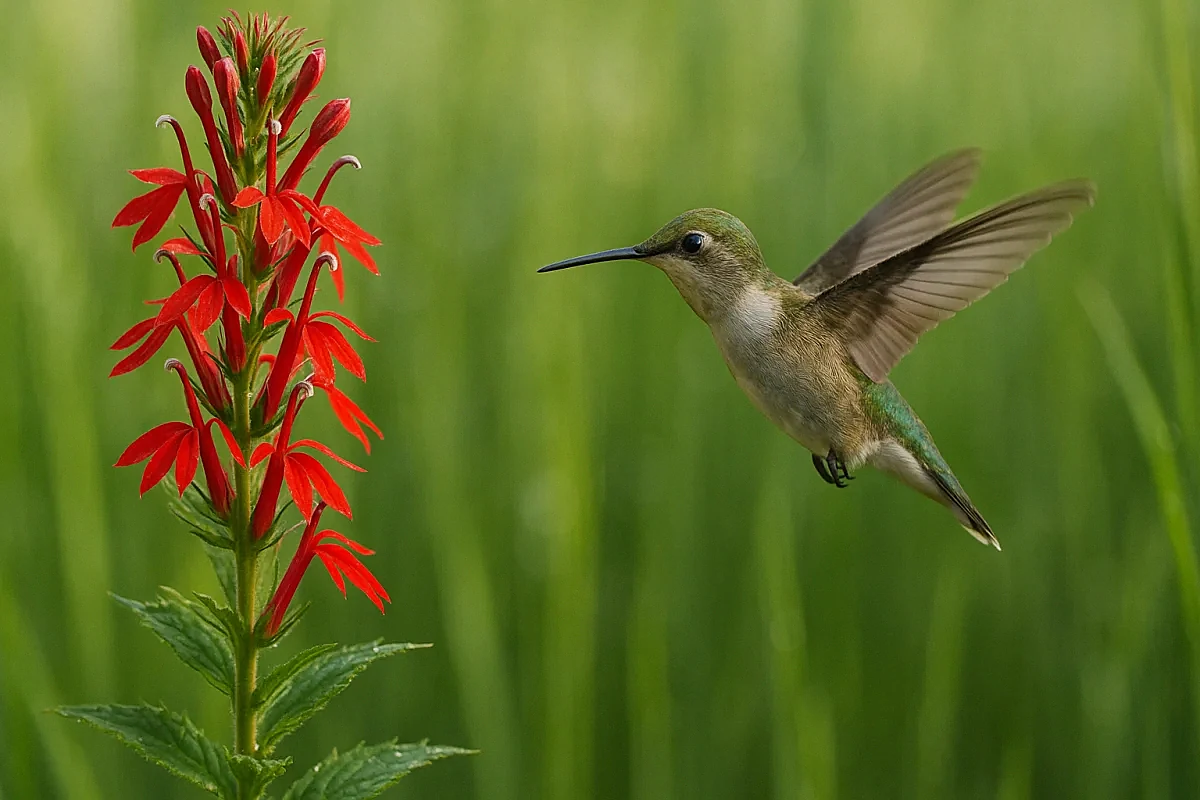
4. Cardinal Flower (Lobelia cardinalis), Zone 3–9
The hummingbird magnet. Brilliant red spikes in July and August. Grows 3–4 feet. Self-seeds heavily in a rain garden environment, so after year two you will have more plants than you started with. Short-lived perennial (2–3 years), but it replaces itself before you notice.
Where to buy: Available at big-box stores in spring. This one is fine to buy from Lowe’s or Home Depot. The cultivars with pink or white flowers exist, but the straight red species is superior for hummingbirds.
5. Joe-Pye Weed (Eutrochium purpureum), Zone 4–9
If you plant one thing in this zone, plant Joe-Pye. Mauve-pink flowers in August. Grows 4–6 feet and becomes a landmark in the garden. Supports 40+ native bee species. Deer-resistant. Zero maintenance after establishment.
Where to buy: Local native nurseries; less common at big-box stores, but available on Amazon from reputable sellers like Prairie Moon Nursery.
6. New England Aster (Symphyotrichum novae-angliae), Zone 4–8
The fall workhorse. Purple flowers in September and October when almost nothing else is blooming. Key for monarch fall migration fueling. Spreads aggressively by seed, so deadhead after blooming if you want to contain it. I do not deadhead mine.
7. Prairie Blazing Star (Liatris pycnostachya), Zone 3–9
Purple spikes in July. Blooms top-to-bottom, which matters because monarchs use it as a fueling station during migration. The corms are available cheaply in fall from big-box stores (look for them next to tulip bulbs) or from Prairie Moon Nursery year-round.
8. Switchgrass (Panicum virgatum), Zone 5–9
The structural anchor of the slope zone. Upright blue-green foliage in summer, golden in fall, and holds bird-feeding seed heads through winter. Provides nest-building material for wrens and sparrows. ‘Shenandoah’ is the cultivar I use because it turns brilliant red in fall without being invasive.
Zone 3 Recipe, Dry Edge Plants
This is your HOA buffer zone. These plants need to look structured and controlled from the street.
9. Little Bluestem (Schizachyrium scoparium), Zone 3–9
The best structural grass for the outer edge. Stays upright in winter, turns copper-orange in fall, and feeds dozens of sparrow and junco species through February. 3 feet tall. Available everywhere.
10. Black-Eyed Susan (Rudbeckia hirta), Zone 3–7
The ambassador native. Even the most skeptical neighbor recognizes this one as a “real flower.” Yellow blooms all summer. Spreads from seed but is easy to manage. Available at every single big-box garden center.
11. Wild Blue Indigo (Baptisia australis), Zone 3–9
The slow-starter that becomes a shrub. Takes 3 years to establish, then lives for decades. Blue-black seedpods rattle in fall. Hosts over 17 species of specialist native bees. Plant it once and leave it alone forever.
12. Purple Coneflower (Echinacea purpurea), Zone 3–9
Yes, it is everywhere. It is everywhere because it works. Goldfinches eat the seed heads in fall. Bees love the pollen. It handles dry edge conditions well. Buy the straight species, not the fancy double-petaled cultivars which are useless for pollinators.
What NOT to Plant in Your Rain Garden (The Invasive Trap)
This section exists because garden centers routinely sell the following plants as “great for wet spots,” and every single one of them is either invasive, highly aggressive, or both.
1. Yellow Flag Iris (Iris pseudacorus)
The most dangerous plant on this list. Sold everywhere as “water iris.” Invasive in 33 US states. It will escape your rain garden via seed and rhizomes into every waterway within distance. The Xerces Society regional plant list lists it as a threat to native wetland communities in nearly every ecoregion. Use Iris versicolor (blue flag iris) instead. Same visual impact, native, well-behaved.
2. Purple Loosestrife (Lythrum salicaria)
Bold magenta spikes. Federally listed noxious weed. Produces up to 2.7 million seeds per plant per year. Chokes out entire wetland communities. If you see it at a garden center, tell the manager. Use native Liatris instead. Similar purple spike, no ecological bomb.
3. Common Cattail (Typha latifolia). In small residential gardens
Cattails are native, but they spread via rhizomes so aggressively that they will consume a rain garden in two years. Unless your garden is 500+ square feet with a defined water feature, skip cattails. Sedges (Carex spp.) do the same ecological work without the takeover.
4. Japanese Iris (Iris ensata and Iris kaempferi)
Popular at big-box stores, beautiful flowers. Not native to North America and provides zero value to native pollinators. If you want a dramatic iris in your rain garden, plant blue flag iris.
5. Any “Wildflower Mix” Seed Packet from Big-Box Stores
Read every single plant name before you buy. Most cheap wildflower mixes contain non-native species (bachelor’s button, cosmos, poppies) that will crowd your natives in year one without supporting a single native bee larva. If the mix does not list every species and confirm all are native to your ecoregion, skip it. Refer to Prairie Moon Nursery or American Beauties Native Plants for vetted mixes.
Making Your Rain Garden HOA-Proof: The Curb Appeal Strategy
The single biggest mistake people make with rain gardens is treating the edge as an afterthought. A rain garden without a clean, defined edge reads as a muddy ditch to every neighbor and HOA inspector who walks by.
Here is the strategy I use. And that I detail more fully in my HOA-safe native garden curb appeal guide.
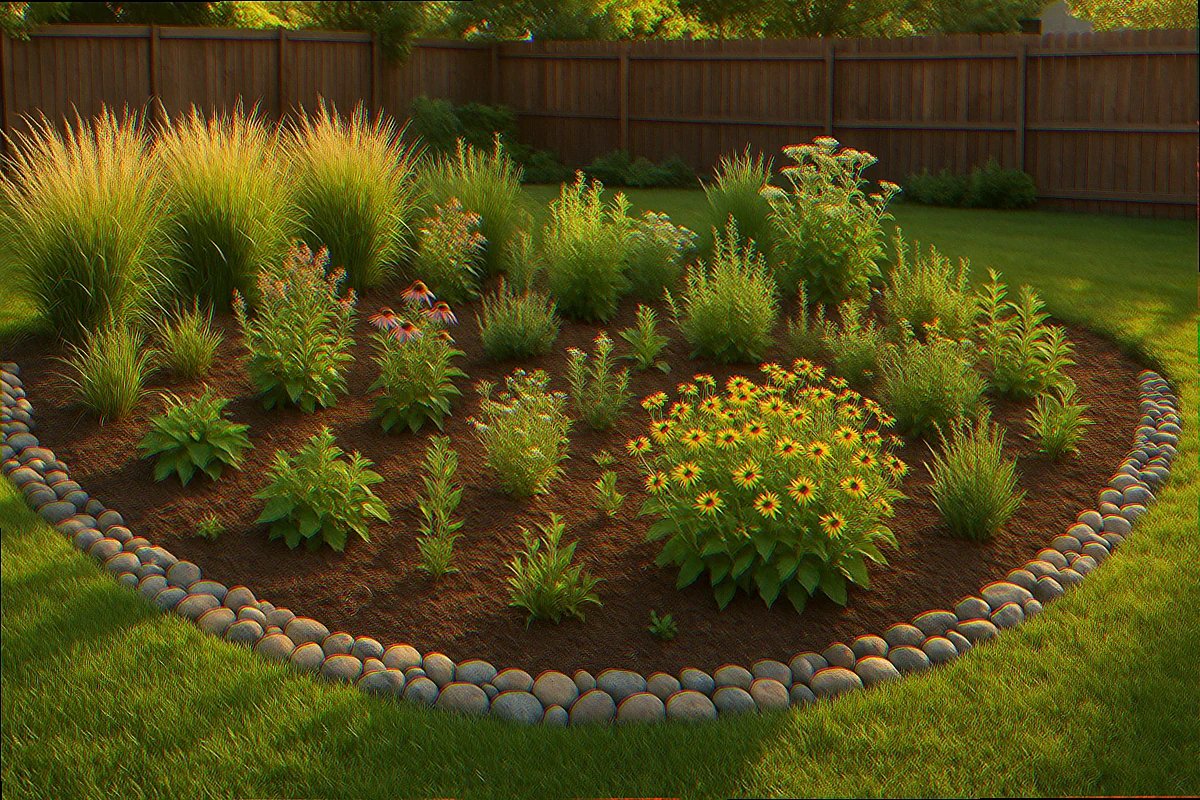
1. Define the Edge with River Rock
A 6–8 inch border of natural river rock around the outer perimeter of your rain garden serves two purposes: it prevents erosion at the edge where water enters the garden, and it signals “this was designed.” River rock communicates intentionality. Use a natural size (3–5 inch cobbles), not the uniform pea gravel that reads as fake.
2. Install a Pathway Element
A simple stepping-stone path from the yard into or alongside the rain garden makes it look like a garden destination, not a drainage feature. Two or three flagstones, slightly sunken, accomplishes this for under $30.
3. Use Upright Grasses at the Street-Facing Edge
Little bluestem and switchgrass have upright, architectural forms that read as “intentional landscaping” to any observer. Unlike weeping or floppy plants, they hold their structure through winter and look maintained even when they are not.
4. Post a Small Plant Sign
A small metal or wooden sign that says “Native Rain Garden, Stormwater Management Area” or similar does two things: it educates curious neighbors before they complain, and it pre-empts HOA action by naming the function explicitly. I have seen this single sign stop three HOA letters before they were written.
The First-Year Survival Checklist
Rain gardens fail in year one almost exclusively due to plant stress during establishment. Here is what to do.
Mulch everything with 2–3 inches of shredded wood mulch. Do not put landscape fabric underneath. It destroys the soil biology your plants need and will become a maintenance nightmare by year three. Refer to my note in the cold stratifying native seeds post about how soil biology interacts with mulch decomposition.
Water once per week in the first 6 weeks if there is no rain. After that, do not water unless you have an extreme drought. You want the roots to chase moisture downward, which is what makes them drought-tolerant in year two.
Weed aggressively in year one. This is non-negotiable. Your mulch will help, but fast-germinating annual weeds (crabgrass, thistle seedlings) will try to take over before your natives establish canopy. Pull them by hand. No herbicides near the rain garden because those chemicals will leach into the water you are trying to clean.
Do not deadhead everything. Leave seed heads on Joe-Pye, coneflowers, and blazing star through winter. Goldfinches, dark-eyed juncos, and American tree sparrows will work through those seeds from November through February.
Do not cut anything back in fall. The dead standing stems of switchgrass, cardinal flower, and Joe-Pye are overwintering habitat for 30+ species of native bees. Cut them to 18 inches in late March, not in October.
For more on planning your native plant layering for year-round wildlife support, see my native plant recipes by hardiness zone guide.
What About Mosquitoes?
This comes up every time. It is a legitimate concern, and the answer is: properly built rain gardens do not breed mosquitoes.
Mosquito larvae require standing water for a minimum of 7–10 days to complete their development cycle. A properly designed rain garden drains completely within 24–48 hours. No standing water for a week = no mosquito breeding.
If your rain garden is taking longer than 48 hours to drain, you have a soil permeability issue. Amend with a sand/compost mix in the basin, or in extreme clay situations, install a perforated pipe at the bottom of the basin that connects to a dry well 10 feet away from the garden.
The wildlife net benefit of a rain garden. Breeding habitat for dragonflies, toads, and beneficial wasps that eat mosquitoes. Far outweighs any perceived mosquito risk.
Common questions readers send me
Q: Can I build a rain garden in full shade?
Full shade options are more limited, but workable. Use royal fern (Osmunda regalis), turtlehead (Chelone glabra), blue cardinal flower (Lobelia siphilitica), and native sedges (Carex spp.) in the wet zone. Skip the sun-loving species like black-eyed Susan and prairie blazing star. Plan for 25% less total plant diversity but still excellent wildlife value.
Q: How do I connect my downspout to the rain garden?
Run a flexible downspout extension across the lawn toward your garden. Bury it in a shallow trench (6 inches) and terminate it at a splash pad of river rock just uphill from the rain garden’s edge. The rock dissipates the water velocity so it does not crater the garden. Total cost: under $40 in supplies from any hardware store.
Q: Will this attract frogs and toads?
Yes, and enthusiastically. Rain gardens with native plants support American toads, gray treefrogs, and. If you are near water. Green frogs. Each American toad eats up to 10,000 pest insects per summer. This is not a bug, it is the entire point.
Q: My HOA says I cannot have a “wet area” in my front yard. What do I do?
Frame it as a “stormwater management garden” in any communication with your HOA. Many municipalities actually incentivize or require this type of installation. Check with your local county stormwater office. Several offer rebates ($50–$300) for rain garden installation. The functional language and the structured appearance together give you a defensible position.
Q: How long before my rain garden is fully self-maintaining?
Year two you will see real establishment. Year three, it is largely self-sustaining. Weed pressure drops sharply as your natives close canopy, and the only maintenance is cutting stems in late March and dividing any overcrowded clumps every 3–5 years. The most work is front-loaded in year one.
The Payoff
Last May, my corner yard problem spot became a rain garden. I planted it over two weekends with a combination of plants from a local native nursery (blue flag iris, joe-pye weed, cardinal flower) and from Lowe’s spring stock (black-eyed susan, switchgrass, swamp milkweed). Total cost: about $180 in plants and $45 in river rock. The neighbor who used to complain about my “messy yard” asked me in August what kind of garden I had put in. The hummingbirds had been landing on my cardinal flower every morning.
The soggy corner is gone. The water management is invisible. The wildlife is not.
That is the rain garden formula: solve a problem so cleanly that it looks like a garden, not a solution.
Sources:
- Xerces Society, Pollinator-Friendly Native Plant Lists
- USDA Plants Database
- UMN Extension, Building a Rain Garden
- Grow Native!, Rain Garden Native Landscape Plan
Want More Wildlife Garden Tips?
Join 5,000+ nature lovers getting our weekly tips on creating wildlife-friendly gardens.
No spam, unsubscribe anytime. Privacy Policy
Emma Harrington
Emma Harrington is a wildlife habitat researcher and content editor with a passion for backyard conservation. She has spent over a decade translating ecological science into practical tips anyone can follow — from selecting native plants to building wildlife-friendly habitats. Her work focuses on helping homeowners transform ordinary yards into thriving ecosystems for bees, butterflies, hummingbirds, and other beneficial wildlife.