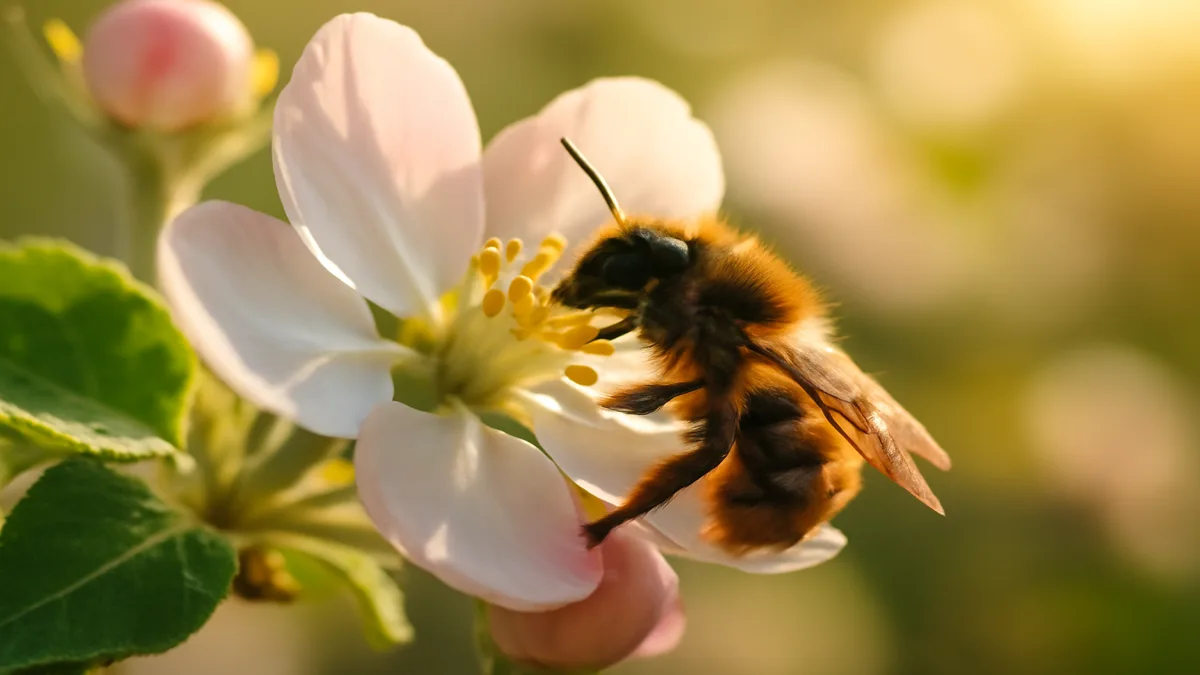
If you’ve spent any time watching fruit trees bloom in early spring, you’ve probably noticed something curious: the honeybees are still bundled up in their hives, waiting for warmer weather, while tiny dark-blue bees are already darting from blossom to blossom, getting the job done. Those are mason bees. And once you learn what they’re capable of, you’ll wonder why more gardeners haven’t been championing them for decades.
A mason bee house is not the same thing as a generic “bee hotel.” The multi-species insect hotels you see at garden centers are well-intentioned, but they often fail mason bees specifically, because the tube diameters are wrong, the depth is too shallow, or the materials harbor parasites that wipe out an entire generation of cocoons. If your goal is to support Osmia lignaria, the blue orchard mason bee native to much of North America, you need a structure built to their exact specifications.
This guide is written for folks in their forties and beyond who want to do this right the first time. We’re going to get specific: exact tube diameters down to the millimeter, why bamboo is a trap, what $30 worth of cocoons from a reputable supplier actually buys you, and the fall maintenance ritual that separates a thriving mason bee population from a sad, parasite-ridden collapse. By the end, you’ll have the plans, the materials list, and the placement knowledge to build something that pays back its cost in pollination many times over.
FREE: Wildlife Garden Starter Guide
Get our 12-page PDF with the 25 best plants for pollinators, simple habitat tips, and a printable checklist — all 100% free.
No spam. Read our Privacy Policy.Why Mason Bees Deserve a Dedicated House

Let’s start with the headline statistic that stops most people in their tracks: a single female mason bee does the pollination work of roughly 100 honeybees, and field studies put their pollination efficiency on apple bloom near 95% compared to honeybees at about 5%. That’s not marketing hyperbole from a cocoon supplier, either. It comes down to how the bee’s body is built and how she behaves on a flower. Honeybees pack pollen neatly into wet baskets on their legs, which is efficient for the hive but lousy for cross-pollination. Mason bees, by contrast, carry dry pollen loose on the hairs of their abdomen. Every time she bellies up to a blossom, she dusts the stigma with pollen from the last three flowers she visited. She’s a messy, prolific, and absurdly effective pollinator.
She’s also gentle. Solitary bees don’t defend a hive because there is no hive to defend. Each female is her own queen, building her own nest, provisioning her own eggs. With roughly 70% of North American native bee species living solitary lifestyles, this is the rule rather than the exception. With no colony to protect, mason bees have essentially abandoned the instinct to sting. Technically a female can sting if you squeeze her in your fist, but you can walk right up to an active mason bee house, put your face six inches from the entrance, and watch them work without any risk. Males have no stinger at all. This makes them ideal for families, for gardens with grandchildren visiting, and for anyone who loves pollinators but has always been a little nervous around honeybee hives.
Then there’s the native angle. Osmia lignaria evolved alongside the flowering plants and fruit trees of North America. Apples, cherries, plums, pears, almonds, blueberries, and a long list of native wildflowers all benefit dramatically from mason bee visits. In parts of the country where wild bee populations have crashed due to habitat loss and pesticide exposure, a backyard mason bee house is one of the few genuinely effective conservation tools an individual homeowner can deploy. You’re not just decorating the garden. You’re rebuilding a piece of local ecology.
The Specifications That Actually Matter
Here’s where most bee hotels go wrong and where your build will go right. Mason bee biology is unforgiving on two measurements: tube diameter and tube depth. Get either one wrong and the bees either skip your house entirely or produce a skewed, unhealthy sex ratio.
The tube interior must measure 5/16 inch, or 8 millimeters. That’s not “around 8mm” or “roughly 5/16.” Female mason bees select nesting cavities based on exact fit. Too narrow, and she can’t turn around inside the tube to lay eggs. Too wide, and she wastes enormous amounts of pollen filling the gaps, plus the nest becomes vulnerable to parasitic wasps that prefer roomy cavities. The 8mm dimension is specifically tuned to Osmia lignaria. Hornfaced mason bees and other Osmia species sometimes prefer slightly different diameters, but for the common blue orchard mason bee across most of the US and Canada, 5/16 inch is the number.
Tube depth should be 6 to 8 inches. This matters more than most people realize because of how mason bees organize their nests. The female lays female eggs at the back of the tube, where they are safest, and male eggs toward the front, where they emerge first in spring to await the females. A shallow tube of three or four inches only holds male eggs. You’ll get bees, but no females means no next generation at your house. Six inches is the practical minimum. Eight inches gives her room for a healthy ratio of four or five females per tube plus the male escort at the front.
“The single greatest improvement a homeowner can make for native pollinators is to install a properly sized mason bee nest and commit to managing it through the seasons. An unmanaged nest becomes a parasite farm within two years. A managed nest produces more bees every year and doubles as a living science lesson for the whole family.”
Choosing the Right Tube Material
This is where opinions in the backyard beekeeping community diverge sharply, and where the wrong choice will quietly sabotage your project. There are four common options, and they are not equivalent.
Paper tubes with removable liners are the gold standard. These are purpose-made kraft paper tubes, often with a thin inner liner that slides out in fall. They let you harvest cocoons cleanly, inspect each one for parasites, and replace the tubes every season for almost zero cost. Paper breathes, resists mold if kept dry, and mimics the hollow plant stems mason bees use in the wild. If you’re buying tubes online from a reputable supplier, these are what you want.
Natural reed sections are a close second. Teasel, phragmites, and Japanese knotweed reeds have the right diameter when cut to the right species, and they split cleanly in fall for cocoon harvest. The downside is sourcing: you either cut and measure your own, which takes real time, or you buy them from a native-plant nursery. Reeds look beautiful in a mason bee house and give it a naturalistic feel many gardeners prefer.
Cardboard tubes without liners work acceptably if you replace them every single year. They cannot be harvested and reused, and any attempt to open them usually destroys cocoons. Budget option only.
Drilled wood blocks, often sold as the “traditional” mason bee house, are the worst option for long-term use. You cannot harvest cocoons from them without destroying the block, which means parasites and fungal spores build up inside the wood year after year. By year three, a drilled wood block is often doing more harm than good. Use them only if you commit to replacing the entire block annually, which defeats the economy.
And a critical warning: never use bamboo for mason bees. Bamboo is everywhere in cheap insect hotels because it looks rustic and cuts easily, but it fails on three counts. First, the interior diameter is rarely 8mm and varies wildly between internodes. Second, bamboo splits along its length as it ages, exposing cocoons to predators and weather. Third, and most damning, the smooth, sealed inner surface of bamboo harbors pollen mites and chalkbrood fungus that you cannot clean out. A bamboo house often looks full of activity while actually functioning as a mason bee graveyard. Skip it.
Materials List and Construction Plan
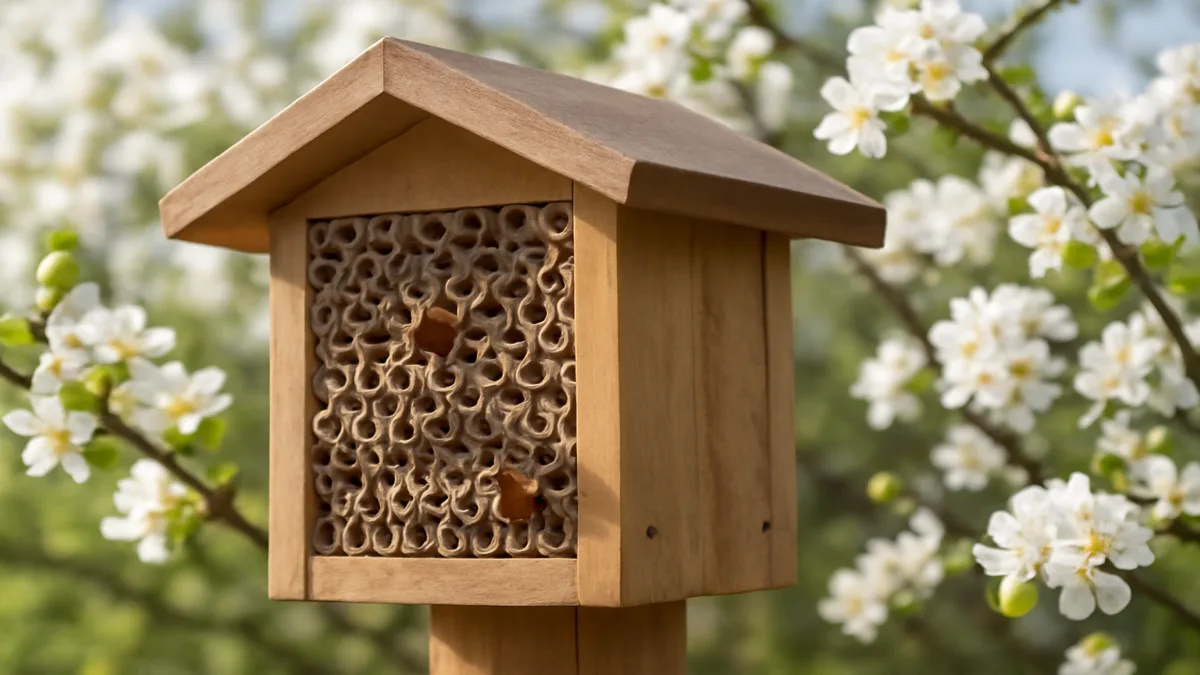
Now that we’ve settled on paper or reed tubes as the nesting medium, let’s build the shelter that protects them. The shelter serves three jobs: it keeps rain off the tube openings, it blocks wind that could chill the developing larvae, and it provides a stable mounting surface. You are not building a birdhouse with a single round hole. You are building a small, open-fronted box that holds a bundle of tubes horizontally, with a generous roof overhang and a solid back.
The dimensions below produce a house that holds roughly 40 to 60 tubes, which is an appropriate size for a residential yard with fruit trees or a pollinator garden. Scale up or down as needed, but resist the urge to build something enormous. Large concentrations of mason bees attract disproportionate parasite pressure. Two medium houses 30 feet apart are better than one giant house.
| Item | Dimension / Spec | Quantity | Approx. Cost |
|---|---|---|---|
| Untreated cedar or pine board (1×8) | 6 feet length | 1 | $12 to $18 |
| Paper mason bee tubes with liners | 8mm interior, 6 inch length | 50 | $15 to $20 |
| Exterior wood screws | 1-1/2 inch, galvanized or stainless | 12 | $3 |
| Wood glue (exterior grade) | Small bottle | 1 | $4 |
| Mounting bracket or French cleat | For wall or post mount | 1 | $6 to $10 |
| Mason bee cocoons (optional starter) | 20 to 30 cocoons | 1 pack | $25 to $40 |
| Roofing material (cedar shingle or metal flashing) | 8 inch by 10 inch piece | 1 | $5 |
Total project cost lands somewhere between $70 and $100 depending on whether you include starter cocoons. A store-bought equivalent of comparable quality runs $90 to $150, and most of them still have the wrong tube diameter. Building your own is both cheaper and better.
Cedar is the preferred wood because it naturally resists rot and insects without chemical treatment. Pine works fine if cedar is unavailable, but expect a shorter service life of maybe six or seven years instead of fifteen-plus. Absolutely do not use pressure-treated lumber, plywood with exterior glues, or any wood that has been painted or stained. The chemicals off-gas into the enclosed space and can kill developing bee larvae.
Building Your Mason Bee House From Scratch
Set aside a Saturday morning for this. The build is straightforward and forgiving, and no step requires precision woodworking skills beyond a decent square cut.
- Cut the lumber to size. From your 1×8 cedar board, cut two side pieces at 8 inches long, one back piece at 8 inches wide by 8 inches tall, one bottom piece at 7 inches wide by 6 inches deep, and one top piece at 9 inches wide by 7 inches deep. The top is intentionally larger than the bottom to create roof overhang on the front and sides.
- Pre-drill pilot holes. Cedar splits easily, so drill 1/8 inch pilot holes wherever you’ll drive a screw. This takes five extra minutes and prevents a lot of cursing.
- Assemble the box. Join the two sides to the back piece using exterior wood glue and two screws per side. Attach the bottom piece between the sides, flush with the back. You now have an open-fronted box with a floor, two walls, and a back, shaped like a small alcove.
- Attach the roof with overhang. Position the top piece so it extends about 2 inches forward of the box front and 1 inch past each side. This overhang is what keeps driving rain out of the tube entrances. Secure with glue and four screws from above.
- Add roofing material (optional but recommended). A small piece of cedar shingle or metal flashing tacked to the top piece doubles the rain resistance and extends the house’s lifespan significantly. Angle it slightly forward so water drips away from the tube openings.
- Install the mounting hardware. Attach a French cleat or sturdy mounting bracket to the back of the box. Mason bee houses must be absolutely rigid. Any swaying in the wind will cause the female to abandon the nest. Hanging from a chain or wire is a common mistake; mount flush to a wall, fence post, or dedicated 4×4 post sunk in concrete.
- Bundle and load the tubes. Group your 50 paper tubes into a tight bundle, closed ends facing the back of the box. The closed back end is critical, because mason bees will not nest in a tube that’s open on both sides. Wedge the bundle snugly into the box so no tube can rotate or shift. Do not glue the tubes in place; you need to remove them in fall.
- Seal any gaps. If the tube bundle doesn’t fill the box completely, stuff crumpled newspaper or a scrap of cedar into the back to prevent the tubes from sliding backward. No daylight should be visible from the front of the box except through the tube openings themselves.
- Mount the house before bloom. Install in late February or early March, depending on your USDA plant hardiness zone, so the house is ready before native fruit trees and early wildflowers bloom. Mason bees emerge from their cocoons at the first sustained warm spell and need housing available immediately.
Placement Rules That Make or Break Success
You can build a textbook-perfect mason bee house and get zero occupancy if you mount it in the wrong spot. These bees are picky about microclimate, and once you understand why, the rules make intuitive sense.
The house needs to face south or southeast. Mason bees require a body temperature of at least 55 degrees Fahrenheit to fly, and they warm up by sunning themselves at the tube entrance each morning. A south-facing house catches the first direct sun of the day, gets the bees airborne earliest, and maximizes their daily foraging window. West-facing mounts miss the critical morning warm-up. North-facing mounts are a dead loss; don’t bother.
Mount height should be 3 to 6 feet off the ground. Higher than that and you can’t do fall maintenance without a ladder, which means you won’t do it. Lower than 3 feet and you expose the bees to splash-up from rain and to curious pets. Eye level or slightly above is ideal.
Proximity to forage matters enormously. Mason bees have a foraging radius of only about 300 feet, which is tiny compared to honeybees. The house should be within that range of your blooming fruit trees, berry canes, or a diverse pollinator garden. If you’re installing the house primarily to pollinate a specific apple or cherry tree, mount it on a post within 50 feet of the tree for best results.
Other placement considerations worth remembering:
- Shelter from prevailing wind is essential. A house constantly buffeted by wind gets abandoned. Use a building wall, a solid fence, or a dense hedge as a windbreak.
- Keep the house away from bird feeders. Woodpeckers and chickadees will raid tubes during winter if they learn the location. Thirty feet of separation is usually enough.
- Mount near a source of damp clay or mud soil. Mason bees are named for their habit of sealing each egg chamber with mud. If your yard is heavily mulched or has only sandy soil, leave a shallow dish of damp clay-rich soil within 25 feet of the house.
- Avoid locations with heavy pesticide or herbicide use. Neonicotinoids are especially deadly to solitary bees. If a neighbor sprays regularly, move the house as far from that property line as possible.
- Never install near a swimming pool, hot tub, or heavily chlorinated water feature. Mason bees will drink from these sources and die.
Buying Starter Cocoons and the Annual Cycle
You have two options for populating your new house: wait for wild mason bees to find it, or buy starter cocoons. Wild colonization works in areas with healthy native populations and typically takes one to three seasons. Buying cocoons gets you a productive house in year one, and the economics are reasonable. A pack of 20 to 30 cocoons from a reputable supplier runs $25 to $40, and that’s enough to fill a 50-tube house with activity in a single spring.
The two names most experienced mason bee keepers mention are Crown Bees and Mason Bees for Sale. Crown Bees in particular has been a driving force in mason bee conservation education for over a decade and ships cocoons that are inspected, cleaned, and free of the pollen mites and chalkbrood that plague untreated stock. The Xerces Society also publishes excellent regional guides on native bee conservation that are worth reading before you commit to a species.
Cocoons arrive in a small ventilated container, typically in late winter. Store them in a refrigerator at around 38 to 40 degrees Fahrenheit until you’re ready to release them, which should be when daytime temperatures are reliably hitting the mid-fifties and your fruit trees are showing pink bud. Place the container inside or just below your mounted house with the lid open, and within a day or two the males will chew their way out and begin patrolling the entrance, waiting for females to emerge.
From that point, the annual cycle runs itself for about six weeks. Females mate, forage, and lay eggs at a rate of roughly one to two tubes completed per female per season. By late May or early June, the adults have died off and the tubes are sealed with distinctive mud plugs at the front. Inside, the larvae feed on pollen provisions for about 10 to 14 days before spinning cocoons. They develop through summer, pupate in late summer, and spend winter as adult bees inside their cocoons, waiting for the next spring.
Fall Maintenance: The Non-Negotiable Step
This is the step that separates mason bee hobbyists from mason bee populations that thrive for decades. In October or early November, after a hard frost has confirmed the season is over, take the entire house down and harvest the cocoons.
If you used paper tubes with removable liners, slide the liners out and gently split them open over a clean towel. You’ll find a row of cocoons separated by mud partitions. Healthy cocoons are firm, oval, dark, and roughly the size of a grain of rice. Discard any that look shriveled, have holes chewed in them (parasitic wasp exit holes), or are surrounded by yellow dust (pollen mites).
Wash the good cocoons gently in cool water with a tiny amount of bleach, one tablespoon per gallon, for sixty seconds. Rinse thoroughly and let them air dry on a paper towel for an hour. This step removes pollen mites and fungal spores that would otherwise build up in your house year after year. Store the cleaned cocoons in a ventilated container in the refrigerator at 38 to 40 degrees until next spring’s release.
Meanwhile, discard the used tubes entirely. Do not reuse them. This is why paper tubes are the best choice economically; at twenty cents each, replacing them annually is trivial. Clean the empty house itself with a stiff brush and let it air in the sun for a few hours before storing it indoors over winter or remounting it empty in early spring with fresh tubes.
Skipping fall maintenance is the single most common reason mason bee houses fail in their second and third years. Parasitic wasps, pollen mites, and chalkbrood fungus all compound. A house that produced 80 bees in year one will produce 40 in year two and 10 in year three if never cleaned, even though it looks fully occupied. With annual maintenance, that same house produces 80, 150, 250 bees across the first three years as the population grows.
For gardeners building out broader native pollinator support, a mason bee house works beautifully alongside other habitat projects. If you want a design with truly removable chambers, a cleanable mason bee house with accessible chambers takes the maintenance ritual described above and makes it dramatically easier. Pest pressure benefits from a mosquito-control approach that doesn’t harm bees, birds, or bats on the same property. And none of these structures work in isolation; they need a diverse native pollinator garden matched to your USDA zone within foraging distance to actually feed the residents you’re inviting. For visitors who want to enjoy the bees up close, our guide to attracting bees without getting stung covers the safety basics.
Predator Protection and Common Mistakes
Woodpeckers are the primary vertebrate predator of mason bee cocoons. A downy woodpecker can empty a full tube of cocoons in a single winter afternoon. The best defense is fall maintenance, which removes the cocoons to safe indoor storage before woodpeckers get interested. If you prefer to leave cocoons in place through winter, cover the front of the house with half-inch hardware cloth stapled over the tube openings. The spacing lets emerging bees pass through in spring but blocks woodpecker beaks.
Smaller predators include the parasitic wasp Monodontomerus, which drills into sealed tubes and lays its own eggs on top of the mason bee larvae. Hard to prevent entirely, but annual cocoon inspection catches infestations before they spread. Any cocoon with a small exit hole or a cluster of tiny black wasps near it goes in the trash, not back in the house.
Beyond predators, here are the mistakes that sink most first-time mason bee house builders:
- Tubes too wide. Anything over 8mm attracts leafcutter bees, which are wonderful in their own right but will outcompete mason bees for the wrong-sized cavities.
- Tubes too shallow. Under 6 inches and you get all-male populations that die out within a season.
- No overhead rain protection. Water pooling at tube entrances drowns developing larvae. The roof overhang is not optional.
- House swings in wind. Rigid mounting is mandatory. Chains, wires, and hooks are out.
- Using bamboo. Already covered, but worth repeating. Bamboo is not mason bee habitat.
- Ignoring fall maintenance. Your house becomes a parasite reservoir within two years without it.
- Mounting too late. Install by mid-March at the latest in most regions. A house mounted in May is a house for next year, not this year.
- Pesticides in the foraging zone. Even “bee-safe” products can harm solitary bees at the larval stage. Go organic within a 300-foot radius.
Reader questions I’ve answered before
How many mason bees do I need to pollinate my fruit trees?
Roughly 250 to 300 female mason bees provide full pollination for an acre of apple or cherry orchard. For a residential yard with three or four fruit trees, 20 to 40 females is plenty, which corresponds to buying one starter pack of 20 to 30 cocoons (roughly half will be female) and letting the population grow naturally over two or three seasons.
Will mason bees sting my kids or pets?
Practically speaking, no. Male mason bees have no stinger. Females have a stinger but almost never use it, and the sting itself is milder than a mosquito bite if it does happen. You can stand inches from an active house and watch them work without any defensive behavior. They are probably the most family-friendly bees you can invite into a yard.
Do mason bees make honey I can harvest?
No. Mason bees are solitary, meaning each female raises her own young in her own tube, with no colony, no queen, and no honey stores. They collect just enough pollen and nectar to provision each egg chamber. If honey is your goal, you want a honeybee hive, which is a much larger commitment and a very different skill set.
What’s the difference between a mason bee house and a generic bee hotel?
A mason bee house is sized specifically for Osmia lignaria, meaning 8mm tubes, 6-to-8-inch depth, and a design optimized for spring-active pollinators that nest for six weeks and then disappear. A generic bee hotel attempts to serve multiple species with varied tube sizes, including smaller cavities for tiny solitary species and larger cavities for leafcutter bees. Both have merit, but if your goal is fruit tree pollination in early spring, the dedicated mason bee house outperforms the multi-species design significantly.
Can I leave the house up year-round without maintenance?
You can, but you shouldn’t. An unmaintained house produces shrinking populations each year as parasites and disease accumulate. Many houses that look fully occupied by year three are actually producing more parasitic wasps than mason bees. Twenty minutes of fall maintenance per year, once you know what you’re doing, is the difference between a decade of growing populations and a brief, declining hobby. It’s the most important thing in this entire guide.
Related reading
Want More Wildlife Garden Tips?
Join 5,000+ nature lovers getting our weekly tips on creating wildlife-friendly gardens.
No spam, unsubscribe anytime. Privacy Policy
Emma Harrington
Emma Harrington is a wildlife habitat researcher and content editor with a passion for backyard conservation. She has spent over a decade translating ecological science into practical tips anyone can follow — from selecting native plants to building wildlife-friendly habitats. Her work focuses on helping homeowners transform ordinary yards into thriving ecosystems for bees, butterflies, hummingbirds, and other beneficial wildlife.