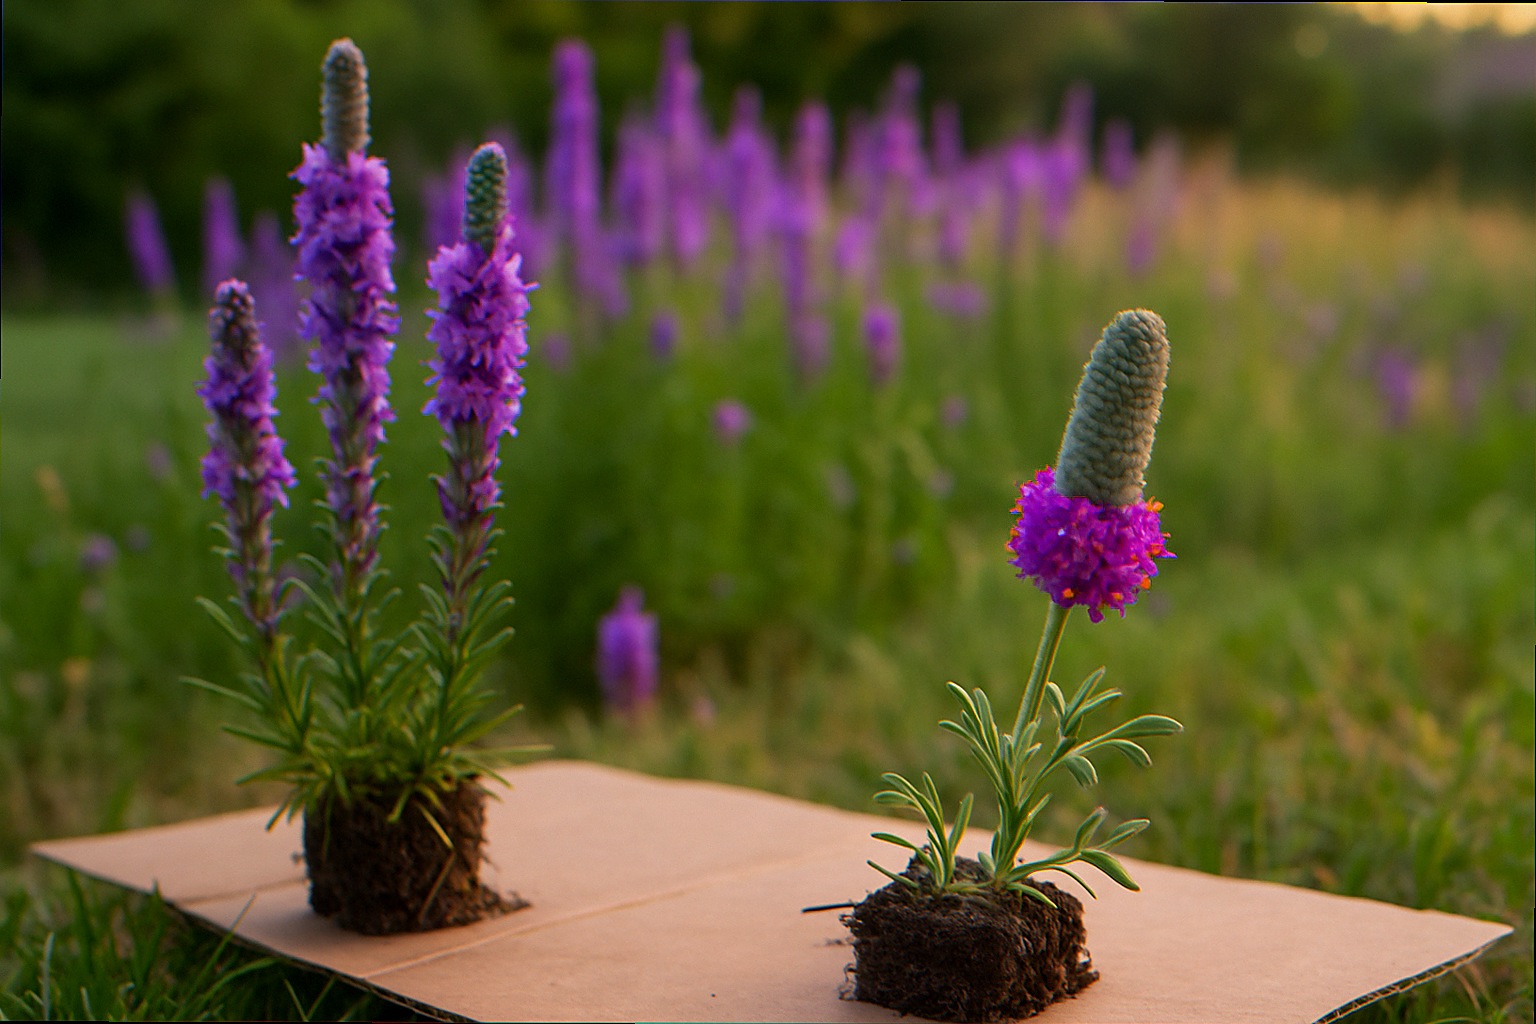
When I first took a good look at my front lawn, I was grappling with the time and money spent on maintaining it. After two hours of mowing and several more on edging, I realized I was merely creating a grassy area that contributed nothing to the goldfinches I could hear enjoying the goldenrod in my neighbor’s yard. In a similar vein, I’ve come across sentiments where people express frustration with traditional lawns and share their journey toward turning their yards into flourishing beds. It’s this quiet act of defiance that draws many to transitioning away from regular lawns, even though the shift can be tricky.
If you have ever stood in a half-stripped patch of crabgrass holding a flat of $4 plugs and wondered whether you should rent a sod cutter, rototiller, or just call the whole thing off, this guide is for you. We are going to walk through the no-till method that some Midwest gardeners have used to swap 100% of their city lawn for over 2,500 native prairie plugs without renting a single piece of heavy equipment, the mistakes that turn the project into a Sisyphean weed-fight, and the curb-appeal moves that keep your HOA inspector from leaving a note in your mailbox.
Why Sheet Mulching With Cardboard Beats Sod-Cutting and Tilling
Sod cutters and rototillers are loud, expensive to rent, and brutal on your back. They also do something subtle that costs you years of progress: they shred and surface the seed bank. A typical lawn carries tens of thousands of dormant weed seeds per square meter; the USDA’s Natural Resources Conservation Service has been documenting this for decades, and a tiller flips that bank straight into the sunlight where it germinates. You think you have killed the lawn. What you have actually done is started a weed nursery.
FREE: Wildlife Garden Starter Guide
Get our 12-page PDF with the 25 best plants for pollinators, simple habitat tips, and a printable checklist — all 100% free.
No spam. Read our Privacy Policy.Cardboard sheet mulching does the opposite. You cap the existing turf and the dormant seeds together in the dark, the grass exhausts itself trying to reach light, and the whole layer composts in place. The fungal network underneath is mostly preserved, the worms keep working, and you do not lose the topsoil structure that took the previous owners thirty years to build. Xerces Society’s habitat staff use cardboard layering as a default for pollinator plantings precisely because it protects soil biology while ending the grass-versus-natives war.
There is one more reason this method matters for the kind of gardener who reads this site. You can do it without a tractor, without a permit, and without telling anyone. It is a slow, patient act of erasure. By the time the neighbors realize the lawn is gone, you already have asters blooming in its place.
The Mistake Most New Lawn Converters Make (It Is Not the Cardboard)
The cardboard rarely fails. The plant choice does. People watch a Proven Winners video, get inspired, and order a seed mix labeled “Midwest pollinator blend” from a sketchy big-box rack. Six weeks later they are looking at a sea of crown vetch and Queen Anne’s lace and wondering why nothing they expected came up. I have heard the frustration framed this way: “unscrupulous sellers like American Meadows whose ‘native wildflower’ mixes contain nonnative and even invasive species” are the reason most cardboard-conversion projects feel like a betrayal in year two.
Seed mixes are an act of trust. Plugs are an act of verification. When you buy plugs from a regional native nursery, you can read the genus and species on each tray and check it against the BONAP North American Plant Atlas for your county. A good rule for a first conversion: skip seed mixes entirely. Plant the bones of the meadow as plugs, then let them seed in around themselves over the next three years. You spend more money up front and less money replanting in years two and three.
The other mistake is mulching too thin. A single sheet of cardboard with three inches of arborist chips on top will hold back fescue. It will not hold back Bermuda grass, quackgrass, or anything with rhizomes that go deeper than your fork. For warm-season lawns and aggressive perennial weeds, you want overlapping double layers of cardboard and four to six inches of chips, and you want to leave it down for at least one full growing season before you cut planting holes through it.
Sourcing the Right Cardboard (Free Pickups Beat Big-Box for Once)
Cardboard is one of the rare gardening inputs where your big-box trip costs more than the local route. Appliance stores, bike shops, and furniture retailers throw out enormous flat panels every week and most of them will let you back your car up to the dumpster on a Friday afternoon. What you want, specifically:
- Plain corrugated cardboard with no glossy color printing on the surface that will touch the soil. Black-ink shipping labels and barcodes are fine; full-bleed glossy color advertising is the question mark.
- Sheets at least 24 by 36 inches. Smaller pieces will work but the seam count goes up and grass tunnels through seams.
- No tape, no staples, no plastic strapping. Pull off the tape before you lay the sheets.
If you cannot find free panels and you are tempted to buy rolled landscape cardboard at the home center, do the math first. A 4-by-50-foot roll runs about $35 in 2026 and covers 200 square feet. A standard front-yard conversion of 600 square feet would cost over $100 in store-bought cardboard versus $0 from the appliance store down the road. Sarah’s paradox shows up here in miniature: yes, the box store has it, and yes, the bike shop down the street will pay you in good will to take theirs off their hands.
For mulch, your local arborist is the equivalent free hookup. The free service ChipDrop connects homeowners with crews looking to dump chips locally rather than pay a tipping fee at the dump. You typically wait a week or two and then come home to a 10-cubic-yard pile in the driveway. That is enough to mulch a full front yard with a few wheelbarrow-loads to spare.
How to Lay Cardboard Without Killing the Soil Underneath
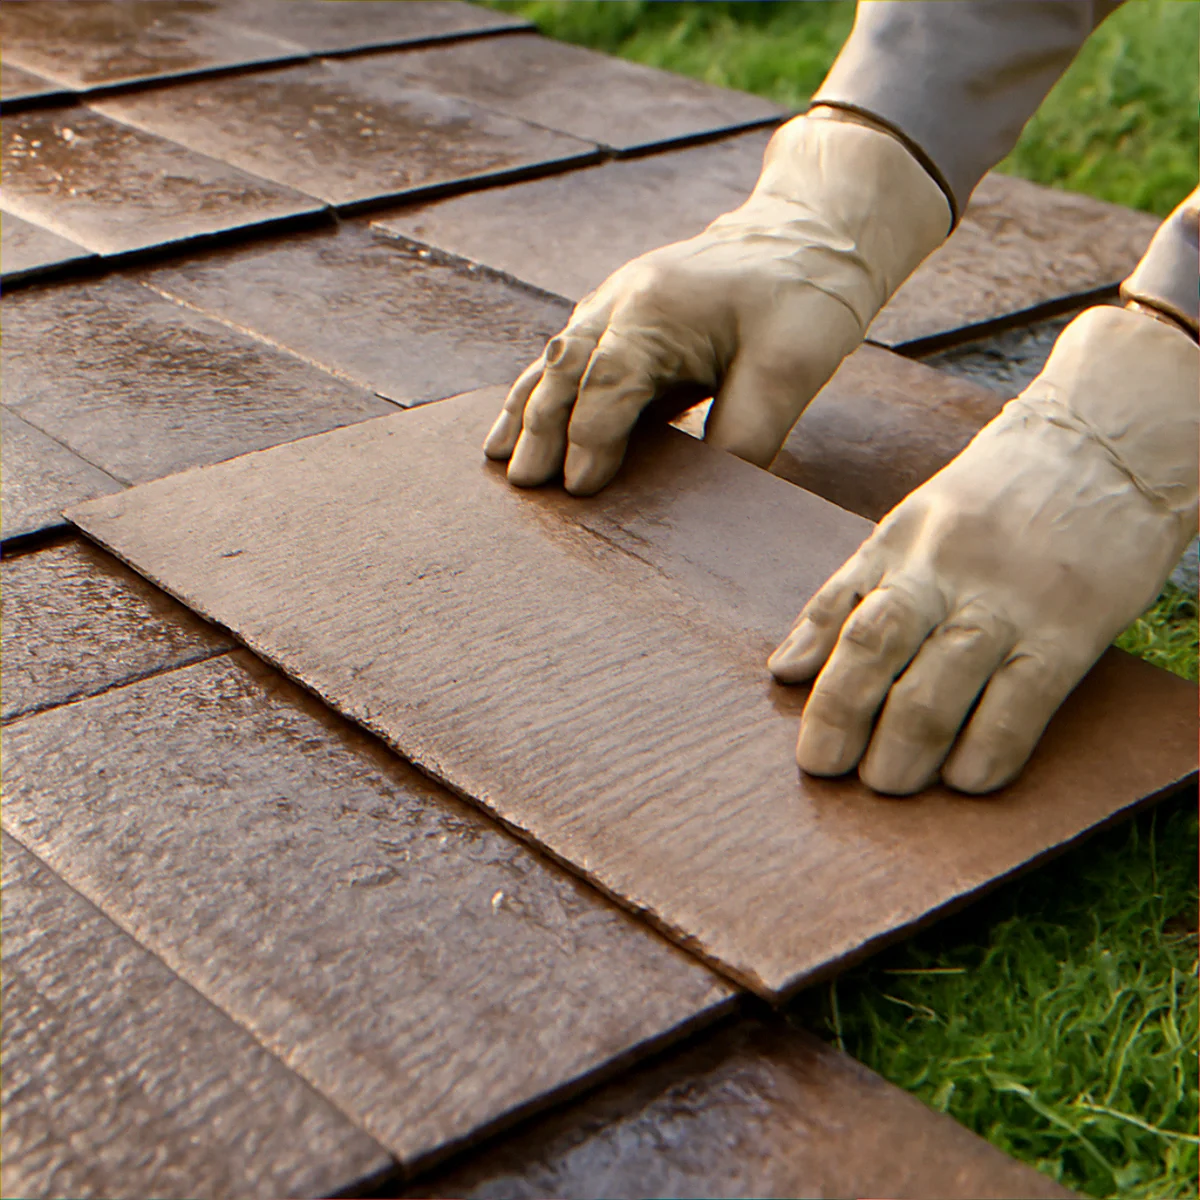
The order of operations matters more than the materials. The version that gives you the cleanest year-one bed:
- Mow the lawn as short as possible the day before. You are not trying to kill it with the mower, you are trying to remove the cushion of long grass that would lift the cardboard off the soil and create a tunnel for new growth.
- Soak the lawn the morning you sheet-mulch. Run sprinklers for 45 minutes if you do not have soaking rain in the forecast. You are creating the moisture that begins composting the cardboard from below. Dry sheet mulching takes twice as long to break down.
- Lay cardboard in overlapping layers. Every seam should be covered by at least 6 inches of overlap from the next sheet. Walk the perimeter on hands and knees and tuck the cardboard under any edging stones. Grass finds gaps the way water finds them.
- Wet the cardboard immediately. A garden hose, no nozzle, set on a slow trickle. You want the sheets dark and floppy, not soaked-through. Dry cardboard blows away the moment a thunderstorm hits.
- Top with 4 to 6 inches of arborist chips. Not bark mulch, not dyed mulch, not pine straw. Mixed-species arborist chips have the right particle range to lock the cardboard down and break down on a 12-to-18-month schedule that lines up with planting season.
- Walk away. The single biggest improvement you can make to your conversion is leaving it alone for one full growing season before you plant. If you laid sheets in October, you are planting plugs the following May or June. If you laid sheets in May, you are planting the following spring.
One small note that nobody mentions in the YouTube tutorials: avoid laying cardboard in late spring on a hot, dry week. The cardboard hits the soil at peak heat, the worms retreat downward, and you end up with a bone-dry layer that breaks down sideways instead of vertically. Either start in fall, or start in early spring while the soil is still cool and moist.
Choosing Native Prairie Plugs Your County Will Actually Support
“Native” is a word that does a lot of regional shape-shifting. A purple coneflower from a Tennessee nursery is technically the same species as one from Wisconsin, but the genetics are tuned to a different growing season. For a no-till conversion that you want to last twenty years, your goal is to buy plugs whose seed origin is within roughly 200 miles of your house, ideally from your own ecoregion.
The most successful lawn conversion stories I’ve come across usually feature a shopping list that includes specific native plants suitable for a Midwest sun-to-part-sun setting.
- Backbone grasses (30% of plugs): Little bluestem (Schizachyrium scoparium), prairie dropseed (Sporobolus heterolepis), or sideoats grama (Bouteloua curtipendula). These are the structural matrix that keeps weeds out and holds the bed together visually in winter.
- Long-bloom forbs (40% of plugs): Wild bergamot (Monarda fistulosa), purple coneflower (Echinacea purpurea), butterfly milkweed (Asclepias tuberosa), and black-eyed Susan (Rudbeckia hirta). These give you eight months of staggered bloom and feed the broadest range of pollinators.
- Late-season anchors (20% of plugs): Smooth blue aster (Symphyotrichum laeve), New England aster (S. novae-angliae), stiff goldenrod (Solidago rigida). The migrating monarchs and the queen bumblebees who need a last fat-up before winter both depend on these.
- Spring fillers (10% of plugs): Prairie smoke (Geum triflorum), golden Alexanders (Zizia aurea), or wild lupine (Lupinus perennis) where appropriate. These are the plants that bloom in the boring early-May window when nothing else in a prairie has woken up.
Before you place the order, run every species through your county’s BONAP map. The atlas will show whether the species is documented as native, introduced, or absent for your specific county. Sometimes a “Midwest native” species is actually documented two states over and not in your county; that is fine for a generalist pollinator garden but worth knowing rather than guessing. The USDA PLANTS Database is a useful second cross-check, especially for federal status notes on protected or threatened species.
Pricing as of the 2026 spring season: most regional native nurseries sell plugs for $3 to $5 each in flats of 32 or 38, with discounts at quantities over 200. A 600-square-foot front-yard conversion needs roughly 300 plugs at one-foot spacing. Budget $1,200 to $1,500 for the planting itself, plus your free cardboard and free chips. If that number feels punishing, our guide to cheap-or-free native plant sources walks through plant-rescue events, seed-share groups, and bare-root mail-order options that can cut the bill by 60 to 80 percent.
Planting Through Cardboard: The 4-Inch Cut Method
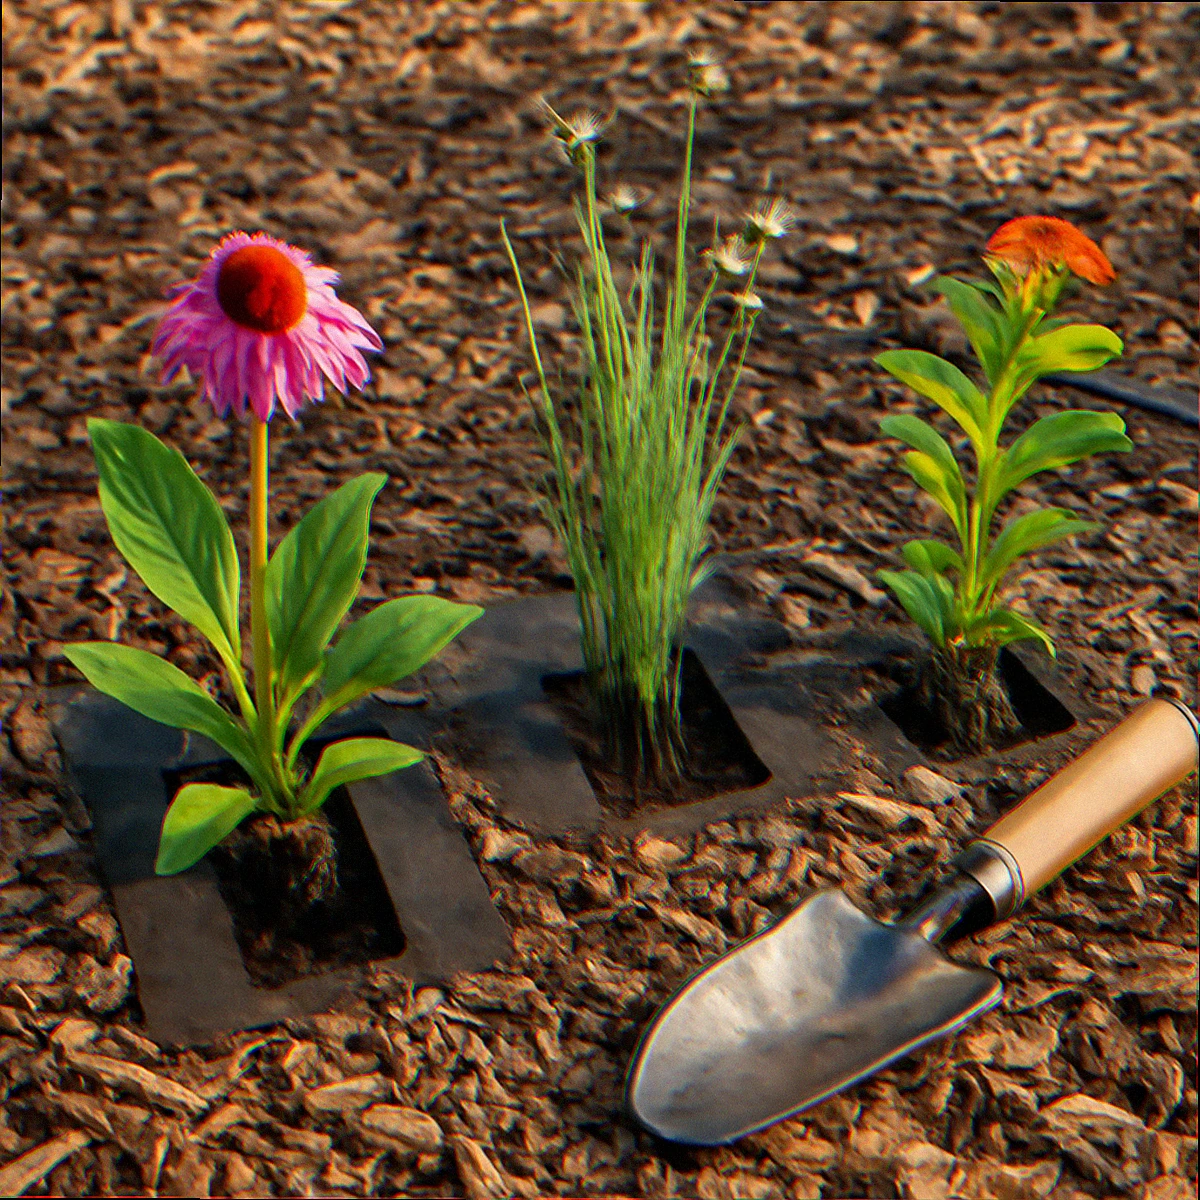
By the time you are ready to plant, the cardboard underneath your chips should be soft, brown, and falling apart at the edges. If you can still see crisp corners or read shipping labels, you waited the right amount of time but the top layer protected it from moisture; pull the chips back and water the cardboard for a week before planting.
The 4-inch cut method, in order:
- Lay all your plug flats out on the bed in their planned positions before you cut a single hole. This is the analysis-paralysis killer. Walk around the bed from three angles and shuffle the trays until the layout looks right. Take a phone photo before you start planting in case the layout disappears mid-job.
- Use a serrated steak knife or hori-hori to cut a 4-inch by 4-inch X through the chip-and-cardboard layer. Peel back the four flaps. You should see soft, dark soil underneath; if you hit dry compacted clay, water the hole and wait an hour.
- Plant the plug at the same depth as the original cell. The crown sits at soil level. Burying it kills it.
- Push the cardboard flaps back around the plug, leaving a 2-inch ring of bare cardboard around the stem. Pull the chips back over.
- Water each plug with about a quart of water as you plant it. Do not wait to water at the end. Plug roots dry out in five minutes on a sunny afternoon.
For the first six weeks, you are watering by hand or by drip every two to three days unless you get inch-plus rains. After that, prairie plugs become genuinely drought-tolerant, and you should be able to walk away. Our drip irrigation comparison guide covers the rigid-versus-flexible-tubing tradeoff that matters for newly planted plug beds.
When the Neighbors (or HOA) Notice: Defending Your No-Till Conversion
This is the part of the project that the YouTube tutorials skip. Cardboard mulching looks like a construction site for the first six months. From the street, your front yard goes from a clipped green carpet to a brown rectangle of wood chips, then to a sparse green pincushion of plugs, and only somewhere around month 14 does it start looking like a “garden” in the traditional sense. Neighbors notice. HOA inspectors notice. The note in the mailbox is a real risk.
Three moves that consistently defuse the social pressure:
- Frame the perimeter. A 12-inch mowed grass strip, brick edging, or a row of low ornamental natives like prairie dropseed along the sidewalk reads as “intentional” to neighbors who are scanning for unkempt yards. Without the frame, even a thriving meadow reads as neglect from the curb. Our HOA-safe curb appeal patterns guide walks through five specific edge designs that pass HOA review.
- Post a small sign. A 6-by-8-inch wooden sign reading “Pollinator Habitat in Progress – National Wildlife Federation Certified” (you can certify any yard for $20 through NWF’s program) does more to neutralize neighbor complaints than any other single move. It signals intention and lends institutional authority to a yard that otherwise looks half-finished.
- Talk to the immediate neighbors before you start. A two-minute conversation in late March that says “I’m replacing the front lawn with native flowers; it’ll look brown for a few months and then it’s going to be full of bees and goldfinches” is worth a thousand defensive responses to a complaint letter. Most HOA escalations happen when a neighbor is surprised. They almost never happen when a neighbor was forewarned.
If you live under a particularly strict HOA, check whether your state has a “pollinator garden” or “native plant” exemption statute. As of 2026, more than a dozen US states have passed laws limiting HOA authority over native plant gardens, and the National Wildlife Federation maintains a current list. The legal terrain has improved substantially in the last five years.
Year One vs Year Three: What 2,500 Plugs Actually Look Like
Set your expectations honestly and you will not abandon the project in month seven, which is when most people quit. The realistic timeline:
Year one (months 0–12). Cardboard is breaking down underneath. Plugs are establishing root systems and putting almost no above-ground growth into bloom. You will see one or two flowers per plug. The bed looks sparse. This is correct. Native plant gardeners use the saying “first year sleep, second year creep, third year leap” precisely to keep newcomers from panic-replanting in year one.
Year two (months 12–24). Plants begin filling sideways and putting up taller stems. Black-eyed Susans and bergamot will hit full size. Asters and goldenrod are still building their bases. You start seeing the first real pollinator traffic; bumblebees and hover flies are the early adopters. Weed pressure peaks here and you will spend April through June pulling annual invaders out of the gaps.
Year three (months 24–36). The matrix closes. Grasses and forbs grow into each other and weed pressure drops dramatically because there is no bare soil left for opportunistic seeds to colonize. Monarchs find the milkweed, hummingbirds find the bergamot, goldfinches start eating coneflower seed heads in August. The yard is now a “Homegrown National Park” in the Tallamy sense, not a brown rectangle. This is the year your neighbors will start asking how to do it themselves.
One last thing worth saying out loud: there is no scenario in which a sheet-mulch lawn conversion is a one-weekend project. It is a three-year project disguised as a one-weekend project. The people who finish are the people who decided in March that they would still be working on it in October. That is the only meaningful difference between the half-converted yards and the thriving ones.
What I get asked the most
How long does cardboard take to fully break down under wood chips?
In a moist, temperate climate with a healthy soil microbiome, single-layer cardboard breaks down in 6 to 9 months and is undetectable by month 12. Double layers, which is what you want for warm-season grasses or aggressive rhizomatous weeds, take 12 to 18 months. Dry climates and compacted urban soils slow this down significantly; if you have heavy clay or you are in a drought zone, expect to plant through partially-intact cardboard in year one and find soft, broken-down fragments in year two.
Can I plant prairie plugs the same season I lay the cardboard?
You can, but the failure rate is much higher because the plug roots have to push through still-intact cardboard before they can establish. The cleanest results come from a fall-laid cardboard layer planted the following spring, or a spring-laid layer planted the following fall. If you absolutely must plant the same season, double-water the planting holes and expect a 20 to 30 percent first-year mortality on your plugs.
Will sheet mulching kill warm-season grasses like Bermuda and zoysia?
It will, but only with double-thick cardboard, 6+ inches of chips, and at least 12 months of being undisturbed. Bermuda in particular sends rhizomes 12 to 18 inches deep and can travel laterally under a thin sheet-mulch layer. For known-aggressive warm-season turf, some gardeners do a one-time solarization pass with clear plastic in July and August before sheet-mulching in September; that combination is much closer to a guaranteed kill than cardboard alone.
Is cardboard sheet mulching safe for soil microbes and earthworms?
Yes, when you avoid glossy color-printed cardboard and tape. Plain corrugated cardboard is essentially compressed wood pulp; soil bacteria and fungi treat it as a slow-release carbon input, and earthworms accelerate decomposition by pulling fragments down. Studies from extension services have shown short-term increases in earthworm populations under sheet mulch compared with bare soil. The one input you should never use under cardboard is sheet plastic, which suffocates soil biology and is a true “kill the dirt to kill the lawn” approach.
Do I need to remove the cardboard before planting deep-rooted natives like baptisia or compass plant?
For deep-rooted long-lived perennials, plant them as small plugs through the cardboard the same way you plant the matrix species and let the cardboard decompose around them. Their taproots will reach deeper than the cardboard layer within the first season. The exception is if you are planting bare-root woody natives (small trees or shrubs); for those, cut a much larger 12-by-12-inch hole and remove the cardboard from the planting zone entirely.
If you are coming to lawn conversion from a more traditional pollinator-garden background, our 9-step pollinator garden guide covers the bed-preparation differences between a small pollinator border and a full lawn replacement, and our USDA-zone native plant recipe guide gives you the matrix-species swap-outs for your specific zone.
Want More Wildlife Garden Tips?
Join 5,000+ nature lovers getting our weekly tips on creating wildlife-friendly gardens.
No spam, unsubscribe anytime. Privacy Policy
Emma Harrington
Emma Harrington is a wildlife habitat researcher and content editor with a passion for backyard conservation. She has spent over a decade translating ecological science into practical tips anyone can follow — from selecting native plants to building wildlife-friendly habitats. Her work focuses on helping homeowners transform ordinary yards into thriving ecosystems for bees, butterflies, hummingbirds, and other beneficial wildlife.