A pollinator garden is one of the most useful things you can plant in your yard. And one of the easiest to get wrong. Every spring, well-meaning gardeners grab a flat of petunias from the big-box store, stick them in a row along the fence, and wonder why the butterflies never show up. The problem isn’t effort. It’s approach. Most conventional garden advice was designed for looks, not for feeding bees, butterflies, and hummingbirds.
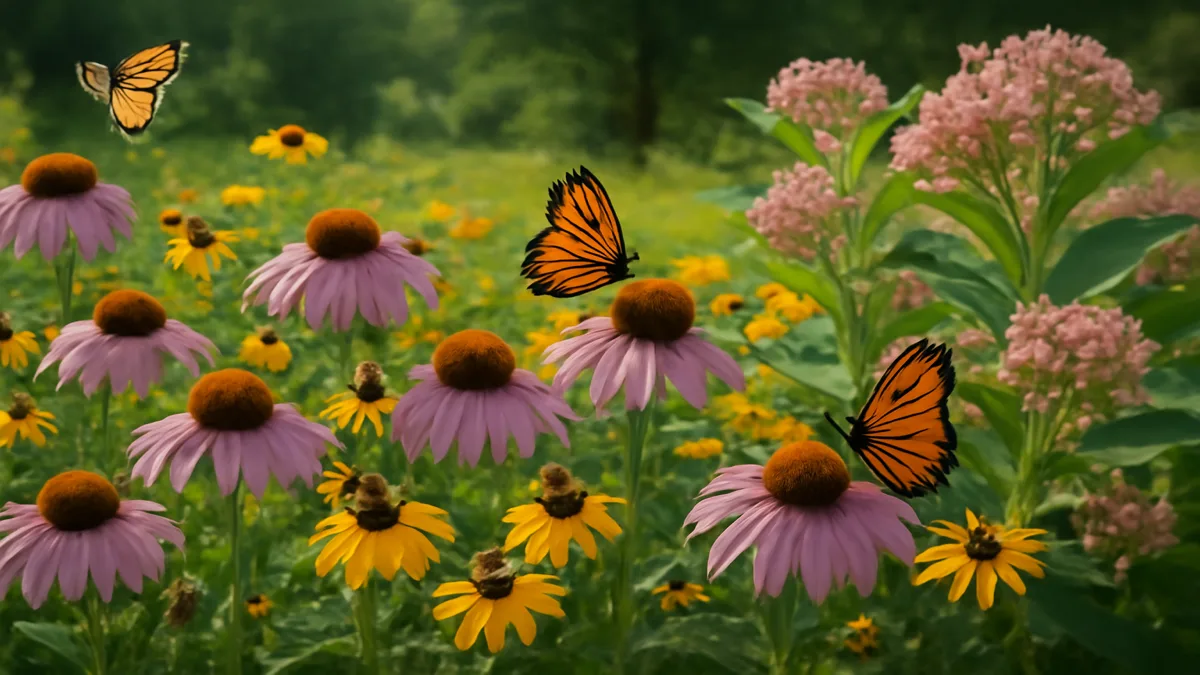
Here’s the good news: building a pollinator garden that actually works doesn’t require a degree in botany or a massive budget. With the right plant choices, smart layout, and a few unconventional maintenance habits, you can turn even a modest 100-square-foot patch into a buzzing, fluttering wildlife hub. We’re talking real results. Monarch caterpillars munching milkweed, native bees nesting in your dead stems, swallowtails puddling in your homemade mud station.
In this guide, you’ll learn exactly how to plan, plant, and maintain a pollinator garden in nine concrete steps. We’ll cover site selection, turf removal, native plant choices by season, vertical layering, budget breakdowns, and the counterintuitive maintenance rules that most gardeners get backwards. Whether you’re working with a 10×10 corner or a full backyard makeover, every section below gives you something you can act on this weekend.
FREE: Wildlife Garden Starter Guide
Get our 12-page PDF with the 25 best plants for pollinators, simple habitat tips, and a printable checklist — all 100% free.
No spam. Read our Privacy Policy.Step 1: Choose the Right Spot (Sun, Size, and Soil)
Before you buy a single plant, you need to pick the right location. And this decision alone will determine whether your pollinator garden thrives or struggles. The single most important factor is sunlight. Your garden needs a minimum of 6 hours of direct sunlight per day. Not dappled light filtering through tree canopy. Not “bright shade.” Direct, unobstructed sun hitting the soil.
Why so specific? Most native wildflowers and pollinator-friendly plants evolved in open meadows and prairies. They produce the most nectar and bloom the longest when they get full sun. A shaded pollinator garden will give you leggy plants, sparse blooms, and very few visitors.
For size, start with a minimum of 100 square feet. That’s roughly a 10×10 or 10×15 area. This gives you enough room to plant in clusters (which pollinators need to find your flowers efficiently) while keeping the project manageable. You can always expand later. Many successful pollinator gardeners started with a single 100-square-foot bed and grew to 500+ square feet over three seasons.
Test your soil before planting. Most native plants prefer well-drained soil and actually do poorly in heavily amended, nutrient-rich beds. If your soil is heavy clay, consider raised beds or amending with coarse sand and compost. If it drains well already, you’re ahead of the game. Native plants are adapted to lean conditions.
Step 2: Remove the Turf Without Poisoning the Ground
You’ve picked your spot. Now you need to get rid of the grass. This step trips up a lot of people because the fastest methods often involve herbicides. Which defeats the entire purpose of creating a pollinator-safe habitat. Here are three effective, chemical-free approaches:
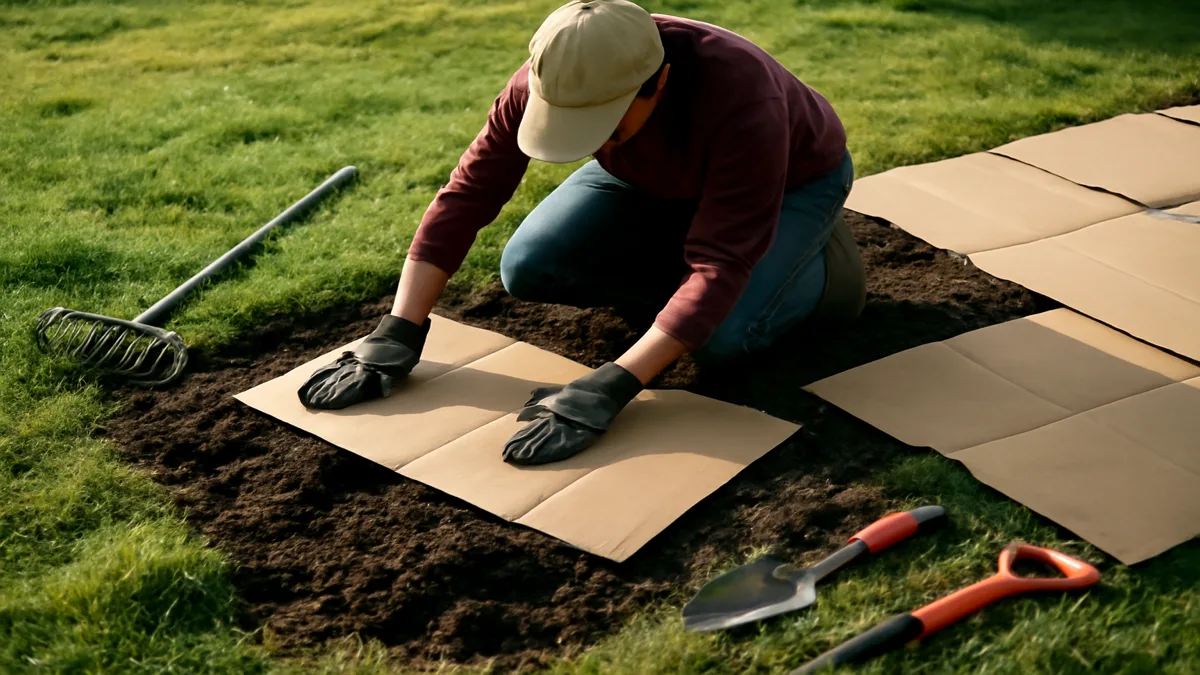
Sheet Mulching (The Patient Gardener’s Method)
Lay overlapping sheets of plain cardboard directly on the grass. Cover with 4-6 inches of wood chip mulch or leaf mold. Water it down thoroughly. Walk away for 2 months. The cardboard smothers the grass, earthworms break down the cardboard, and you’re left with rich, plantable soil. This is the best method if you’re planning in fall for a spring garden.
Solarization (The Summer Fast-Track)
Mow the grass as short as possible. Lay clear plastic sheeting (not black. Clear traps more heat) over the area and anchor the edges with rocks or soil. The trapped heat kills grass, weed seeds, and soil pathogens. This also takes about 2 months and works best during the hottest part of summer.
Mechanical Removal (The Weekend Warrior)
Rent a sod cutter from your local equipment rental shop (typically $70-100 per day). This machine slices the grass and roots off in strips that you can roll up and compost or offer to neighbors. It’s the fastest option. You can clear 100 square feet in under an hour. But it’s also the most physically demanding.
Important: Do NOT use landscape fabric under your pollinator garden. While it seems like a logical weed barrier, landscape fabric hinders drainage, prevents beneficial insects from nesting in the soil, and blocks the self-seeding that native plants rely on to spread naturally. Use 2-3 inches of leaf mulch instead.
Step 3: Design Your Layout Using Vertical Hierarchy
A pollinator garden isn’t a row of flowers. It’s a layered ecosystem. The layout principle is simple: tall plants at the back, short plants at the edges, with medium-height species filling the middle. This vertical hierarchy does three critical things. It ensures every plant gets adequate sunlight, it creates wind shelter for delicate pollinators, and it makes the garden visually striking from the front.
Here’s how the layers break down:
| Layer | Height | Position | Example Plants | Pollinators Served |
|---|---|---|---|---|
| Back / Tall | 4-7 feet | Rear of bed | Joe-pye weed, ironweed, tall asters | Butterflies, large bees |
| Middle / Medium | 2-4 feet | Center of bed | Milkweed, black-eyed Susan, coneflower | Monarchs, native bees, beetles |
| Front / Low | 6-18 inches | Edges and borders | Crocus, moss phlox, creeping thyme | Small native bees, ground beetles |
| Ground Cover | Under 6 inches | Between clumps | Wild strawberry, violets | Tiny sweat bees, ants |
The second layout rule is just as important: plant in drifts or clumps of 3-5 of the same species, grouped within a 3-foot square area. Pollinators are far more efficient when they can move between multiple blooms of the same flower without flying across the yard. A single coneflower here and a single milkweed there forces bees to waste energy searching. A cluster of five coneflowers creates a reliable fueling station.
If your garden is against a fence or wall, the tall-to-short arrangement flows naturally from back to front. For island beds visible from all sides, put your tallest plants in the center and grade down toward the edges in all directions.
Step 4: Choose Native Plants Over Fancy Cultivars

This is where most pollinator gardens fail. You walk into a nursery, see a gorgeous double-petaled purple coneflower labeled “pollinator friendly,” and assume it’ll do the job. It won’t. Many cultivars. Especially double-flowered varieties. Have been bred for appearance at the expense of nectar production. Those extra petals? They often replace the reproductive parts of the flower that produce nectar and pollen in the first place.
Native species outperform cultivars for pollinators almost every time. A straight-species Echinacea purpurea (purple coneflower) produces significantly more nectar than its “PowWow Wild Berry” cultivar cousin. Native milkweed (Asclepias) is irreplaceable for monarch butterflies. No cultivar substitute exists for their larval cycle.
Equally important: avoid any plant treated with neonicotinoid pesticides. These systemic insecticides are absorbed into every part of the plant, including the nectar and pollen. A bee visiting a neonicotinoid-treated flower gets poisoned while trying to feed. Always ask your nursery whether their plants have been treated. If they can’t answer definitively, buy from a dedicated native plant nursery instead.
To find native plants specific to your region, the National Wildlife Federation’s Native Plant Finder lets you search by zip code. Enter yours and you’ll get a list of the most productive native plants for your exact area, ranked by the number of butterfly and moth species they support.
Step 5: Plan for Three-Season Bloom Coverage
A pollinator garden that only blooms in July is a buffet that’s open one month a year. Pollinators need food from early spring through late fall, and a gap of even a few weeks can force local bee populations to relocate or starve. Your planting plan must cover three distinct bloom windows.
Here’s a practical three-season bloom schedule using widely available native plants:
- Early Season (March – May): Crocus, moss phlox (Phlox subulata), Virginia bluebells, wild columbine. These are lifelines for early-emerging bumblebee queens who need immediate nectar after winter hibernation.
- Mid Season (June – August): Milkweed (Asclepias tuberosa or A. incarnata), black-eyed Susan (Rudbeckia hirta), purple coneflower (Echinacea purpurea), joe-pye weed (Eutrochium purpureum), bee balm. This is peak pollinator season. Load up here with the most species diversity.
- Late Season (September – November): New England aster, aromatic aster, goldenrod, ironweed (Vernonia), borage. These late bloomers are critical for migrating monarchs and bees building up winter fat reserves.
Aim for at least 2-3 species blooming in each window. If you’re working with a 100-square-foot garden, a mix of 20-30 plants across these three periods gives you solid continuous coverage. That brings us to budget: native perennials typically cost $5-12 per plant depending on pot size and species, putting your total plant budget at roughly $100-360 for a starter garden.
Don’t overlook larval host plants. Nectar feeds adult butterflies, but their caterpillars need specific host plants to survive. Milkweed is the classic example. It’s the only plant monarch caterpillars can eat. Violets host fritillary butterfly larvae. Asters and goldenrod support dozens of native moth species. A garden with both nectar sources and host plants supports the full life cycle, not just the pretty flying stage.
Step 6: Add Water, Minerals, and Shelter Features
Flowers alone don’t make a complete habitat. Pollinators also need water, minerals, and shelter. And providing these extras is what separates a flower bed from a real pollinator garden.
Build a Mud Puddling Station for Butterflies
Male butterflies. Especially swallowtails and blues. Practice “puddling,” gathering at damp mud to extract sodium and amino acids they can’t get from nectar. You can create a puddling station in five minutes: fill a shallow dish or plant saucer with sand, mix in a pinch of sea salt (not table salt. Sea salt has the mineral profile they need), and keep it consistently damp. Place it in a sunny spot near your garden. You’ll be amazed how quickly butterflies find it.
Provide a Shallow Water Source
Bees need water but can drown in even an inch of it. A birdbath with flat stones or marbles breaking the surface gives bees a safe landing pad to drink from. Change the water every few days to prevent mosquito breeding. If you have a hummingbird feeder nearby, your existing water features may already serve double duty.
Leave Shelter for Overwintering Insects
This is the maintenance rule that feels wrong but is essential: leave dead plant stems standing through winter. Many native bees. Including mason bees and leafcutter bees. Lay their eggs inside hollow stems in fall. Those eggs overwinter and hatch in spring. If you cut everything down in October for a “tidy” garden, you’re destroying next year’s bee generation.
Similarly, leave a patch of bare soil somewhere in your garden. About 70% of native bee species are ground-nesters. They need access to undisturbed soil at least 4-8 inches deep to dig their brood tunnels. Heavy mulch everywhere eliminates this nesting habitat.
Step 7: Plant Correctly and Establish Smartly
Planting technique matters more than most guides acknowledge. Here’s the process that gives your pollinator garden the best start:
- Plant in spring or fall. Never in the heat of summer. Spring planting (after last frost) gives roots a full growing season. Fall planting (6-8 weeks before first frost) lets roots establish during cool weather with less water stress.
- Dig each hole twice the width of the root ball but no deeper. Planting too deep is the number-one killer of new perennials.
- Water deeply at planting. Soak each plant until water pools on the surface, then let it drain. For the first month, water every 2-3 days if rain doesn’t cooperate.
- Mulch between plants with 2-3 inches of shredded leaves or wood chips, keeping mulch pulled back 2 inches from each stem to prevent crown rot.
- Don’t fertilize native plants. They evolved in lean soil conditions. Excess nitrogen produces lush foliage at the expense of flowers. Exactly the opposite of what you want in a pollinator garden.
- Label everything. First-year native plants often look like weeds. Without labels, you’ll accidentally pull them during early-season weeding. Use metal or stone markers that won’t fade.
Expect your garden to look sparse the first year. There’s an old saying among native plant gardeners: “First year they sleep, second year they creep, third year they leap.” Most native perennials invest their first season in root development. By year three, you’ll have a full, lush garden that largely takes care of itself.
Step 8: Maintain Your Garden the Right Way (Less Is More)
Conventional gardening maintenance will harm a pollinator garden. Here’s the seasonal maintenance calendar that actually supports pollinators:
Spring (March – April): This is the ONLY time to cut back last year’s dead stems. And wait until daytime temperatures consistently hit 50 degrees F. Cut stems to about 12-18 inches rather than ground level, so any remaining overwintering insects can still emerge. Pull early weeds before they establish. Divide any overcrowded perennials.
Summer (June – August): Deadhead spent blooms to encourage reblooming on species like coneflower and black-eyed Susan. This extends your bloom window by weeks. Water during extended dry spells (more than 10 days without rain), but otherwise let established native plants tough it out. They’re adapted to your local rainfall patterns.
Fall (September – November): This is the critical one. Do NOT clean up your garden in fall. Leave the dead stems. Leave the seed heads. Leave the leaf litter. All of it provides overwintering habitat for the very pollinators you planted to support. Goldfinches will also feast on coneflower and black-eyed Susan seed heads through winter. A bonus if you’re worried about birds hitting your windows.
Winter: Do nothing. Resist the urge to tidy. Your “messy” winter garden is a functioning wildlife hotel.
One more thing: never use any pesticides, herbicides, or fungicides in or near your pollinator garden. Not even “organic” ones. Organic pesticides like spinosad are still lethal to bees. If you have a pest problem, let the predatory insects handle it. A healthy pollinator garden attracts parasitic wasps, ladybugs, and lacewings that keep pest populations in check naturally.
Step 9: Certify, Document, and Expand
Once your garden is planted and established, consider getting it officially recognized. The National Wildlife Federation’s Certified Wildlife Habitat program verifies that your garden meets standards for food, water, cover, and sustainable practices. The application fee is just $20, and you receive a certificate and an optional yard sign that signals to neighbors and visitors what you’re doing. Which often sparks conversations and inspires others to plant their own.
Document your garden’s progress with photos each month. Track which pollinators visit which plants. This data isn’t just personally satisfying. It helps you make smarter decisions about what to add in future seasons. If you notice swallowtails love your joe-pye weed but ignore your bee balm, you know where to invest next year’s plant budget.
As your garden matures, think about expansion. Connect your pollinator garden to other habitat features on your property. A native plant border along your driveway, a wildflower strip next to your vegetable garden, or a flowering hedge along the property line all create corridors that help pollinators move safely between food sources. In neighborhoods where multiple yards have pollinator habitat, local bee and butterfly populations can bounce back within just 2-3 seasons.
Pollinator Garden Budget Breakdown
Worried about cost? A pollinator garden is one of the most affordable landscaping projects you can take on, especially compared to traditional perennial beds with expensive cultivars. Here’s what a realistic 100-square-foot starter garden costs:
| Item | Quantity | Cost Range |
|---|---|---|
| Native perennials (4-inch pots) | 20-30 plants | $100 – $360 |
| Cardboard for sheet mulching | Free (recycled) | $0 |
| Wood chip mulch (bulk delivery) | 2-3 cubic yards | $30 – $60 |
| Soil amendments (if needed) | 1-2 bags compost | $10 – $20 |
| Puddling station (dish + sand + sea salt) | 1 | $5 – $10 |
| Plant markers | 20-30 | $10 – $15 |
| NWF Certification (optional) | 1 | $20 |
| Total | $155 – $485 |
Compare that to a professional landscaping install, which typically runs $15-30 per square foot. Meaning $1,500-3,000 for the same area. And unlike a traditional landscape that needs annual replanting, division, and heavy feeding, a native pollinator garden gets cheaper to maintain every year as plants self-seed and fill in naturally.
You can cut costs further by starting plants from seed (many native species germinate readily with 30-60 days of cold stratification), splitting plants with gardening friends, or checking local native plant sales run by conservation districts and Master Gardener programs. These sales often offer locally-sourced native plants at half the nursery price.
Common Mistakes That Kill Pollinator Gardens
Even with the best intentions, these errors can undermine your garden’s effectiveness:
Planting one of everything. A garden with 30 different species. One plant each. Looks like a botanical sampler but confuses pollinators. Those drifts of 3-5 same-species plants grouped within a 3-foot square aren’t just an aesthetic choice. They’re how pollinators actually forage in the wild. Clumps save them energy and increase pollination rates.
Choosing only mid-summer bloomers. If everything blooms in July and nothing blooms in April or October, you’ve created a feast-or-famine scenario. Early and late season plants are just as important as the showstopper midsummer flowers.
Cleaning up too early in fall. The urge to cut everything back in October is strong. Fight it. Those hollow stems are nurseries. Those seed heads are bird feeders. That leaf litter is insulation for ground-nesting bees. Wait until late spring to clean up, and even then, leave some stems standing permanently.
Using landscape fabric. It prevents self-seeding, blocks ground-nesting bees from accessing soil, reduces drainage, and creates an anaerobic environment that degrades soil health over time. Leaf mulch does the weed-suppression job better and actually improves your soil as it decomposes.
Ignoring the “neonicotinoid” question at the nursery. If your nursery can’t tell you whether their plants have been treated with neonicotinoids, shop elsewhere. You’d be planting poison traps disguised as flowers.
Questions from the comments
How big does a pollinator garden need to be?
Start with a minimum of 100 square feet. Roughly a 10×10 or 10×15 foot area. This gives you enough space to plant in effective clumps of 3-5 plants per species while maintaining the vertical layering that pollinators need. You can absolutely expand over time, but 100 square feet is the practical minimum for attracting consistent pollinator traffic rather than occasional visitors.
Can I start a pollinator garden in shade?
Most pollinator-friendly native plants require at least 6 hours of direct sunlight daily and won’t bloom well in shade. If your only available space gets 4-5 hours of sun, you can try shade-tolerant natives like wild columbine, Virginia bluebells, and native asters, but expect fewer pollinators. For the best results, choose the sunniest spot in your yard.
How much does it cost to start a pollinator garden?
A 100-square-foot pollinator garden typically costs between $155 and $485 total, with native perennials running $5-12 per plant and most gardens needing 20-30 plants. You can reduce costs significantly by starting plants from seed, attending native plant sales from local conservation districts, or swapping divisions with other gardeners in your area.
When is the best time to plant a pollinator garden?
Plant in spring after your last frost date or in early fall at least 6-8 weeks before first frost. Spring planting gives roots a full growing season to establish. Fall planting reduces water stress since cooler temperatures mean less evaporation. Avoid planting in the heat of summer when transplant shock is highest and water demands are extreme.
Should I deadhead flowers in my pollinator garden?
Deadhead selectively during summer to extend blooming on species like coneflower and black-eyed Susan. However, stop deadheading by late August so plants can set seed for fall-feeding birds and self-seeding. Never do a full garden cleanup in fall. Leave dead stems and seed heads standing through winter to shelter overwintering insects and feed birds until spring.
Starting a pollinator garden isn’t just a landscaping project. It’s a direct contribution to the ecosystem your neighborhood depends on. Every cluster of milkweed, every patch of native asters, every mud puddling station you build gives pollinators a fighting chance in a landscape that’s increasingly hostile to them. And the best part? Once established, your garden will reward you with more life and movement than any manicured lawn ever could.
Found this helpful? Share it with a friend who wants to help pollinators!
Want More Wildlife Garden Tips?
Join 5,000+ nature lovers getting our weekly tips on creating wildlife-friendly gardens.
No spam, unsubscribe anytime. Privacy Policy
Emma Harrington
Emma Harrington is a wildlife habitat researcher and content editor with a passion for backyard conservation. She has spent over a decade translating ecological science into practical tips anyone can follow — from selecting native plants to building wildlife-friendly habitats. Her work focuses on helping homeowners transform ordinary yards into thriving ecosystems for bees, butterflies, hummingbirds, and other beneficial wildlife.