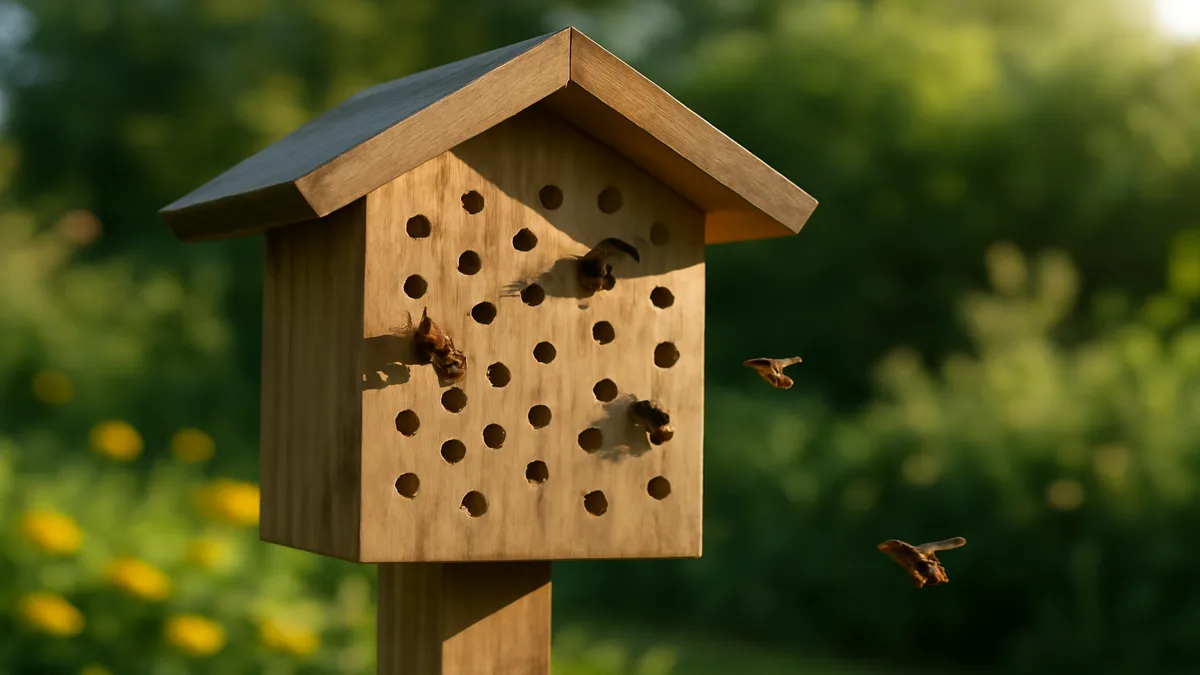
Learning how to build a bee hotel is one of the most rewarding weekend projects you can tackle for your garden, and the results will genuinely astonish you. Within days of hanging a properly constructed bee hotel, you’ll start seeing tiny, jewel-colored native bees investigating the holes, measuring them with their antennae, and moving in to raise their young. These aren’t the honeybees most people picture when they hear the word “bee”. These are solitary native bees, and they’re the unsung heroes of pollination in nearly every ecosystem on the continent.
I built my first bee hotel about twelve years ago from a scrap piece of pine and a borrowed drill bit set, and I’ve been obsessed ever since. What started as a curious experiment turned into watching mason bees zip around my fruit trees every spring, setting pollination records my neighbors couldn’t match with their honeybee hives. The truth is, most gardeners have no idea that roughly 90% of North American bee species are solitary, living alone rather than in colonies, and that providing them with nesting habitat is absurdly simple once you know the basic rules.
This complete guide walks you through everything. Materials, hole specifications for different species, construction steps, proper placement, and the surprising mistakes that can turn a bee hotel into a death trap. By the time you finish reading, you’ll have the confidence to build a structure that will serve wild pollinators for years, boost your garden yields dramatically, and give you a front-row seat to one of nature’s most charming spectacles. Grab a cup of coffee, and let’s get started.
FREE: Wildlife Garden Starter Guide
Get our 12-page PDF with the 25 best plants for pollinators, simple habitat tips, and a printable checklist — all 100% free.
No spam. Read our Privacy Policy.Why Native Solitary Bees Matter More Than You Think
Before we pick up a single tool, it helps to understand why this project is worth your Saturday afternoon. Native solitary bees. Mason bees, leafcutter bees, small carpenter bees, and dozens of other species. Are the workhorses of pollination in most landscapes. Research from the Xerces Society and university extension programs consistently shows that native bees pollinate roughly 80% of wildflowers and contribute massively to fruit and vegetable yields in home gardens and commercial farms alike.
Here’s a statistic that surprised me when I first encountered it: a single female mason bee can do the pollination work of roughly 100 honeybees. Mason bees are what entomologists call “messy” pollinators. Pollen sticks all over their bellies, and they transfer it clumsily but effectively from flower to flower. Honeybees, by contrast, pack pollen neatly into baskets on their legs and deliberately try not to lose any. The messiness of native bees is exactly what makes them 50 times more efficient as pollinators per individual.
There’s another huge advantage that tips the scales for families with children and pets: solitary bees are essentially sting-risk-free. Without a hive or queen to defend, they have no reason to be aggressive. I’ve had mason bees land on my hand while I inspect nesting tubes, and I’ve never once been stung in over a decade of hosting them. You can stand three feet from an active bee hotel with a toddler in your arms and watch the show with complete peace of mind.
Choosing the Right Materials for Your Bee Hotel
Materials make or break this project. The wrong choices won’t just fail to attract bees. They’ll actively kill any eggs laid inside. I’ve seen well-meaning beginners build gorgeous-looking bee hotels from pressure-treated lumber and glass test tubes, only to watch them become mass graves for pollinators. Let’s walk through what works and why.
For the nesting block itself, you have three solid options. First, untreated softwood. Pine or fir works beautifully. Cut to at least 6×6 inches in cross-section. Softwood drills cleanly, holds up reasonably well under a protective roof, and contains no chemicals that would harm developing larvae. Second, bamboo tubes of various diameters, with the back ends sealed by the natural node or plugged with mud or non-toxic sealant. Third, drilled hardwood blocks, which last longer than softwood but are harder to work. For the outer frame and shelter, untreated cedar is ideal because it naturally resists rot and weathering without any chemical treatment.
“The single most important rule of bee hotel construction is simple: never use treated wood, never use glass, and never use metal tubes. If you remember nothing else from this guide, remember that. Chemically treated lumber leaches toxins into nesting chambers, glass overheats and cooks the eggs, and metal generates condensation that drowns larvae and promotes fungal growth.”
You’ll also need a weather-resistant roof with a 2-3 inch overhang on all sides. This overhang is non-negotiable. It keeps rain from running down the face of the nesting block and flooding the holes. I typically use a simple piece of cedar shingle or an untreated plank angled at about 15 degrees. Finally, you’ll want mounting hardware sturdy enough that the hotel doesn’t sway in the wind, because movement disturbs the bees and reduces occupancy rates dramatically.
Hole Diameter Specifications by Species
This is where most online tutorials go wrong. They give you a single hole size. Usually 5/16 inch. And call it a day. That will attract mason bees, sure, but you’re leaving four or five other fantastic pollinator species on the table. Different native bees require different hole diameters, and offering a range dramatically increases both the diversity and number of occupants. Here are the specifications I’ve refined over years of experimentation.
| Bee Species | Hole Diameter | Hole Depth | Active Season |
|---|---|---|---|
| Mason bees (Osmia) | 5/16 inch (8 mm) | 6 inches | Early spring |
| Leafcutter bees (Megachile) | 1/4 inch (6 mm) | 6 inches | Summer |
| Small carpenter bees (Ceratina) | 3/16 inch (4 mm) | 4 inches | Spring through summer |
| Larger native bees | 3/8 inch (10 mm) | 6-8 inches | Varies by species |
A few critical notes on drilling. The inside of each hole must be smooth. No splinters, no rough patches, no debris. Female bees reject rough holes because splinters can tear their delicate wings when they back in to deposit pollen and lay eggs. Use sharp, high-quality brad-point drill bits and drill slowly to avoid tearing the wood grain. After drilling, I run a pipe cleaner in and out of each hole to clear out sawdust and check for roughness.
Crucially, do not drill all the way through the block. Bees absolutely require a sealed back end to their nest tunnel. It mimics the dead-end cavities they find in nature, such as hollow plant stems or beetle borings in tree trunks. If you can see light through the back of the hole, that hole will never be used. Leave at least half an inch of solid wood at the back, or seal any through-holes with non-toxic caulk or a wooden plug.
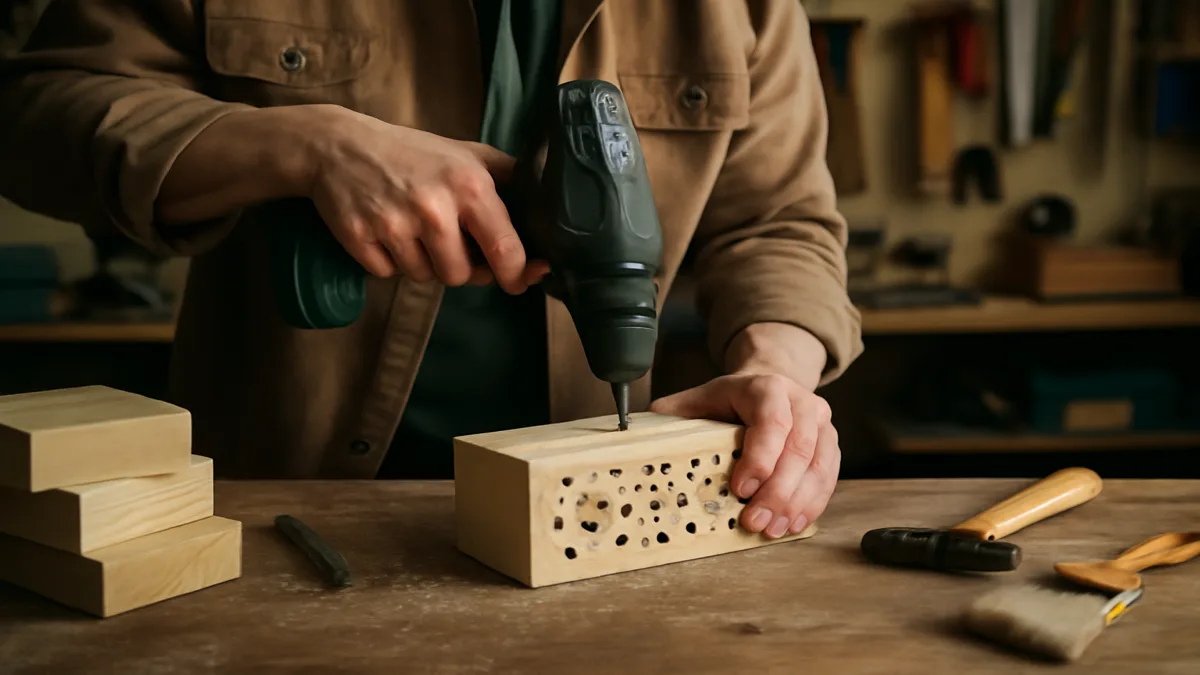
Step-by-Step Construction Guide
With materials gathered and hole specifications in hand, you’re ready for the fun part. This project takes about two to three hours for a basic model, and you don’t need advanced woodworking skills. I’ve taught ten-year-olds to build these at nature center workshops. Here’s the full construction sequence I’ve refined over dozens of builds.
- Cut the nesting blocks. Start with a 6x6x6 inch cube of untreated softwood. If you’re using 4×4 lumber (which is actually 3.5 inches on a side in most lumberyards), stack two or three pieces to reach adequate depth for your deepest holes.
- Mark and drill the holes. Lay out a grid spacing holes roughly 3/4 inch apart. Mix diameters, I typically do half 5/16 inch, a quarter 1/4 inch, and the remainder split between 3/16 inch and 3/8 inch. Drill each hole to its specified depth, keeping the bit perpendicular to the wood face.
- Clean and inspect each hole. Run a pipe cleaner or cotton swab through every hole to remove sawdust and check smoothness. Re-drill or sand any rough holes.
- Seal the back of the block. If any holes accidentally went through, plug them with untreated wood glue and a small dowel, or reposition the block against a solid back panel.
- Build the protective frame. Construct a simple cedar box slightly larger than your nesting block, open at the front. This frame holds the block and provides structural rigidity for mounting.
- Attach the overhanging roof. Angle the roof about 15 degrees so water sheds forward and away from the hole openings. Ensure a 2-3 inch overhang on all four sides.
- Mount the hotel securely. Fix it to a post, fence, or wall with a south or southeast exposure, 3-5 feet off the ground. Use lag bolts or heavy screws. Wobbling is a dealbreaker for bees.
- Verify morning sun exposure. Stand in front of the hotel between 7 and 10 a.m. If sunlight hits the front face during those hours, you’ve placed it correctly. Morning sun warms the eggs and triggers emergence.
That’s it. Eight steps, a few basic tools, and you’ve created prime real estate for some of the most beneficial insects on the continent. If you enjoy this build, you might also love our companion guides on how to build a birdhouse and bat house plans. Together they form a trio of wildlife structures that transform any backyard into a thriving habitat.
Placement: Getting the Location Exactly Right
You can build the most beautiful bee hotel in the world, but if you hang it in the wrong spot, it’ll sit empty season after season. Placement is the single biggest variable separating wildly successful bee hotels from disappointing ones. After watching hundreds of these structures in gardens across my region, I’ve boiled placement down to a handful of non-negotiable rules.
- Face south or southeast. Morning sun warms the nesting block and is absolutely critical for triggering egg development and adult emergence in spring. A north-facing hotel stays cold and damp and rarely attracts tenants.
- Mount 3 to 5 feet above the ground. Too low and ground predators (ants, skunks, raccoons) become a problem. Too high and females struggle to navigate with heavy pollen loads.
- Locate within 100 meters of flowering plants. Solitary bees don’t travel far. A nearby pollinator garden with diverse native blooms dramatically boosts occupancy.
- Shelter from prevailing wind and driving rain. A wall, fence, or dense shrub on the windward side provides excellent protection without blocking sun.
- Ensure a rock-solid mount. Any wobble or sway in the wind drives bees away. Lag-bolt the frame to a sturdy post or wall.
- Avoid active ant trails. Ants will invade nesting tunnels and eat larvae. A quick scan of the area before mounting is worth the effort.
One subtle placement tip that I rarely see mentioned: avoid west-facing walls. Afternoon sun, especially in summer, can push the surface temperature of a west-facing bee hotel above 110 degrees Fahrenheit, which cooks developing larvae inside the tunnels. Morning warmth is ideal; afternoon heat is catastrophic. If south or southeast isn’t possible, east-facing is your next-best option.
Maintenance: The Step Most People Skip
Here’s the uncomfortable truth about bee hotels: an unmaintained hotel eventually becomes a disease factory. Parasitic wasps, pollen mites, and fungal infections build up in old tunnels year after year, and by season three or four, mortality rates can exceed 70%. Proper maintenance is what separates responsible bee-hotel hosts from accidental pollinator killers. The good news is that maintenance is straightforward once you understand the annual rhythm.
In mid-winter, while the bees are still sealed inside their cocoons, replace or clean out the tubes. If you used paper-lined cardboard tubes (my personal favorite system), you can carefully open them and harvest the cocoons, inspect them for mites or mold, give them a gentle rinse in cool water with a drop of non-chlorinated solution, and store them in a cool garage or refrigerator until spring. For drilled wooden blocks, the easiest approach is to rotate out old blocks every two years and replace with freshly drilled ones.
Never, ever spray pesticides, herbicides, or fungicides anywhere near your bee hotel. This includes “organic” pesticides like neem oil and pyrethrins, which are still toxic to bees. If you have a pest problem in the garden, handpick insects or use physical barriers rather than chemical sprays within at least 50 feet of the hotel. Resources from the Xerces Society and your local university extension service offer excellent pesticide-free pest management guides tailored to backyard gardeners.
Mistakes to Avoid: What NOT to Do
Over the years I’ve seen every possible bee hotel mistake, usually made by enthusiastic but under-informed beginners. Here are the big ones to avoid, each of which I’ve personally seen turn a well-intentioned project into a pollinator graveyard.
Using treated wood. Pressure-treated lumber, painted wood, and wood stained with modern oil-based finishes all leach chemicals that kill bee larvae slowly over weeks. Stick to raw, untreated softwood or cedar. If you want to extend the exterior life of the frame, a single coat of pure linseed oil (not boiled linseed, which contains metallic driers) is safe.
Using glass or metal tubes. Clear glass tubes were briefly trendy because they let you observe the bees, but they create lethal heat buildup in direct sun. Metal tubes generate condensation as temperatures swing, and that moisture promotes the fungal growth that destroys developing larvae.
Building giant hotels with hundreds or thousands of holes. Commercial-scale bee hotels concentrate too many bees in one place, and parasites and diseases spread rapidly through them. Keep your hotel modest, 30 to 100 holes maximum. And consider spreading several smaller hotels around your property rather than one mega-structure.
Facing west. As mentioned above, afternoon sun overheats the nesting block and kills developing bees. South, southeast, or east-facing only.
Forgetting the back seal. I’ve watched people drill straight through a block and wonder why no bees ever use it. Bees need a dead-end tunnel. Always seal the back.
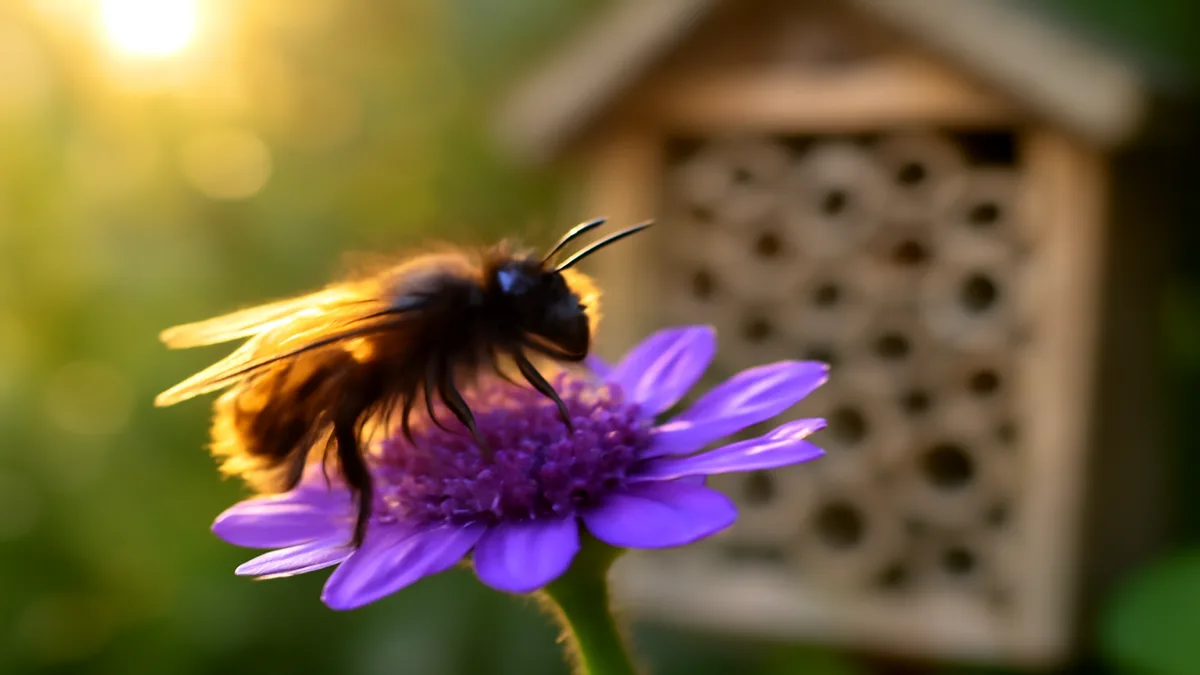
Expected Results and What You’ll See
If you’ve followed this guide, you can realistically expect your first tenants within two to six weeks of mounting in spring. Early in the season, you’ll likely see female mason bees hovering near the holes, entering and backing out repeatedly as they inspect the interiors. Once a female selects a tunnel, she’ll begin the remarkable process of provisioning each cell. Collecting pollen and nectar, forming it into a loaf at the back of the tunnel, laying an egg on top, then sealing the cell with mud or leaf fragments before starting the next cell.
You can track your hotel’s occupancy simply by looking at which holes have sealed entrances. A finished tunnel will have a small, round plug of mud (mason bees), cut leaf pieces (leafcutter bees), or fine plant fibers (some carpenter bees). Each tunnel typically contains 5 to 10 individual cells stacked end-to-end, which means a modest 30-hole hotel can produce 150 to 300 new bees each year. A remarkable return on a Saturday’s work.
Beyond the numbers, there’s the sheer pleasure of watching a bee hotel come alive. Mornings during peak season bring a gentle hum of activity as females depart to forage and return with pollen-laden bellies. It’s hypnotic, peaceful, and profoundly hopeful in an era when pollinator populations are under serious pressure. Many families make a ritual of morning coffee near the bee hotel during late spring, and I don’t think there’s a better way to start a day.
Conclusion and Next Steps
Building a bee hotel is one of those rare projects where the effort-to-impact ratio is genuinely outstanding. For the cost of a scrap block of wood, a drill bit set, and an afternoon of your time, you can support populations of the most effective pollinators on your continent, dramatically improve your garden yields, and create a daily wildlife-watching opportunity right outside your window. The rules are simple, the materials are cheap, and the results are visible within weeks.
If you’re ready to take the next step, gather your materials this weekend and aim to have your hotel mounted before the first warm spring days. Pair it with a diverse pollinator garden featuring native flowering plants that bloom in succession from early spring through fall, and you’ll create an absolute paradise for solitary bees. Share photos of your build and your first tenants with friends and neighbors. Every bee hotel that goes up is one more small victory for pollinators in a world that desperately needs more of them. Your bees are waiting. Go build.
Frequently Asked Questions
How long does it take for bees to find a new bee hotel?
Most properly built and placed bee hotels attract their first tenants within two to six weeks during spring or early summer. Mason bees are usually the earliest arrivals, often investigating new hotels within days of emergence. If your hotel sits empty for an entire season, review placement, sun exposure, and the proximity of flowering plants. These factors are almost always the cause.
Do bee hotels attract wasps or aggressive stinging insects?
Occasionally, small solitary wasps may use a bee hotel, but these are non-aggressive, beneficial species that hunt garden pests like caterpillars and aphids. Solitary bees themselves are exceptionally docile because they have no hive to defend. In over a decade of hosting active bee hotels, I’ve never been stung once, and children can safely observe the bees from just a few feet away.
Can I build a bee hotel if I only have a small balcony?
Absolutely. Small bee hotels work wonderfully on balconies, provided you meet three conditions: securely mount the hotel so it doesn’t sway, ensure morning sun exposure, and have flowering plants nearby (even container gardens count). A 20-hole hotel in a sunny balcony corner can easily host 50 to 100 native bees per season, boosting pollination for your container herbs and vegetables.
What’s the difference between a bee hotel and a honeybee hive?
A honeybee hive houses a single large colony of social bees led by a queen, producing honey and requiring active beekeeper management. A bee hotel hosts dozens of individual solitary bees that live independently, produce no honey, require minimal maintenance, and pose virtually zero sting risk. For most home gardeners focused on pollination rather than honey, a bee hotel is the far easier and more beneficial choice.
Do I need to bring my bee hotel indoors during winter?
In most climates, no. Bee hotels are designed to weather winter outdoors, with developing bees safely sealed inside their cocoons. However, if you live in an area with extreme temperature swings or heavy predation from woodpeckers and rodents, you can move the hotel to an unheated garage or shed from late November through February, then return it outside before the first warm spring days.
Want More Wildlife Garden Tips?
Join 5,000+ nature lovers getting our weekly tips on creating wildlife-friendly gardens.
No spam, unsubscribe anytime. Privacy Policy
Emma Harrington
Emma Harrington is a wildlife habitat researcher and content editor with a passion for backyard conservation. She has spent over a decade translating ecological science into practical tips anyone can follow — from selecting native plants to building wildlife-friendly habitats. Her work focuses on helping homeowners transform ordinary yards into thriving ecosystems for bees, butterflies, hummingbirds, and other beneficial wildlife.