Solid bat house plans are the difference between a weekend project that attracts a thriving colony and a sad, empty box that sits unused on the side of your shed for a decade. I’ve seen both outcomes in my own backyard, and the gap between them comes down to about six measurements and two hours of extra care during construction. If you get the chamber width wrong by even a quarter inch, wasps move in before the bats ever notice. If you mount it in the wrong spot, the sun angle is off, or the paint color doesn’t match your climate, the house simply won’t hit the internal temperature nursing mothers need to raise their pups.
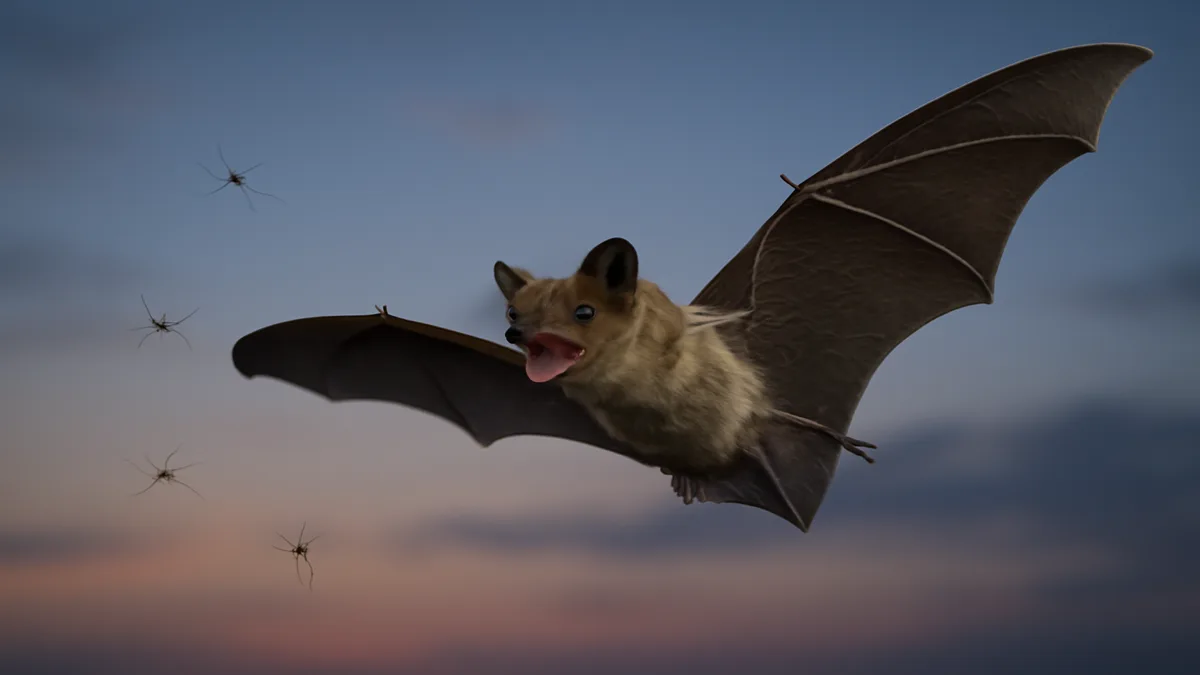
The good news is that once you understand why each specification matters, building a functional bat house is genuinely straightforward. You don’t need a woodshop full of tools, and the whole material list runs about forty-five dollars at any hardware store. A single female bat can eat thousands of mosquitoes, moths, and beetles in one night. Which means one well-placed house can replace an entire summer’s worth of bug sprays and citronella candles.
This guide walks through everything I wish someone had told me the first time I attempted this: the exact dimensions that work, the woods to buy (and the one to never touch), a complete construction sequence, placement rules that people get wrong constantly, and the climate-specific paint trick that prevents overheating deaths in southern states. By the end, you’ll have a blueprint you can take to the lumber yard this weekend.
FREE: Wildlife Garden Starter Guide
Get our 12-page PDF with the 25 best plants for pollinators, simple habitat tips, and a printable checklist — all 100% free.
No spam. Read our Privacy Policy.Why Bat Houses Matter More Than Ever
North American bat populations have been decimated over the past fifteen years by white-nose syndrome, a fungal disease that has wiped out entire hibernacula across the eastern United States. Some species have declined by more than 90 percent in affected regions. Habitat loss compounds the problem. Dead trees with peeling bark, which bats have used as roosts for millennia, get removed from suburban yards on sight.
A properly built bat house gives displaced colonies a replacement roost that actually meets their thermal and structural needs. Beyond conservation, the practical benefit in your own yard is immediate. A nursery colony of fifty bats can consume somewhere around 25,000 insects on a warm June evening. If you’re also building a pollinator garden or planting flowers for hummingbirds, adding a bat house completes the nocturnal side of the ecosystem. Pollinators work the day shift, bats handle the night patrol.
A single little brown bat can catch up to 1,000 mosquito-sized insects in an hour. A nursing mother eats her entire body weight in bugs every single night to produce milk for her pup. You are not going to out-spray that with a can of DEET.
Critical Dimensions: The Numbers That Actually Matter
Most failed bat houses fail because someone eyeballed the chamber width or built the whole thing too short. Bats are incredibly particular about roost geometry, and cutting corners here is the single most common reason a house sits empty for years. Here are the non-negotiable dimensions:
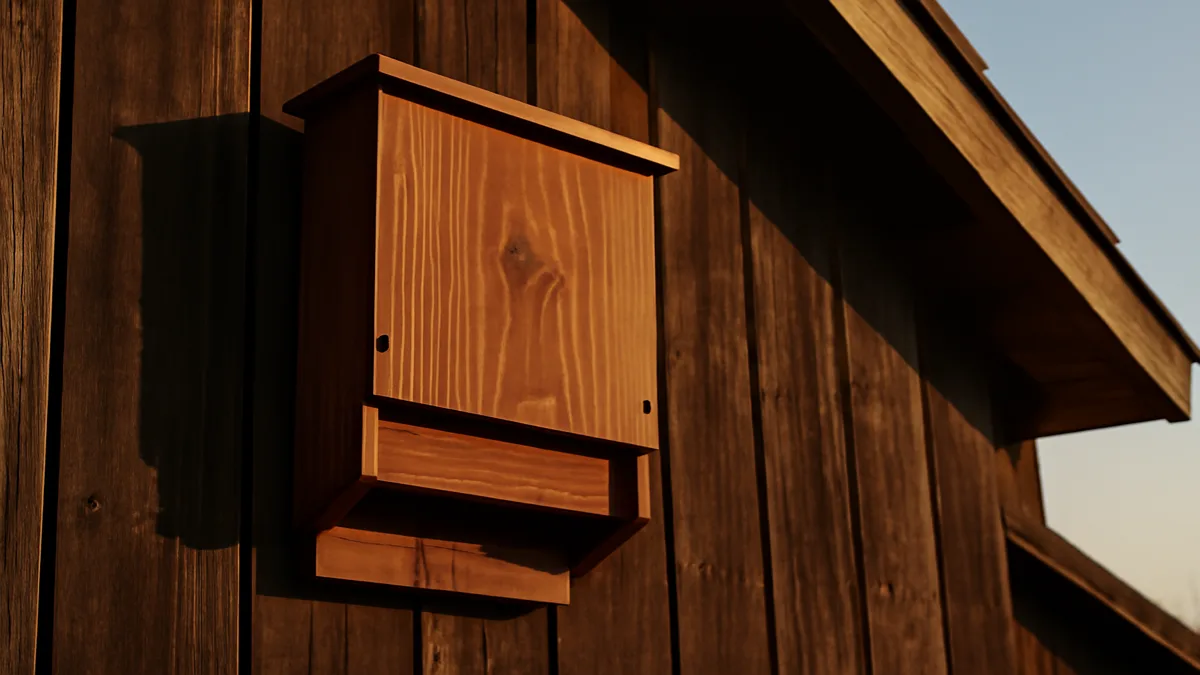
- Overall height: minimum 24 inches, with 30 to 36 inches being ideal. Taller houses create a vertical temperature gradient so bats can move up or down to find their preferred warmth throughout the day.
- Width: 14 to 17 inches. Anything narrower feels claustrophobic to a colony; wider wastes wood without adding usable roosting surface.
- Chamber depth (the gap bats actually roost in): exactly 3/4 inch to 1 inch. This is the most critical measurement in the entire build. Wider than 1 inch and paper wasps will colonize it before bats arrive.
- Landing pad: the backboard should extend 3 to 6 inches below the entrance slot, roughened for grip, so bats have a surface to grab as they swoop in from below.
- Entrance slot: 1/2 inch to 3/4 inch high, running the full width of the bottom.
If you take only one thing from this article, make it the chamber depth. I built my first bat house with a 1.25-inch chamber because I figured “more room” was better. Within three weeks it had a softball-sized wasp nest in it and zero bats. Tear-down and rebuild.
Choosing the Right Wood (And the One to Avoid)
Wood selection affects both durability and safety. Bats are mammals with sensitive respiratory systems, and they roost pressed directly against the interior surface for hours at a time. Whatever chemicals are in that wood are chemicals they’re breathing.
The premium choices are cedar, black locust, and white oak. All three resist rot naturally without chemical treatment and will last 15 to 20 years outdoors. Cedar is the easiest to find at a big-box hardware store, though it costs roughly double what plywood does.
For a budget build, use 1/2-inch exterior-grade plywood, ACX, BCX, or T1-11 siding plywood all work well. These are rated for outdoor use and hold up fine when properly sealed and painted. A single 4-foot by 4-foot sheet is enough for one house with scraps left over.
Never use pressure-treated lumber. This is non-negotiable. The copper-based preservatives in PT wood are toxic to bats in enclosed spaces, and the off-gassing continues for years. The same goes for railroad ties, old fence boards treated with creosote, and anything that smells chemically when you cut into it.
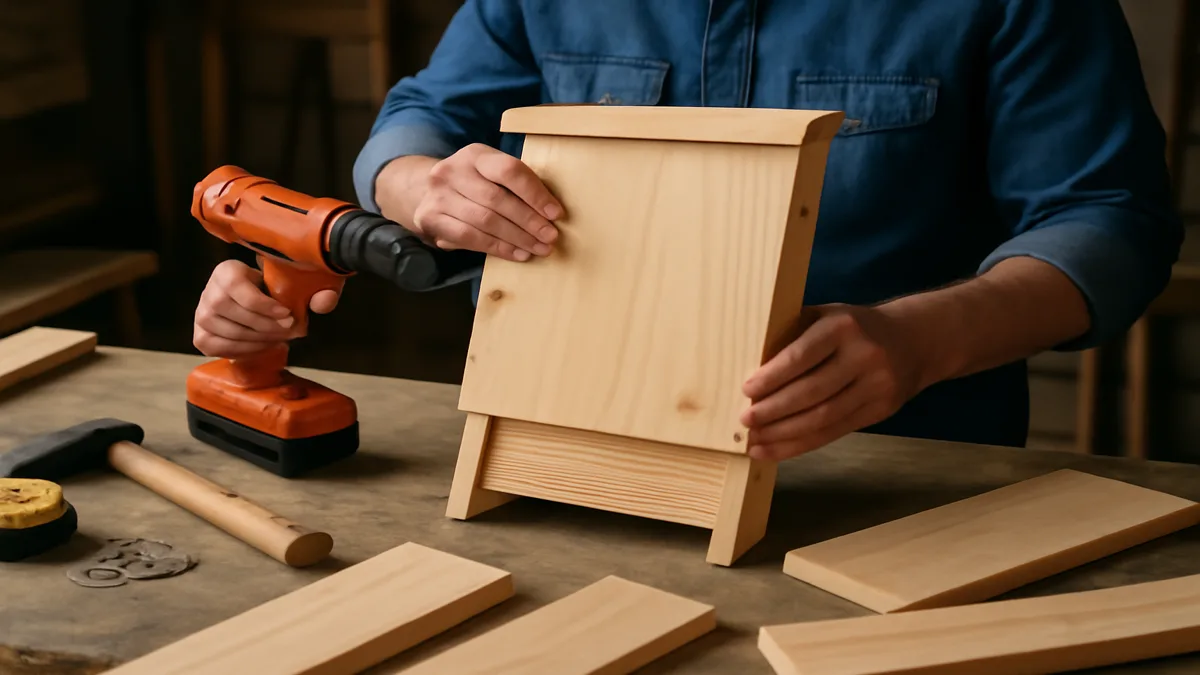
Complete Materials List and Budget
Here’s the full shopping list for a single three-chamber bat house that will comfortably host 100 to 200 bats. Prices are typical 2026 hardware store numbers and may vary a bit by region.
| Material | Specification | Approx. Cost | Purpose |
|---|---|---|---|
| Exterior plywood | 4′ x 4′ sheet, 1/2″ thick (ACX/BCX) | $20 | Back, front, sides, roof panels |
| Pine board | 1″ x 2″ x 8 ft | $3 | Chamber spacers (maintains 3/4″ gap) |
| Exterior screws | 1 3/4″, rust-resistant, 30-40 count | $5 | Assembly fasteners |
| Water-based exterior stain | 1 liter, dark color (climate-dependent) | $15 | Exterior finish and weatherproofing |
| Paintable latex caulk | Single tube | $4 | Sealing all seams against drafts |
| Titebond II wood glue | 8 oz bottle | $5 | End-grain sealing before assembly |
| Asphalt shingles or metal flashing | Small scrap piece | Optional / scrap | Roof waterproofing |
| Mounting brackets or lag bolts | 4-inch, exterior rated | $5 | Attaching to pole or building |
| Total | ~$45 |
Tools you’ll need beyond materials: a circular saw or jigsaw, a drill with a Phillips bit, a utility knife or chisel (for interior grooves), a caulk gun, and a paintbrush. That’s it.
Climate-Specific Tips by US Region
Follow this order exactly. Several steps depend on earlier ones being done first. For example, you can’t roughen the interior after the chambers are assembled because you won’t have access.
- Cut all panels to dimension before assembling anything. The backboard should be 24 inches by 17 inches (this is the piece that extends below as a landing pad). The front panel is 16 inches by 17 inches, leaving that bottom strip exposed. Cut two side rails and a roof panel to match.
- Roughen the interior faces. Using a utility knife, score horizontal grooves about 1/16 inch deep, spaced 1/4 to 1/2 inch apart across every surface that will face the chamber interior. Bats have tiny claws and literally cannot cling to smooth plywood. Skip this step and your house is unusable to them.
- Seal all end grain with Titebond II wood glue. Brush a thin coat along any cut edge, especially tops and bottoms of panels. This prevents moisture wicking into the plywood layers, which is the #1 cause of premature failure.
- Assemble with 1″x 2″ spacers. Rip your 1×2 pine into strips that will maintain an exact 3/4-inch chamber width when sandwiched between the back and front panels. Drive exterior screws through the back into the spacers, then the spacers into the front. Measure twice. This is the make-or-break dimension.
- Caulk every single seam. Inside and out. Bats will abandon a drafty roost within days, and cold air infiltration makes it impossible to hold the 80-100°F internal temperatures nursing colonies need. Run a bead along every joint and smooth it with a wet finger.
- Attach the roof with a 2-3 inch overhang on the front and sides to shed water away from the entrance. Cover the roof with a scrap of asphalt shingle or a piece of thin metal flashing stapled down. Angle the roof 10-15 degrees toward the back.
- Paint or stain the exterior only (never the interior. The finish fumes drive bats away). Use water-based exterior stain in the appropriate color for your climate. Do NOT use Kilz or oil-based primers; bats reliably avoid houses finished with them, likely due to lingering solvent odor.
Total build time once you have the materials cut: about three hours, plus overnight for the caulk and paint to cure.
Temperature, Paint Color, and Climate Matching
This is the section that separates functional bat houses from decorative ones. Nursing females need internal roost temperatures between 80 and 100 degrees Fahrenheit to successfully raise pups. The temperature is controlled almost entirely by paint color plus sun exposure, and getting it wrong can be lethal.
In cool northern climates (USDA zones 3-5, or anywhere with summer highs rarely above 85°F), paint the exterior black or very dark brown. The dark color absorbs solar heat and pushes the interior into the target range during the short warm season.
In hot southern climates (zones 8-10, summer highs regularly above 95°F), use light colors. Tan, pale gray, or even white. A black bat house in Texas or Arizona will cook its occupants. Internal temperatures above 110°F kill bats, and I’ve seen reports of entire colonies dying in a single afternoon because someone followed generic “paint it dark” advice in the wrong climate.
Moderate climates in between (zones 6-7) do well with medium shades. Chocolate brown, forest green, or slate gray. In all climates except the absolute coldest, cut a 1/2-inch ventilation slot about 6 inches below the roofline on the front panel. This lets hot air escape and prevents heat buildup on peak summer afternoons.
Placement: Where Most People Get This Wrong
You can build a perfect bat house and still end up with zero occupants if you mount it in the wrong location. The placement rules are specific and they are not suggestions.
- Height above ground: minimum 12 feet, with 15 to 20 feet strongly preferred. Bats drop from the entrance as they fly out and need room to gain airspeed before clearing obstacles.
- Direction: face the house south, southeast, or east. This maximizes morning and midday sun exposure when the colony needs to warm up.
- Sun exposure: 6 to 8 hours of direct sun daily is the sweet spot. Less and it won’t hit nursing temperatures; much more in hot climates and you need the light paint color.
- Mounting surface: attach to a wooden or masonry building wall, or to a dedicated pole (4×4 post, metal pole, or galvanized pipe). Do not mount on a tree. Trees shade the house, block flight paths, and give predators like raccoons and rat snakes an easy ladder directly to the entrance.
- Clear drop zone: 20 to 25 feet of open air in front of and below the entrance, with no branches, power lines, or structures in the flight path.
- Water source: ideally within a quarter mile. Bats drink on the wing from ponds, streams, pools, or even large birdbaths.
Poles work better than buildings for most backyards because you can pick the perfect sun angle without compromising on architecture. A 4×4 cedar post sunk 3 feet deep in concrete, with the bat house mounted at the 16-foot mark, is the gold-standard installation.
Common Mistakes That Kill Colonies Before They Start
After helping neighbors troubleshoot their own failed installations, I’ve noticed the same handful of mistakes come up repeatedly. Every one of these is avoidable:
- Mounting on a tree. The single most common error. Too shady, no flight path, predators climb right up.
- Using pressure-treated wood. Toxic off-gassing in an enclosed chamber. Hard pass.
- Chamber wider than one inch. Wasps colonize it within weeks and bats won’t compete.
- Skipping the caulk. Drafts make thermal regulation impossible and bats abandon quickly.
- Installing metal mesh or screen inside. This used to be recommended decades ago as a grip surface, but metal shreds the delicate membranes of bat wings. Always use roughened wood instead.
- Mounting too low. A bat house at 8 feet is a raccoon buffet.
- Facing north. The house never warms up enough, colony never moves in.
- Giving up after one season. It can take 1 to 3 summers for bats to find and adopt a new roost. Patience pays off.
If you’re also trying to manage other backyard wildlife. Say, learning how to keep squirrels out of the garden. Remember that bat houses don’t attract rodents or cause any of the problems people sometimes worry about. Bats come and go at dusk, make almost no noise, and never enter homes through a properly maintained bat house.
What to Expect After Installation
Realistic timeline: bats may find your house in the first summer, or it may take two to three seasons. Don’t panic if July rolls around and nothing’s moving in. The first sign of occupation is usually guano (bat droppings, which look like dark grain-of-rice pellets) appearing on the ground below the entrance. Check early in the morning before the rain washes it away.
Once a colony establishes, numbers grow year over year as pups return to the roost where they were born. A house that hosts 20 bats in year one can easily hold 200 by year five. Annual maintenance is minimal. Check for wasp nests in early spring before bats return from hibernation, and repaint every 4 to 5 years to maintain weather resistance.
For deeper research on species native to your region and additional build variations, Bat Conservation International maintains certified plans and a bat house database. The National Wildlife Federation also offers certification for yards that meet full wildlife habitat criteria, of which a bat house counts as a major component.
Final Thoughts and Your Next Step
Building a bat house is one of the highest-impact, lowest-cost wildlife projects any homeowner can take on. For less than the price of a nice dinner and an afternoon of work, you get decades of natural pest control, contribute meaningfully to the recovery of a threatened group of mammals, and add a genuinely fascinating piece of nocturnal wildlife to your backyard ecosystem. The bats do all the work from there.
The dimensions in this guide. Especially the 3/4-inch chamber, the 24-inch minimum height, the 12-foot mounting minimum, and the climate-appropriate paint color. Are the difference between success and a forgotten box on a pole. Nail those four, and the rest is finishing details.
If this guide helped you plan your build, please share it with another gardener, homeowner, or conservationist who’d put it to use. Every new functional bat house in the neighborhood helps a recovering population. And helps cut down on the mosquitoes at your next cookout.
Regional Adjustments for US Gardeners
The same wildlife garden technique can thrive in one region and fail in another, not because the method is wrong but because climate, soil, and native species vary dramatically across the country. Use your USDA Hardiness Zone as a starting point, then adjust for humidity, rainfall patterns, and local pest pressure. The guidance below outlines the most common regional shifts gardeners need to make.
- Northeast (Zones 3 to 7): Short growing season and cold winters mean you should plant by Memorial Day, mulch heavily before Thanksgiving, and favor cold-hardy natives like serviceberry, winterberry holly, and New England aster. Expect heavy deer pressure in suburbs and plan fencing or repellents from the start.
- Southeast (Zones 7 to 10): High humidity invites fungal disease, so space plants generously and water at the base rather than overhead. Summer heat stops many birds from nesting in July and August, so keep shaded water sources available. Choose heat-tolerant natives like beautyberry, native azalea, and passionvine.
- Midwest (Zones 3 to 6): Temperature swings between seasons are extreme, and late spring frosts routinely kill early buds. Delay pruning until April, mulch with 3 to 4 inches of wood chips for insulation, and lean on prairie natives such as purple coneflower, little bluestem, and compass plant. Tornado-damaged trees often become excellent snag habitat if left in place safely.
- Southwest (Zones 6 to 10): Water is the limiting factor. Group plants by water need, install drip irrigation on a timer, and add a shallow dripper-style water feature that attracts more wildlife than any feeder. Native penstemon, desert willow, and chuparosa outperform thirsty ornamentals. Watch for scorpions when moving rocks or logs.
- West Coast (Zones 7 to 10): Wet winters and dry summers reverse the Eastern rhythm. Plant in October so roots establish during the rainy season, then let plants go semi-dormant in July and August. Coastal fog belts support ferns and huckleberry; inland valleys need fire-wise spacing and hardscape buffers within 30 feet of structures.
Whatever your region, check your exact zone at the USDA Plant Hardiness Zone Map before buying plants, and cross-reference with your state extension service for pest alerts and invasive species to avoid. A 20-minute visit to a local native plant nursery will teach you more about what actually works in your soil than any national guide.
Frequently Asked Questions
How long does it take for bats to move into a new bat house?
Occupation times vary widely based on local bat populations and placement quality. Some houses get colonized within the first summer, but it more commonly takes 1 to 3 seasons. If you’re still empty after three full summers, reassess the location. Usually the issue is insufficient sun, wrong direction, or mounting height that’s too low for comfortable flight access.
Do bat houses attract mosquitoes or other pests to my yard?
Quite the opposite. Bat houses dramatically reduce mosquito populations because a single bat eats thousands of flying insects per night. The houses themselves attract nothing beyond bats. No rodents, no odor issues, no droppings on your deck. Guano falls directly below the house on a small patch of ground and actually makes excellent garden fertilizer when collected.
Can I put a bat house on my actual house or garage?
Yes, and wall-mounting on a south or east-facing wall of a wood, brick, or stone building works excellently. It’s often warmer than a pole mount because the building mass retains heat overnight. Just ensure 20+ feet of clear air in front of the entrance and mount at least 12 feet up. Avoid metal siding, which can overheat dangerously in summer sun.
What do I do if wasps build a nest inside my bat house?
Check in early spring before bats return from hibernation or migration, usually March to early April in most of North America. Knock out any wasp nests with a long stick from below and seal with caulk if you find gaps. If wasps become a recurring problem, your chamber depth is likely too wide. Anything over one inch invites them. Rebuild with the correct 3/4-inch gap.
Is it legal to install a bat house in my yard?
In virtually every U.S. state and Canadian province, installing a bat house on your own property is completely legal and actively encouraged by wildlife agencies. Some HOAs have restrictions on exterior structures, so check your covenants if you live in a managed community. Bats themselves are federally protected from harm, but providing habitat is welcomed. Many states even offer certification programs for wildlife-friendly properties.
Related reading
Want More Wildlife Garden Tips?
Join 5,000+ nature lovers getting our weekly tips on creating wildlife-friendly gardens.
No spam, unsubscribe anytime. Privacy Policy
Emma Harrington
Emma Harrington is a wildlife habitat researcher and content editor with a passion for backyard conservation. She has spent over a decade translating ecological science into practical tips anyone can follow — from selecting native plants to building wildlife-friendly habitats. Her work focuses on helping homeowners transform ordinary yards into thriving ecosystems for bees, butterflies, hummingbirds, and other beneficial wildlife.