There’s a quiet revolution happening in backyards across America, and it doesn’t require expensive equipment, fancy native plants, or hours of landscaping expertise. In fact, the most effective wildlife habitat you’ll ever build starts with something you’ve probably been hauling to the curb every spring: fallen branches. A well-constructed brush pile for wildlife can transform a sterile lawn corner into a bustling micro-ecosystem within 3 to 5 days of completion.
If you’ve spent the last few decades maintaining a tidy suburban property, the idea of intentionally stacking dead wood in your yard might feel counterintuitive. But here’s the truth many of us have come to appreciate later in life: nature thrives in the in-between spaces, the transition zones, the tangles and thickets that we were once taught to clear away. Wildlife biologists now recognize the brush pile as one of the single most effective habitat features a homeowner can create, and it costs absolutely nothing to build.
This complete beginner’s guide will walk you through everything you need to know about building a proper brush pile for wildlife, from site selection and construction techniques to species benefits and common mistakes to avoid. Whether you’ve got a quarter-acre suburban lot or five wooded acres, you’ll finish this article with a clear blueprint for creating shelter that supports rabbits, songbirds, salamanders, pollinators, and dozens of other species right outside your window.
FREE: Wildlife Garden Starter Guide
Get our 12-page PDF with the 25 best plants for pollinators, simple habitat tips, and a printable checklist — all 100% free.
No spam. Read our Privacy Policy.What Exactly Is a Brush Pile for Wildlife?

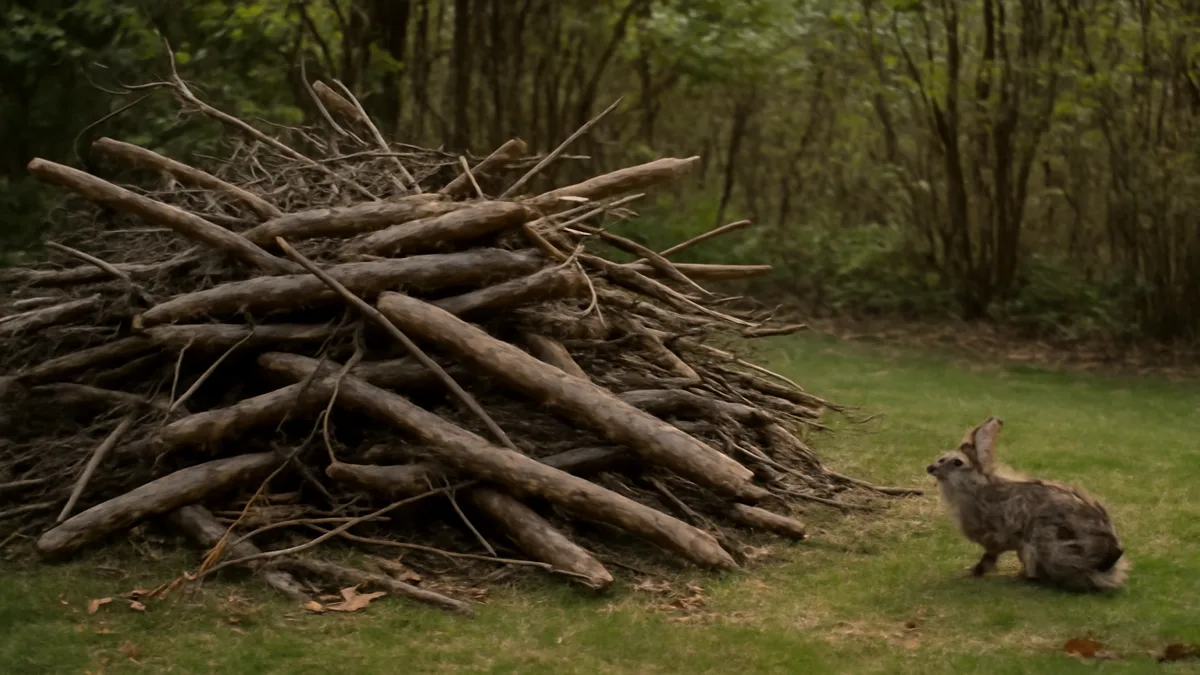
A brush pile is not a haphazard heap of yard waste. That distinction is critical, and it’s where most well-meaning homeowners go wrong. A true wildlife brush pile is a strategically engineered stack of logs, branches, and twigs designed to provide shelter, thermal cover, escape routes, and nesting opportunities for a wide range of animals.
The difference between a messy brush stack and a proper brush pile comes down to structure and intention. A pile of yard debris tossed into a corner will compress into a dense mat within 4 to 6 months, eliminating the interior cavities that make brush piles valuable. A properly constructed brush pile, by contrast, is stable, layered, and hollow at its core, with deliberate entry points at ground level and protected chambers inside.
Think of it less like a trash heap and more like a rustic apartment building. The foundation supports everything above it. The middle floors offer distinct living spaces. The roof provides protection from predators, rain, and snow. Every layer serves a purpose, and when built correctly, the whole structure can remain functional for years before needing to be refreshed.
Which Wildlife Species Actually Use Brush Piles?
The list of creatures that benefit from a brush pile is genuinely astonishing. Within the first week of construction, you’ll likely notice activity, and within a month, your pile will be supporting 12 to 15 species simultaneously.
Small mammals are among the most enthusiastic tenants. Cottontail rabbits use brush piles as daytime bedding areas and as winter refuges during deep snow. Eastern chipmunks tunnel beneath and through the base. White-footed mice, voles, and shrews establish runways along the bottom layer, which in turn attracts larger predators like foxes and hawks to the general area, creating a richer food web.
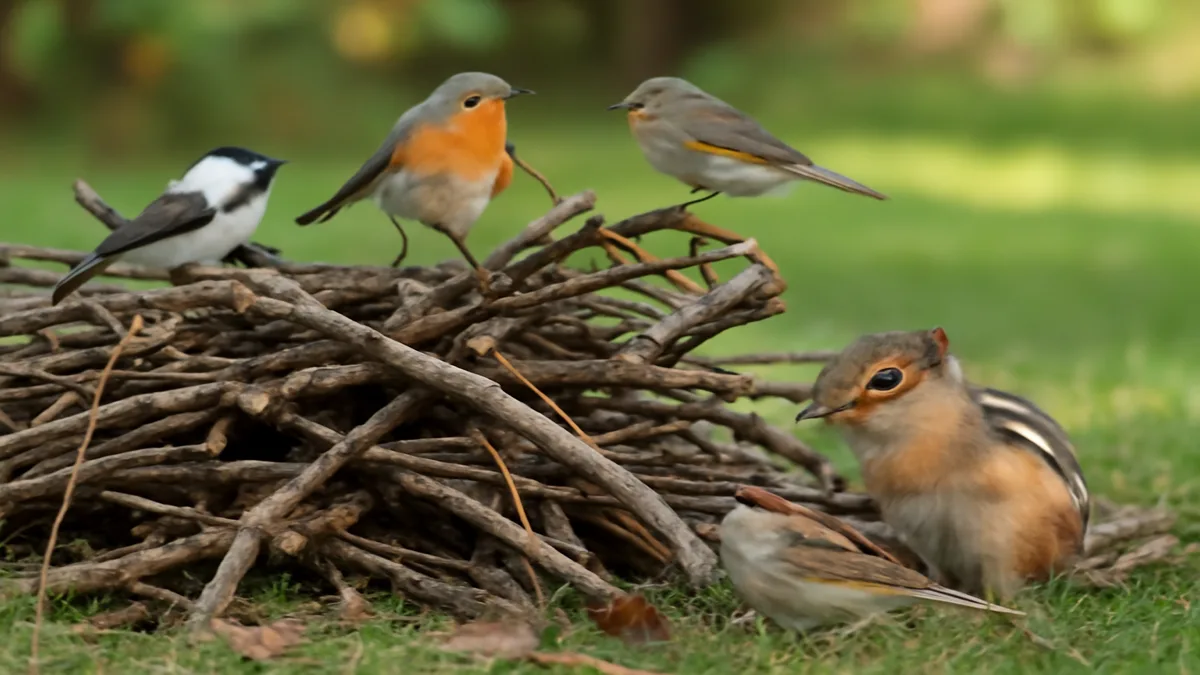
Songbirds are equally devoted users. Wrens, towhees, sparrows, cardinals, and juncos all forage in and around brush piles for insects and seeds. Ground-nesting species may build nests within the protected interior, and during harsh winter weather, you’ll often see small birds diving into brush piles to escape wind and predators. The National Audubon Society has documented how dense natural cover dramatically improves songbird survival during cold snaps and storm events. If you enjoy backyard birding, building a brush pile will likely bring you more species than any feeder ever could, and pairing it with safety upgrades like the strategies in our guide on how to stop birds from flying into your windows creates a much safer route between food, cover, and your viewing window.
Amphibians and reptiles also find sanctuary here. Salamanders and toads love the cool, moist microclimate at the base of the pile, where they hunt insects and avoid drying out during hot weather. Garter snakes frequently use brush piles as basking and hunting grounds. And the real unsung heroes, beneficial insects and spiders, use the decaying wood and leaf litter to overwinter, emerging in spring to control garden pests. Roughly 70% of native bee species are solitary ground- or cavity-nesters, and research summarized by the Xerces Society for Invertebrate Conservation shows that woody debris and leaf litter are among their most important overwintering structures.
“Brush piles are one of the best and easiest ways to provide cover for wildlife. Even a small brush pile, three to four feet high and six to eight feet across, can provide valuable escape cover and shelter for birds, rabbits, and other small animals.”, National Wildlife Federation habitat guidance
How to Choose the Best Location for Your Brush Pile
Location matters more than most beginners realize. A perfectly constructed brush pile in the wrong spot will sit largely unused, while a modest pile in an ideal location will become a wildlife hub. The goal is to place your pile where it functions as part of a larger habitat network, not as an isolated feature.
Start by thinking about transition zones, the edges where one habitat type meets another. The boundary between lawn and woods, between garden and hedgerow, between open field and shrub line, is where wildlife activity concentrates. Positioning your brush pile along these edges dramatically increases its use. Wildlife biologists call this the “edge effect,” and it’s one of the most reliable principles in habitat design. If you want to think bigger, our walkthrough on how to create a wildlife corridor in your yard shows how a single brush pile can become one node in a chain of cover that small mammals and ground birds actually travel along.
Proximity to food and water is the next consideration. A brush pile placed within 30 feet of a berry-producing shrub, a flower bed, or a small pond will see far more activity than one stranded in the middle of a lawn. If you’ve already created other habitat features on your property, like a wildlife pond or a pollinator garden, tuck your brush pile near them to build a connected habitat corridor.
Existing cover is another magnet for wildlife. Building your pile at the base of a large tree, against a fence line with climbing vines, or adjacent to a shrub thicket provides animals with safe travel routes in and out. Nothing makes a rabbit more nervous than having to cross open lawn to reach shelter.
Safety considerations round out the location decision. Keep your brush pile at least 30 feet from any structure to minimize fire risk, and avoid placing it directly against the foundation of your home, shed, or garage. A south-facing slope or the south side of a tree offers valuable winter warmth, as the low winter sun can gently warm the pile and provide a thermal refuge on bitter days.
Step-by-Step Construction of a Proper Brush Pile
Building a brush pile is genuinely satisfying work, the kind of hands-on project that rewards care without demanding expertise. The entire build for an average pile takes between two and four hours, depending on how much material you’re working with and how organized your approach is.
Before you begin, gather your materials in one area near the build site. Separate your pieces into three rough categories: large logs, medium branches, and small twigs with fine debris. Having this sorting done before you start stacking will save you significant time and produce a better final structure.
Here is the proper construction sequence from ground up:
- Mark out your footprint. Aim for a minimum of 4 feet by 4 feet by 4 feet tall. If you have the space and materials, an ideal pile is 8 feet by 8 feet at the base and 6 feet tall. Bigger piles support more species and last longer.
- Lay the foundation logs. Place three to four large logs, ideally 6 to 12 inches in diameter, in a crisscross pattern. This creates immediate tunnels and hollow spaces at ground level where small mammals and amphibians will enter.
- Add the middle layer. Stack medium branches, 2 to 5 inches in diameter, crosswise over the foundation. Alternate directions with each layer to maintain structural stability and preserve interior cavities.
- Build the top layer. Pile smaller branches, dense twigs, and woody vines on top. This dense crown provides cover from above, blocking the view from hawks and owls while also shedding rain and snow.
- Carve out entry tunnels. At ground level, make sure there are at least three openings roughly 2 to 3 inches wide where small animals can enter and exit. These tunnels are critical, and without them, the pile is far less useful.
- Leave hollow spaces inside. Never compact your pile by stepping on it or stomping it down. The interior cavities are where wildlife actually lives. A loose, airy structure is exactly what you want.
What Materials to Use (and What to Avoid)
One of the most appealing aspects of brush pile construction is that virtually all the materials come from your own property at zero cost. In fact, building a brush pile is often the cleanest solution to yard waste you’ll ever find, turning what you’d otherwise haul away into valuable habitat.
Excellent materials for brush pile construction include:
- Fallen branches collected after storms or routine pruning
- Discarded Christmas trees, which are perfect December and January additions
- Tree removal debris from take-downs on your property
- Hedge and shrub trimmings from annual maintenance
- Old grape vines and wild grapevine cuttings
- Corn stalks and sunflower stems from end-of-season garden cleanup
- Untreated wooden stakes, broken tool handles, and similar natural wood debris
What you want to avoid is equally important. Never use treated lumber of any kind in your brush pile. The chemicals used to pressure-treat wood are toxic to wildlife and can leach into the surrounding soil as the wood decays. Painted wood, plywood, and anything with glue or finish should also stay out.
Invasive plant material deserves special attention. Species like Japanese honeysuckle, bush honeysuckle, oriental bittersweet, and buckthorn can actually root from cuttings and sprout new plants from the brush pile itself. Adding invasive material to your brush pile can transform the site into an invasive plant nursery. Poison ivy and poison oak should also be excluded, both because they can root from cut stems and because they create an unpleasant surprise for anyone working on or near the pile later.
When to Build and How to Maintain Your Brush Pile
The ideal time to build a brush pile is late fall through winter, precisely when wildlife needs shelter most urgently. A pile completed in November or December offers immediate benefits during the hardest months of the year, when small mammals and birds face extreme cold, predation pressure, and scarce food. That said, a brush pile built in any season will be appreciated, so don’t let timing stop you from starting.
Maintenance is delightfully minimal. Unlike most garden features, a brush pile actually improves with age as it settles and attracts more organisms. Your main task is rebuilding or refreshing the pile every two to three years as the lower layers decompose and the whole structure compresses. Rather than demolishing the old pile, many experienced habitat builders simply add fresh material on top, allowing the decomposed bottom to enrich the soil while maintaining continuous cover.
Here’s a quick reference table to help you plan construction and maintenance throughout the year:
| Season | Recommended Action | Wildlife Benefit |
|---|---|---|
| Late Fall (Oct-Nov) | Build new pile or add substantial layer | Winter shelter ready before cold arrives |
| Winter (Dec-Feb) | Add Christmas tree; check for tracks and signs of use | Critical cold-weather refuge for mammals and birds |
| Spring (Mar-May) | Leave undisturbed; observe nesting activity | Ground birds and small mammals raising young |
| Summer (Jun-Aug) | Light pruning additions; monitor for invasive growth | Cool shelter for amphibians and escape cover |
| Early Fall (Sep) | Assess structural integrity; plan rebuild if needed | Overwintering site for beneficial insects |
Winter is also the perfect time to look for signs of use. Fresh snow reveals tracks leading in and out of the pile, chewed bark and debris suggest rabbit activity, and small tunnels in the surrounding snow indicate meadow voles or shrews. These observations are genuinely rewarding and give you a window into the secret life happening just outside your door.
The Real Benefits of a Brush Pile for Your Property
The ecological benefits of a brush pile extend well beyond the pile itself. You’re not just creating shelter for individual animals, you’re building a small but meaningful contribution to the ecosystem of your neighborhood.
Instant habitat is perhaps the most satisfying benefit. Unlike planting a tree or restoring a meadow, which can take 3 to 5 years to mature, a brush pile is functional the moment you finish construction. Wildlife will begin investigating within 24 to 48 hours and actively using the structure within days. For homeowners who want immediate results from their conservation efforts, few projects deliver so quickly.
Winter survival support is critical for small mammals and birds in cold climates. Field studies of cottontail rabbits suggest that access to dense natural cover can boost over-winter survival by 30 to 40% compared with open habitat. A well-placed brush pile may literally be the difference between life and death for the small animals living on your property.
Pest control benefits often surprise new habitat builders. Brush piles provide overwintering sites for beneficial insects like ground beetles, parasitic wasps, and native bees. These insects emerge in spring to pollinate flowers and prey on garden pests like aphids, caterpillars, and slugs. Many gardeners find that adding a brush pile near their vegetable garden noticeably reduces pest problems in subsequent seasons.
Soil improvement is the long-term gift. As the bottom layers of your brush pile decompose, they return organic matter to the soil beneath, creating rich humus that supports deeper plant growth over time. The area under a decade-old brush pile is often the most fertile patch on the entire property.
A brush pile also complements other wildlife-friendly features beautifully. If you’ve already built a birdhouse or established native plantings, adding a brush pile connects those features into a more cohesive habitat network. Once you have several features in place, our guide on how to get your backyard certified as a wildlife habitat walks through the documentation step that turns a working yard into an officially recognized one. For more detailed species information and regional habitat recommendations, the resources available at the National Wildlife Federation and the Cornell Lab of Ornithology are exceptional starting points for deepening your knowledge.
Common Mistakes to Avoid When Building a Brush Pile
After decades of working with homeowners on habitat projects, wildlife biologists consistently see the same handful of mistakes. Avoiding these pitfalls will dramatically improve the effectiveness of your pile.
Building too small is the most frequent error. A pile smaller than 4 feet by 4 feet simply doesn’t provide enough thermal mass or interior volume to serve as meaningful shelter. If space allows, err on the larger side, since bigger piles consistently attract more species and more individuals.
Compacting the pile during construction is another widespread mistake. It’s tempting to stomp material down to make the pile look tidier or more compact, but doing so destroys the interior cavities that make brush piles valuable in the first place. A loose, airy structure is the goal, even if it looks less neat to human eyes.
Using treated lumber introduces toxins into your habitat and can harm the very wildlife you’re trying to help. Stick exclusively to untreated natural wood. Similarly, placing your pile in a fire-hazard zone near structures, propane tanks, or dry vegetation creates unnecessary risk, especially in drought-prone regions.
Impatience is a subtler but equally common problem. Some homeowners remove or relocate their brush pile after a single year, either because they don’t see enough activity or because they decide it looks unkempt. Wildlife use typically peaks in the second and third years as the pile matures and word gets around, so resist the urge to dismantle a young pile prematurely.
Finally, using invasive plant material or poison ivy can turn your well-intentioned project into an ecological problem. Always identify what you’re adding, and when in doubt, leave questionable material out of the pile.
FAQ
Will a brush pile attract unwanted pests like rats or snakes?
Properly placed brush piles located away from buildings and food sources rarely attract rats. Rats prefer garbage, pet food, and bird seed, not natural wood structures in habitat settings. You may occasionally see native snakes like garter snakes using the pile, which is generally beneficial since they eat rodents and insects. If you’re concerned, simply keep your pile at least 30 feet from your house and avoid adding any food scraps.
How long does a brush pile last before it needs rebuilding?
A well-constructed brush pile typically remains functional for two to three years before the lower layers decompose significantly. Rather than dismantling the old pile, most habitat builders refresh their piles by adding new material on top, which allows continuous wildlife use while the bottom layer enriches the soil. A hardwood-based pile with larger foundation logs may last four to five years before needing substantial rebuilding.
Can I build a brush pile in a small suburban yard?
Absolutely. Even a modest 4-foot by 4-foot pile tucked into a back corner provides meaningful habitat. If space is truly limited, consider a slightly elongated pile along a fence line, which offers the same square footage of shelter while taking up less visual space in your yard. Many suburban homeowners find their small brush piles attract just as much activity as larger rural ones because they provide the only cover in an otherwise open landscape.
Do I need permission from my HOA or local ordinances to build one?
Requirements vary widely by location. Some homeowner associations have rules about yard waste and visible structures, so check your covenants if you belong to an HOA. Most municipalities allow brush piles on private property, but a few have ordinances limiting their size or requiring setbacks from property lines. A quick call to your local zoning office or a look at your HOA documents will clarify your situation. Many communities now actively encourage habitat features as part of broader conservation programs.
What’s the difference between a brush pile and a hugelkultur bed?
Though they look somewhat similar, they serve different purposes. A brush pile is designed primarily for wildlife shelter, with intentional cavities, loose stacking, and exposed surfaces. A hugelkultur bed is a gardening technique where logs and branches are buried under soil to create a raised growing bed that retains moisture and releases nutrients as the wood decomposes. You can actually combine both concepts by building a traditional brush pile next to a hugelkultur bed, creating habitat and productive garden space in a single area of your yard.
Building a brush pile for wildlife is one of those rare projects where the effort is minimal, the cost is zero, and the ecological payoff is immediate and lasting. Whether you’re a lifelong naturalist or simply someone who’s started noticing how quiet the yard has become over the years, this simple structure can reconnect your property to the wildlife that once called it home. Gather some branches, pick a good spot, and start stacking. You’ll be amazed at who shows up.
Related reading
Want More Wildlife Garden Tips?
Join 5,000+ nature lovers getting our weekly tips on creating wildlife-friendly gardens.
No spam, unsubscribe anytime. Privacy Policy
Emma Harrington
Emma Harrington is a wildlife habitat researcher and content editor with a passion for backyard conservation. She has spent over a decade translating ecological science into practical tips anyone can follow — from selecting native plants to building wildlife-friendly habitats. Her work focuses on helping homeowners transform ordinary yards into thriving ecosystems for bees, butterflies, hummingbirds, and other beneficial wildlife.