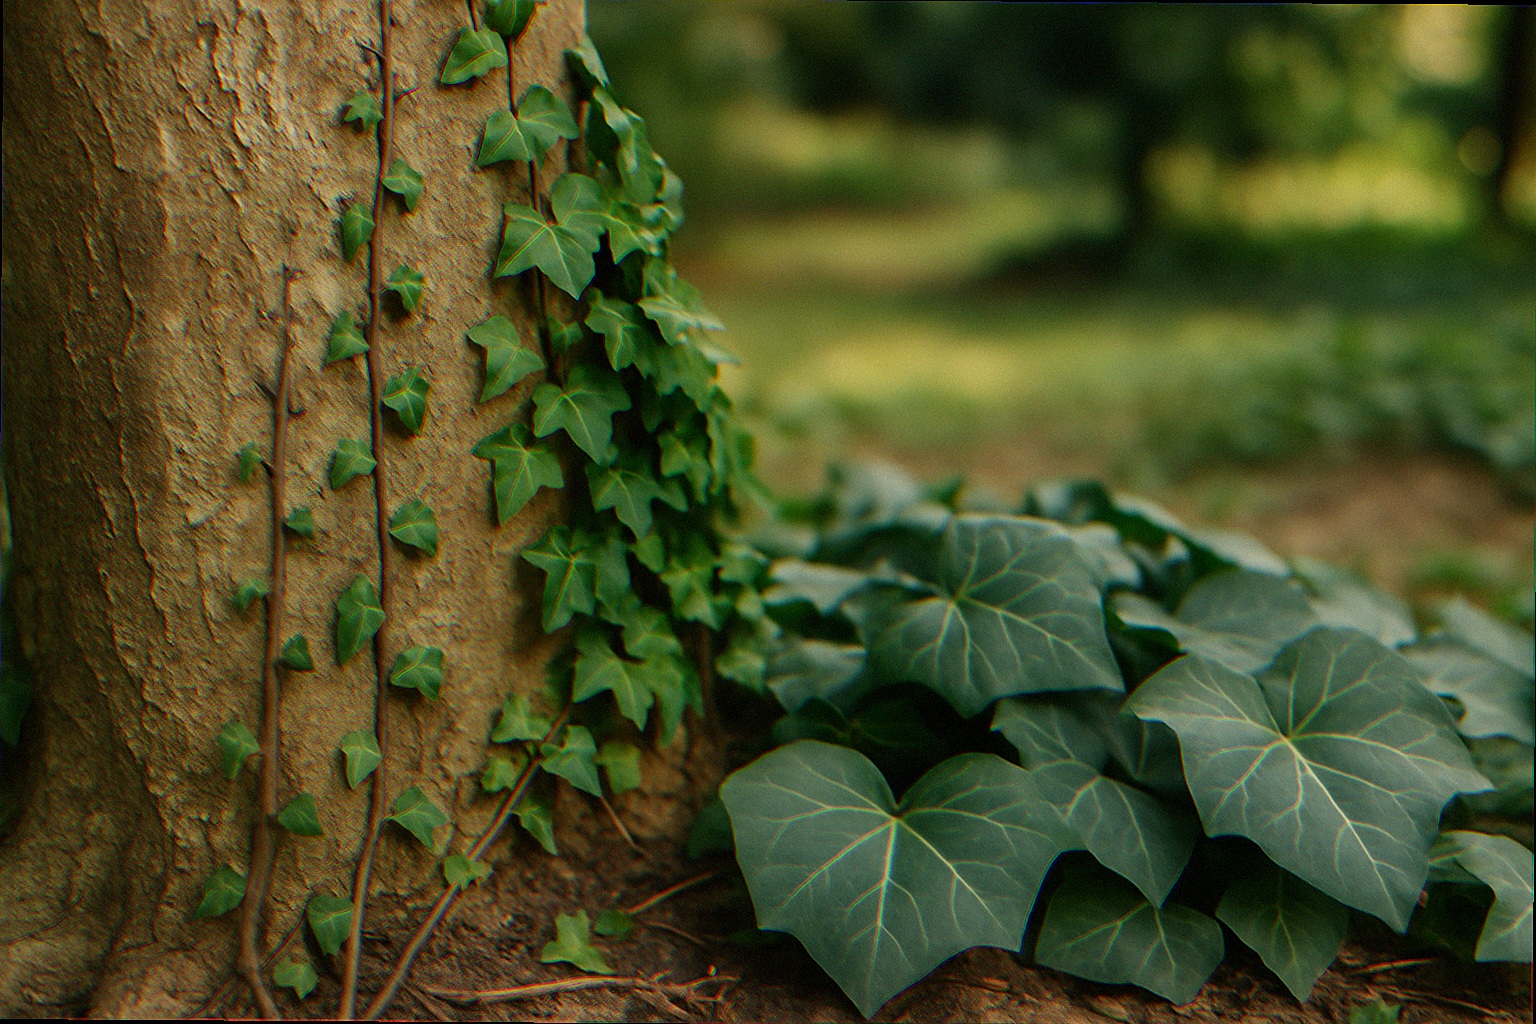
A friend who runs a nursery told me it took two full seasons to finally clear the ivy from the shade bed before planting could begin. So, if you’ve been battling English ivy for a year and a half and still see those glossy green leaves popping up each spring, rest assured, it’s not because you’re doing anything wrong. English ivy has a reputation for its resilience against the strategies most homeowners employ.
This guide is the realistic two-season plan I wish I had when I bought my first house and inherited an ivy-choked side yard from a previous owner who clearly thought “low maintenance” meant “let it eat the dogwoods.” It is the same plan I have watched work in three other yards on my street. It does not require glyphosate. It does not require a landscaping crew. It does require accepting that the roots, not the leaves, are the whole story.
The Pain Behind “I Have Been Yanking This Stuff For Years”
Here is the quote that finally made me feel less alone with my ivy bed: “I spent two seasons battling ivy in the large garden bed in order to start fresh with a nice shade garden.” Two seasons. Not two weekends, not a long Sunday with thick gloves. Two full growing seasons of returning to the same patch and pulling, cutting, and pulling again.
FREE: Wildlife Garden Starter Guide
Get our 12-page PDF with the 25 best plants for pollinators, simple habitat tips, and a printable checklist — all 100% free.
No spam. Read our Privacy Policy.That is the part nobody tells you on Pinterest. The before-and-after photos crop out the year of half-cleared dirt where the ivy keeps trying to come back from a piece of stem you missed under a rock. The pain is not “ivy is hard to remove,” because plenty of plants are hard to remove. The pain is that English ivy has a way of making you feel like you are losing every time you pull at it, because for the first twelve months you basically are.
The good news: once you understand what it is doing under the soil, you can stop fighting on its terms and start fighting on yours.
Why The Usual Methods Quietly Fail
Before we get to what works, a quick tour of the things you have probably already tried, and why each one runs out of steam.
- Pulling by hand. Removes maybe 60 percent of the leafy top growth and almost none of the woody crowns. Ivy laughs at hand-pulling and regrows from any node still in contact with soil.
- Boiling water. Kills surface foliage, browns nicely for a week, then green leaves push up again from intact root crowns. You also cooked any beneficial soil life within reach.
- Vinegar sprays. Same story. Burns the leaves, does not kill the woody root system. You will be back next month.
- Mowing or string-trimming. Cuts the surface, leaves the network underground completely intact, and tends to fling cuttings into other parts of the yard where each one can root again.
- Smothering with a tarp for a season. This actually does help in open turf, but in established ivy beds with woody stems and tree-climbing vines, the tarp just gives you a slightly thinner ivy patch when you pull it back.
None of these are stupid attempts. They all sort of work on softer weeds. They fail on Hedera helix because Hedera helix is not really a weed in the soft-stem sense. It is a woody perennial vine with a multi-year strategy.
The Roots Are The Whole Game
Mature English ivy in a Mid-Atlantic or Southeast yard typically has three layers of biomass:
- The leafy mat on the ground. What you see, maybe four to eight inches tall when stepped on, with the iconic three-lobed leaves.
- Woody runners just below or right at the soil line. These are pencil-thick to thumb-thick, brown, with a hairy or scaly bark. They run for many feet horizontally and root into the soil at every node where a leaf attaches.
- The crown plus deeper anchor roots. Where the ivy first established, often years before you bought the house, there is a knot of older woody growth with thicker roots driving down into the subsoil.
If your removal effort only deals with layer one, you have done about a tenth of the work. If you also handle layer two but skip the crowns, the patch will visibly rebound within the same growing season. Real removal means dealing with all three, and almost no one finishes that in one weekend.
This is why the plan that follows is structured across two seasons rather than two days. It is not pessimism. It is matching the work to the actual biology.

The Two-Season Removal Plan That Actually Works
The whole plan is built around one simple idea: starve the crowns by cutting their tops off, then dig them out before they recover. Nothing exotic, but the timing matters and the order matters.
Year 1, Late Summer Through Fall: Cut and Lift
Step one is to free any trees that have ivy climbing them. Do this before you touch the ground patch. Take sharp loppers and cut every ivy vine on every trunk at about ankle height and again at chest height, removing a six-inch ring of vine entirely. Do not pull the upper vines off the bark. Just cut them and leave them. The severed top growth will turn brown and dry within a few weeks, which both saves the tree and gives you a visible signal of where your work has been.
The Audubon Society has a helpful primer on saving trees from ivy that is worth a read before your first pass; their guide to freeing trees from English ivy walks through the cut-don’t-pull rule with photos.
Step two: section the ground patch. Use a flat shovel or a sharp spade to slice the leafy mat into roughly three-foot-by-three-foot squares. You are basically scoring the mat so you can lift it in pieces rather than wrestling with it as one giant mass. Pull each square back like a sticky carpet, shaking out as much soil as you can, and toss it into a wheelbarrow. Bag the cuttings in heavy contractor bags. Do not compost them. Do not chip them. Ivy will regrow from a stem fragment in a compost pile.
Step three: walk the cleared bed and dig out every visible crown with a mattock or a digging fork. A crown looks like a knotty woody stump, sometimes the size of a softball, sometimes the size of your fist, with several pencil-thick stems coming out of it. Lever it up and out. If you cannot see the bottom, you have not gone deep enough. These crowns are why the patch keeps coming back.
Step four, optional but smart: cover the cleared area with a thick layer of leaf mulch or wood chips, four to six inches deep. The mulch suppresses any fragments you missed and gives the soil a winter to recover before spring.
Year 2, Early Spring Through Early Summer: The Cleanup Pass
If you did Year 1 well, the bed in March looks like a mostly bare brown rectangle with maybe a dozen new ivy sprouts pushing up through the mulch. That is normal. That is the second wave from rooted nodes you missed plus a few seeds in the seed bank.
Walk the bed once a week from late March through May. Each pass, dig out every new sprout with a hori-hori knife or a small hand trowel. Get the whole little stem, root and all, not just the leaves. Drop them in a bag, not in your mulch.
By June, the rate of new sprouts drops dramatically. By August of Year 2, most beds I have worked on are essentially clear, with only a sprout or two a month. That is when you start replanting in earnest. (More on that in a moment.)
The Right Tools, And Where To Actually Buy Them
You do not need a five-hundred-dollar tool kit for this. You do need three or four sharp, durable hand tools.
- Bypass loppers. Look for blades at least 1.5 inches wide and handles 24 to 30 inches long for leverage. Corona or Fiskars at any big-box store work well; if you have a local independent garden center, ask them about the ARS line, which is what I use and what arborists in my area carry.
- A digging mattock. The pickaxe-looking tool with a wide blade on one side and a pointed pick on the other. This is the single most important tool for getting crowns out. A 2.5 to 3 pound head is plenty for residential work. Home Depot, Lowe’s, Tractor Supply, and Amazon all carry serviceable ones for around 40 dollars.
- A flat spade and a digging fork. Together they handle the slicing and lifting steps. Avoid the cheap stamped-steel ones; a forged spade lasts a lifetime and is not much more expensive at a real hardware store.
- A hori-hori knife. Japanese-style soil knife, about a foot long, serrated on one edge. Indispensable for the Year 2 weekly pass on small sprouts. You can find decent ones for 25 to 35 dollars; the bulb-planting versions with measurement marks are nice but not necessary.
- Heavy-duty leather or goat-skin gloves. Ivy itself is not poisonous to skin in the way poison ivy is, but rubbing your bare hands on the woody stems for an afternoon is a guaranteed way to get a rash and a few small cuts.
If you want to go fully local-first, your independent garden center or a local Audubon chapter sale can sell you the same tools and often used or refurbished. If you want to be done in a Saturday morning trip, the big-box stores have everything in one parking lot. Both choices are fine. The plant choice is where it pays to be picky; the tools just need to be sharp.
What To Plant Back: Native Shade Recipes That Hold The Bed
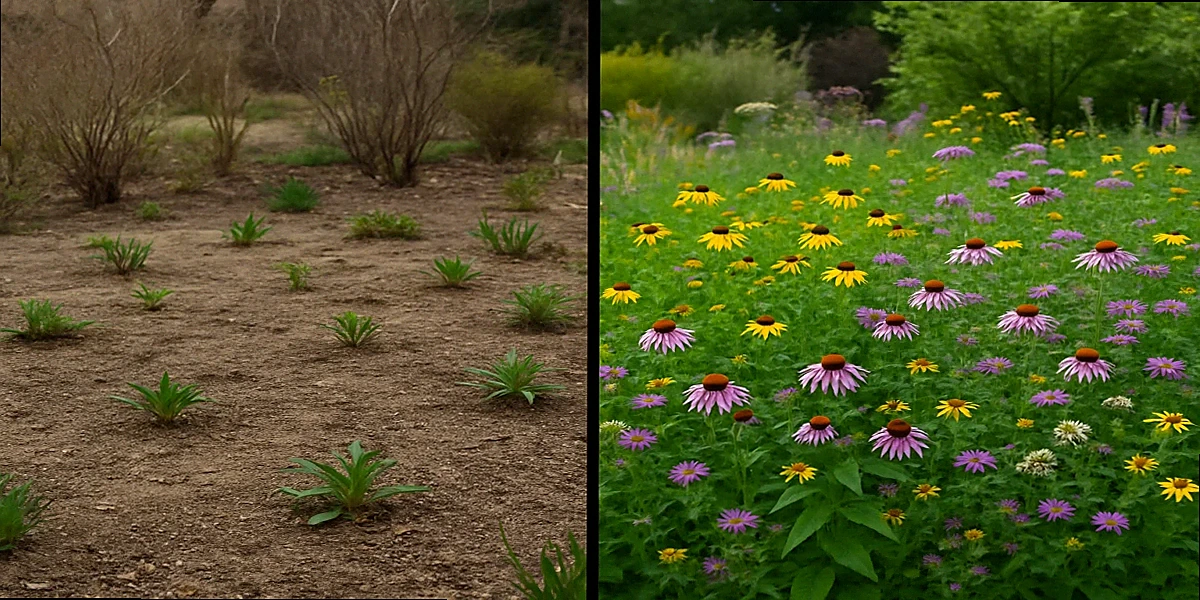
The most expensive mistake people make after clearing ivy is leaving the bed empty. An empty shade bed is an open invitation for the ivy seed bank, plus garlic mustard, plus the runners coming in from the neighbor’s fence line. You want to fill that real estate with native plants that knit together within a season or two.
For most Eastern US shade beds, here is the recipe I keep coming back to. It is shamelessly inspired by the native woodland plant communities you can see at any state arboretum, just shrunk to a residential scale.
- Ground-layer carpet (the new “lawn” of the shade bed): wild ginger (Asarum canadense), foamflower (Tiarella cordifolia), Pennsylvania sedge (Carex pensylvanica), green-and-gold (Chrysogonum virginianum). Plant on roughly 12 to 18 inch centers. Within two years they will close ranks and shade out new ivy seedlings on their own.
- Mid-layer ferns and clumpers: Christmas fern (Polystichum acrostichoides), Northern maidenhair fern (Adiantum pedatum), wild geranium (Geranium maculatum). These give the bed structure year-round; the Christmas fern in particular stays green through winter and prevents that “bare patch” look that triggers HOA letters.
- Spring color punches: Virginia bluebells (Mertensia virginica), white trillium (Trillium grandiflorum), Solomon’s seal (Polygonatum biflorum). Plant in clusters of three to five so they read as intentional groupings, not as accidents.
If you want county-specific native lists rather than my regional shorthand, the BONAP database is the gold standard for verifying that a plant is actually native to your county before you buy it. There is a sister post on this site about building a foolproof native plant garden recipe by USDA zone that walks through the process of matching plant lists to your specific climate.
For sourcing, plan to spend more on shade plants than you would on a flat of annuals, because they are slower to grow and most local nurseries do not carry them in volume. Two solid options: order plugs from a specialty nursery like Prairie Moon or Izel Native Plants in late summer for fall planting, or hit a native-plant-society sale in spring. The big-box stores are getting better at native shade plants, but read every tag carefully; a “wild geranium” at a chain is sometimes the European cranesbill, not the native species. The companion piece on finding a native plant garden on a budget ranks five sources by real cost per plant; worth a quick read before you place an order.
What To Tell The HOA, The Neighbor, And The Voice In Your Head
Here is the part that does not show up in the gardening blogs. By August of Year 1, your bed looks like a war zone. There is a tarp, a mound of mulch, half-rotten stems sticking up out of the dirt, and a strip of brown ivy hanging from the oak. Your neighbor will notice. Your HOA might send a polite letter. The voice in your head will whisper that you should have just kept the ivy.
Three things help.
One: put up a small sign. A 6-by-9 inch metal yard sign that says “Native habitat in progress” or “Wildlife restoration area” is the difference between “messy yard” and “intentional project” in most HOAs. The Pollinator Pathway and Audubon both sell them; you can also just print one on coroplast for ten dollars at a local sign shop. Sounds silly. Works astonishingly well.
Two: keep the edges crisp. A clean, deeply cut edge between bed and lawn signals “intentional design” the way a frame signals “this is a painting.” It does not matter how rough the inside of the bed looks during transition; if the perimeter is straight and tidy, most reasonable neighbors will read the bed as in-progress, not abandoned.
Three: tell the people next door before you start. Walk over once with a beer or a coffee and say, “I am going to be tearing out the ivy along the property line over the next year or so. It is going to look ugly for a while. Here is what it will look like in two years.” Most neighbors are reasonable about ugly when they know it has an end date. If you have a real HOA enforcement situation, the same friend-of-a-friend conversation is even more valuable than the sign.
One more thing on the voice in your head. Two seasons feels like forever when you are six months in and the sprouts keep coming. They will slow down. The math is on your side. Each crown you remove is one fewer crown forever. Each weekly pass in Year 2 takes less time than the one before it. By the second August, the bed shifts from “the place I am fighting ivy” to “the place where my Christmas ferns are doing really well.”
One Year After Replanting: What To Expect
If you stick the plan, here is what realistic outcomes look like in the bed by the third spring after you started.
- Ivy regrowth: down to occasional single sprouts, maybe one or two a month at the bed edges where it tries to creep back from the neighbor’s yard.
- Native ground cover: foamflower and wild ginger have closed roughly 60 to 80 percent of the bare ground. Pennsylvania sedge looks like a soft green carpet that no one ever planted on purpose, even though you obviously did.
- Wildlife: I noticed a pair of Carolina wrens nesting near my bed in spring of Year 3, and an obvious uptick in small native bees on the foamflower bloom. A trail camera I borrowed from a neighbor showed an opossum trotting through twice in a week. Adjacent posts on this site like the multi-year buckthorn removal plan describe the same kind of slow wildlife return after invasive removal; the pattern is consistent across very different plants.
- Maintenance time: my own yard’s ivy bed went from “a Saturday a month forever” to “fifteen minutes once every two or three weeks.” That is the prize at the end of the road.
If the bed is right next to a tree you freed in Year 1, you should also see new bark texture and fewer pest issues on that tree. Penn State Extension has a useful overview of the long-term damage ivy does to host trees in its English ivy management overview, which is also a good resource if you want a second opinion on the timing of cuts. There is also a fun parallel to the “sleep, creep, leap” timeline native plants follow; the same three-year arc that frustrates new native plant gardeners is the exact arc your replanted shade bed will trace.
Frequently Asked Questions
Is English ivy actually invasive in my state, or is this overblown?
It depends on your state’s noxious weed list, but the ecological reality is that Hedera helix is documented as invasive across much of the Mid-Atlantic, Southeast, Pacific Northwest, and parts of the Midwest. It smothers native ground flora, damages and topples mature trees by adding weight and trapping moisture against bark, and provides essentially no value to native pollinators or birds compared to native alternatives. Even where it is not on the official invasive list, the trajectory is consistent: it tends to dominate any patch of soil it lands in within five to ten years.
Can I just spray it with herbicide and be done in a weekend?
You cannot, even with a strong glyphosate or triclopyr application. Mature English ivy has a waxy leaf cuticle that resists most foliar sprays, and the woody crowns survive single applications. The few people I know who have used herbicide successfully did so as part of a multi-pass approach over the same two-season window described above, with cut-stump applications on the woody bases. If you are going to use chemicals, you still need the time. If you are willing to spend the time, you do not really need the chemicals.
What about goats? I keep seeing those “ivy goats” services.
Rental goats are excellent at clearing the leafy top growth quickly and they look great on Instagram. They do not solve the root problem. After the goats leave, you still have the woody runners and crowns underground, and the regrowth is fast because the soil now has a lot of goat-fertilized open ground waiting for it. Goats are a fine first step for very large ivy patches if you want to skip the hand-cutting phase, but you still owe Year 1 step three, the crown removal, and the entire Year 2 weekly pass.
Will pulling ivy hurt my old trees?
Cutting at ankle and chest height will not. Pulling living vines off the trunk can. Mature ivy stems graft themselves into bark crevices, and yanking them off can strip pieces of the host tree’s bark with them. The cut-and-leave method is exactly what arborists recommend for this reason: kill the upper vine in place, let it dry out and detach naturally over a year or two, then gently remove the dead material if you want a tidy look.
How do I know I am done?
You are done when a full month goes by in the growing season without finding a new ivy sprout in the bed. For most yards in zones 6 through 8, that is somewhere in the second half of Year 2 or early Year 3. Mark a calendar reminder for the third May after you started, do one careful walk-through, and if the bed comes back clean, declare victory. Then plant something for the bees and have a beer. You earned both.
Closing Thought
I’ve heard more than one homeowner express that the process of clearing English ivy can be grueling and lengthy. They likened it to a humorous situation where they pose with the invasive plants they’ve removed from their yards, reminiscent of how men flaunt their catches on dating apps. Though it’s said in jest, it really emphasizes that most of the labor goes unnoticed. So when you finally manage to haul a wheelbarrow full of those woody roots to the curb, don’t hesitate to snap a picture to commemorate your hard work. You deserve recognition for all that effort, and the wildlife will appreciate your dedication.
Related reading
Want More Wildlife Garden Tips?
Join 5,000+ nature lovers getting our weekly tips on creating wildlife-friendly gardens.
No spam, unsubscribe anytime. Privacy Policy
Emma Harrington
Emma Harrington is a wildlife habitat researcher and content editor with a passion for backyard conservation. She has spent over a decade translating ecological science into practical tips anyone can follow — from selecting native plants to building wildlife-friendly habitats. Her work focuses on helping homeowners transform ordinary yards into thriving ecosystems for bees, butterflies, hummingbirds, and other beneficial wildlife.