
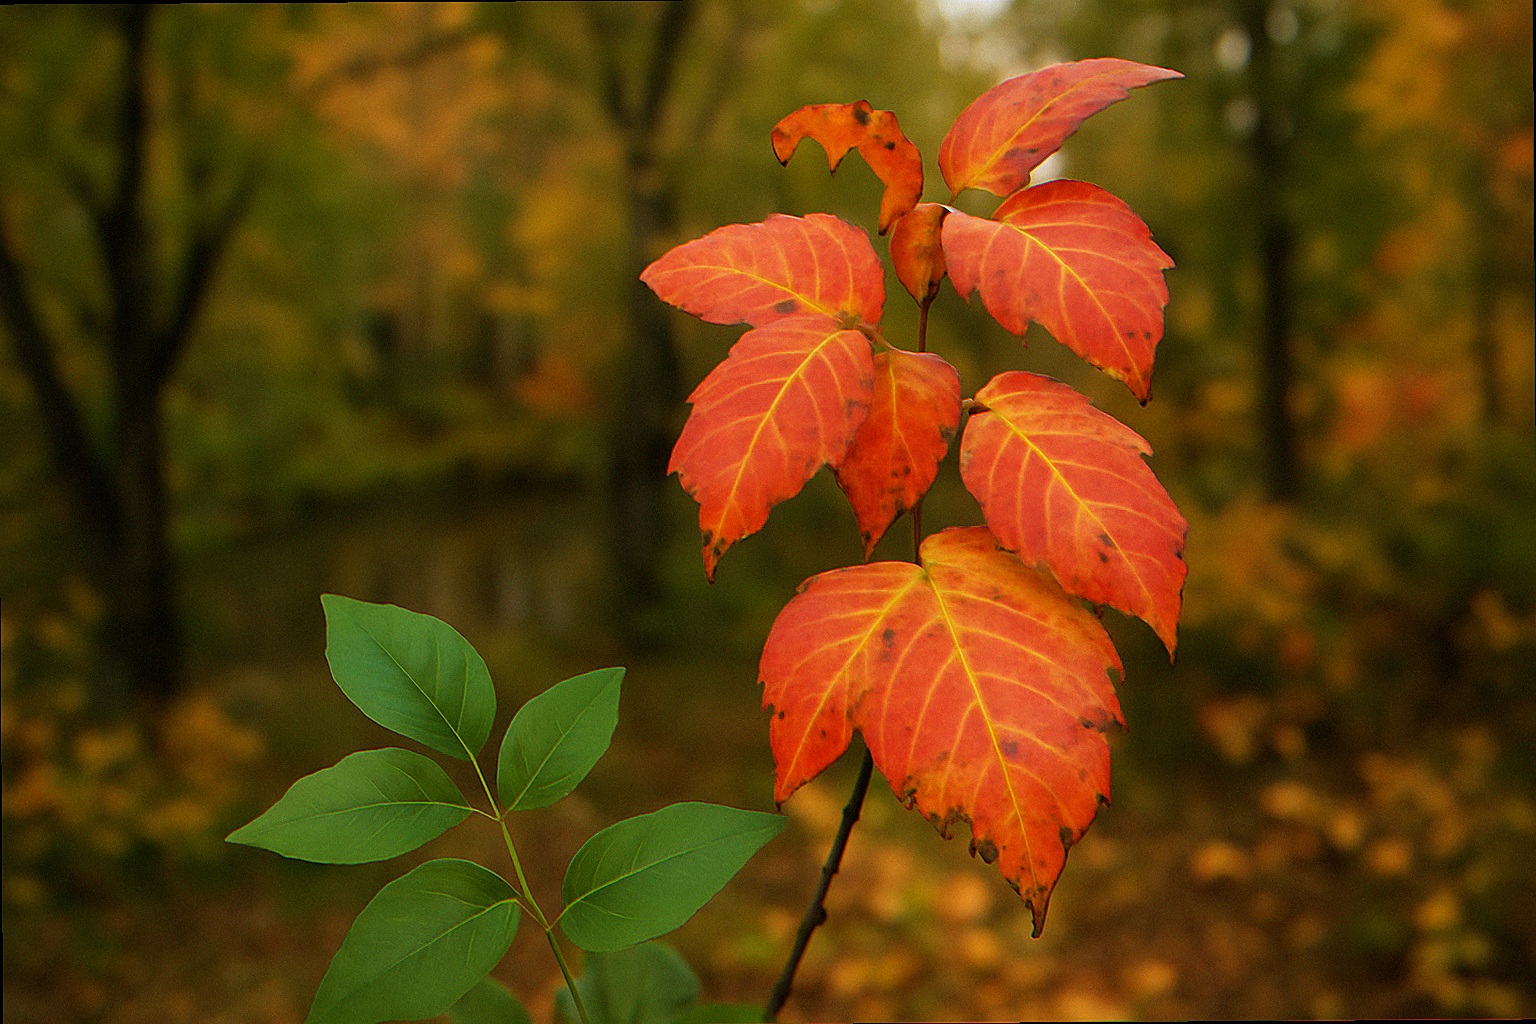
I dug out a single poison ivy taproot from the base of an old white oak last May and counted the rings on the slice afterward. Eleven. The vine had been climbing that tree since before the previous owners moved in, threading itself through a stand of native woodland phlox and golden alexanders that I was trying to protect. Walking away from it was not an option. Spraying glyphosate over the whole patch would have wiped out the natives I had spent four seasons coaxing back. That is the exact corner most native gardeners get stuck in by mid-May: poison ivy is the one native plant nobody negotiates with, but every easy method to kill it also kills the things you actually want.
The frustration is universal. A fellow Master Naturalist confided last month that she suits up every spring in multi-layer long sleeves, long pants, and long socks to pull urushiol-coated vines by hand, and the patches still come back. The reason is not effort. It is method. Hand pulling on a damp May morning leaves living root fragments three feet below the soil, broadcast herbicides drift through the canopy onto your milkweed, and salt-and-vinegar home brews destroy the soil biology that your native bed depends on. There is a way to clear a yard of Toxicodendron radicans at the root without burning down the surrounding ecosystem, but it requires accepting that this is a two-to-three-year project, not a weekend.
Why Poison Ivy in a Native Yard Is Different From a Lawn
A standard suburban lawn lets you cheat. You can mow poison ivy flat, slap a broadleaf herbicide across the whole lot, and call it done by July. The grass shrugs the chemical off; everything else dies. A native bed has the opposite problem: every plant in there is a broadleaf, and almost all of them are more sensitive to drift, root contact, and soil disruption than the poison ivy itself. The University of Georgia Extension notes that poison ivy thrives on the same disturbed edges, woodland margins, and partial-shade conditions where native woodland flora wants to live, which is exactly why it shows up inside established native beds rather than next to them. The two compete for the same niche.
FREE: Wildlife Garden Starter Guide
Get our 12-page PDF with the 25 best plants for pollinators, simple habitat tips, and a printable checklist — all 100% free.
No spam. Read our Privacy Policy.Mature poison ivy stores most of its biomass underground. A vine that looks like a foot of ground cover often has a horizontal rhizome network running ten to fifteen feet sideways and a primary taproot that can descend several feet. Cutting the visible leaves does nothing to that reserve. The plant resprouts within three weeks, often more aggressively, because the underground system now has fewer leaves to support and more stored sugar per remaining bud. This is why “I have been yanking this stuff for years” is the most common phrase you hear from people who tried the lawn method on a wooded lot.
There is a smaller secondary issue worth naming: identification confidence. Verifying a plant’s identity before touching it is normally a low-stakes habit. With poison ivy it is the difference between a controlled removal and a dermatology visit. The leaflet count is reliable (three, alternate, with the middle leaflet on a longer stem), but the leaf shape varies wildly across the season and across a single vine. Spring leaves are reddish and shiny; summer leaves are matte green and large; fall leaves go crimson. Virginia creeper, the most common look-alike in eastern US yards, has five leaflets and reddish climbing tendrils with adhesive pads rather than the hairy aerial rootlets of poison ivy. Box elder seedlings have three leaflets but with toothed edges and opposite leaf arrangement instead of alternate. Spend ten minutes with a photo on your phone before you go near the stem.
Three Reasons Yanking the Vine in May Backfires
Mid-May is exactly when the urge to yank peaks, because the plant is suddenly visible after the leaf-out and the shoots are still tender. It is also the worst possible window to pull. Three reasons.
First, urushiol concentration in the plant tissue is at its highest point of the year between leaf-out and midsummer. The oily compound that triggers the contact dermatitis is present throughout the plant in every season, but the volume the plant produces tracks active growth. A snapped stem in May leaks more urushiol per square inch of cut surface than the same stem in October.
Second, the rhizome network is in full hydraulic activity. Pulling a vine from damp May soil tends to bring up two or three feet of the surface root and snap it cleanly from the taproot below. Every fragment of root left behind, down to about a quarter inch, has the capacity to regenerate a new shoot. By July the patch looks worse than before because you have effectively divided the parent plant into a dozen colonies. The Cornell Cooperative Extension’s poison ivy guidance specifically warns about this regeneration pattern.
Third, the soil disturbance from yanking exposes dormant seeds. Poison ivy berries (the small white drupes that appear in fall) are eaten and dispersed by more than seventy bird species, which means any wooded yard in the eastern US has a seed bank in the duff layer. Turning the soil over breaks dormancy. You will be removing seedlings for the next four years regardless of how much you took out today.
The implication is not that you should never touch the plant. It is that yanking is the last step, not the first. The first step is starving the root system from above.
The Glyphosate Drift That Wipes Out Your Milkweed Stand
Someone in my neighborhood put it bluntly last summer when she walked over to ask why the asclepias along her fence had turned chlorotic and collapsed: her husband had sprayed Roundup on the poison ivy climbing the fence post. The wind shifted. The drift caught a fifteen-foot run of common milkweed and the bumblebee colony that had been working it. By August the patch was bare ground.
This is the single most common failure mode in native yards trying to handle poison ivy. Broadcast glyphosate from a hand sprayer drifts further than people expect, and many native broadleaves are more sensitive to it than the poison ivy you are trying to kill. The vapor pressure of the formulated product also means that on a hot afternoon, you can damage plants you never sprayed through volatilization off the soil surface. The CAES Field Report on landscape poison ivy explicitly recommends against broadcast spraying in mixed plantings for this reason.
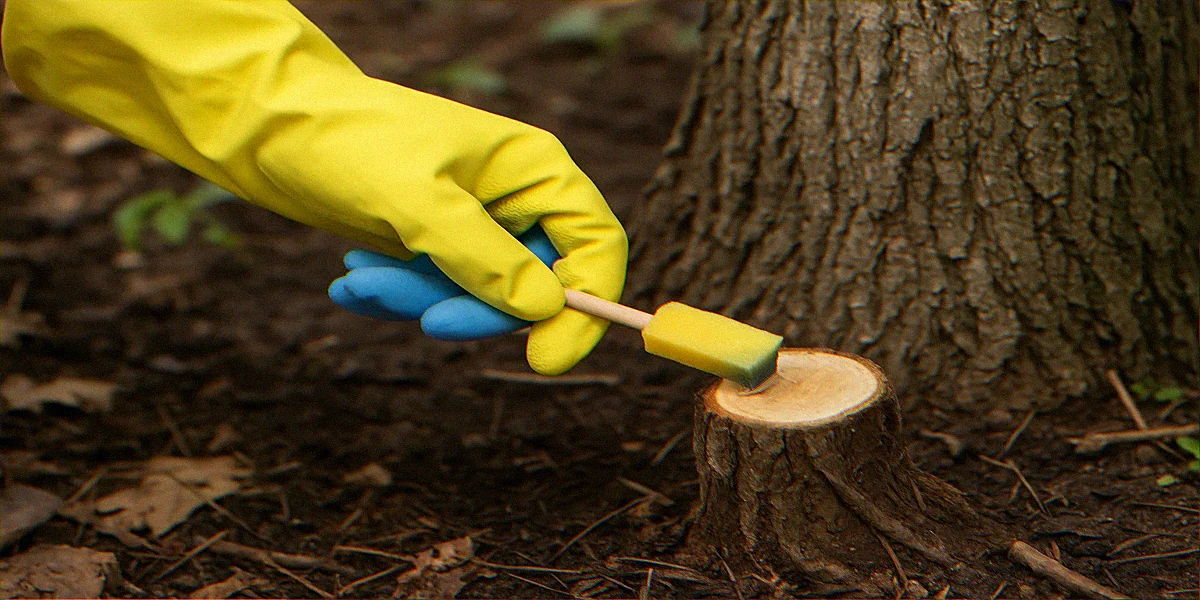
If a herbicide is going to be used in a native bed at all, it cannot be sprayed. It has to be painted, directly, onto a freshly cut stem, with a small disposable foam brush, within fifteen minutes of cutting. The chemistry that works best for this application is triclopyr, not glyphosate, because triclopyr is selective for woody broadleaves and translocates downward into the root system rather than killing whatever it touches on contact. Even then, painted application stays on the stem you intend to kill. Drift is structurally impossible because there is no spray. This is the only herbicide pattern I will use inside an established native bed, and only on mature climbing vines where the smother method is not practical.
For ground-level patches and light climbers under three years old, you do not need any herbicide at all. The smother method works, and it is faster than people who have only tried cardboard sheet mulching for lawn conversion expect, because poison ivy is a shallower-rooted plant than turf grass.
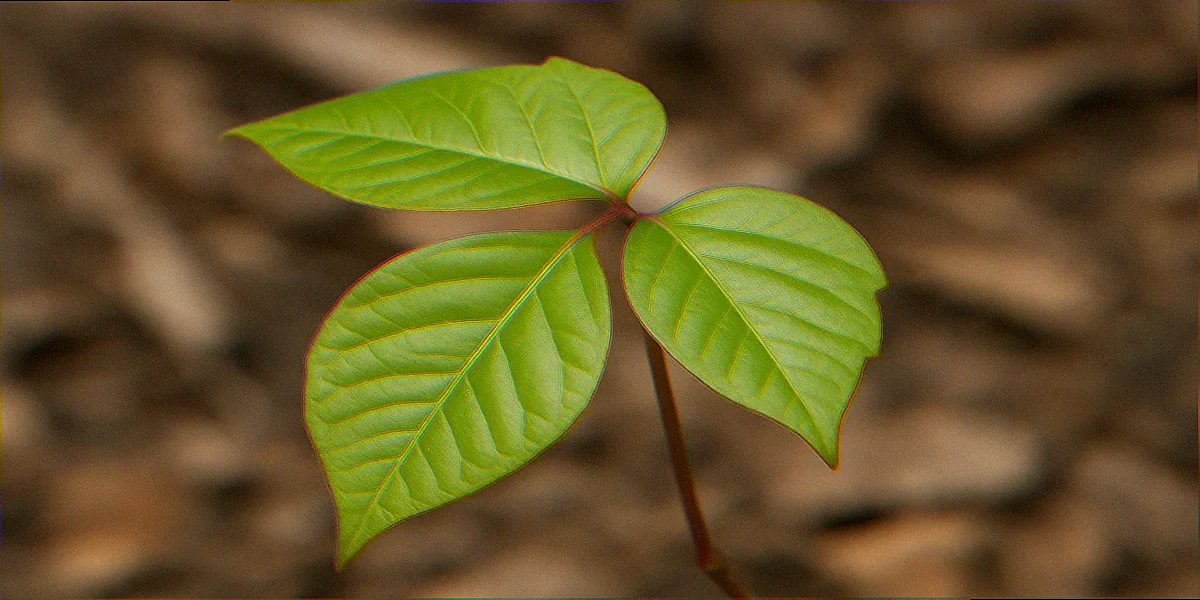
Identify Before You Touch: Leaflets, Vines, and Look-Alikes
Walk the patch with a long stick, not your hands. Use the stick to lift suspect leaves and look at the stem and the leaflet arrangement before you commit. The reliable signs:
- Three leaflets, alternate: one leaf at each node, with three leaflets per leaf. The middle leaflet is on a longer petiolule than the two side leaflets.
- Hairy aerial rootlets on the climbing form: if the vine is climbing a tree trunk, the stem looks fuzzy and ropy, like it grew a beard along its length. Virginia creeper, by contrast, has clean tendrils with little adhesive pads.
- Smooth leaf margins or shallow lobes, never toothed. Box elder seedlings have visibly toothed leaflets.
- Reddish stems on new growth, especially the tip.
If you are not certain, photograph the leaf and the stem and run it through iNaturalist before you cut anything. False positives are common (especially with box elder and young hickory seedlings, both of which I have mistakenly attacked with shears before I learned to slow down). False negatives are dangerous because the plant you walk past unprotected is the one that catches your forearm.
One identification habit I recommend: mark every confirmed poison ivy stem with a small piece of plastic flagging tape before you start a removal session. Tie a strip to the stem one foot above the soil so you can find it again in three days. The tape also tells anyone else in the yard (kids, dog walker, lawn service) what not to brush against.
Method One: Cut and Smother for Ground Patches
For ground-level poison ivy patches up to roughly six feet across, with vines under finger thickness, the smother method is the cleanest approach. It uses no herbicide and works in a single growing season if you commit to the timeline. The principle is straightforward: deny the plant any leaf surface for one full year, so the underground reserves exhaust themselves trying to put up shoots that never reach light.
The sequence I use:
- Suit up properly (PPE checklist in the next section). Cut every visible stem flat to the soil with bypass loppers. Drop each cut piece directly into a contractor-grade trash bag as you go. Do not pile cut vines on the lawn even temporarily. The cut ends will weep urushiol onto whatever they touch.
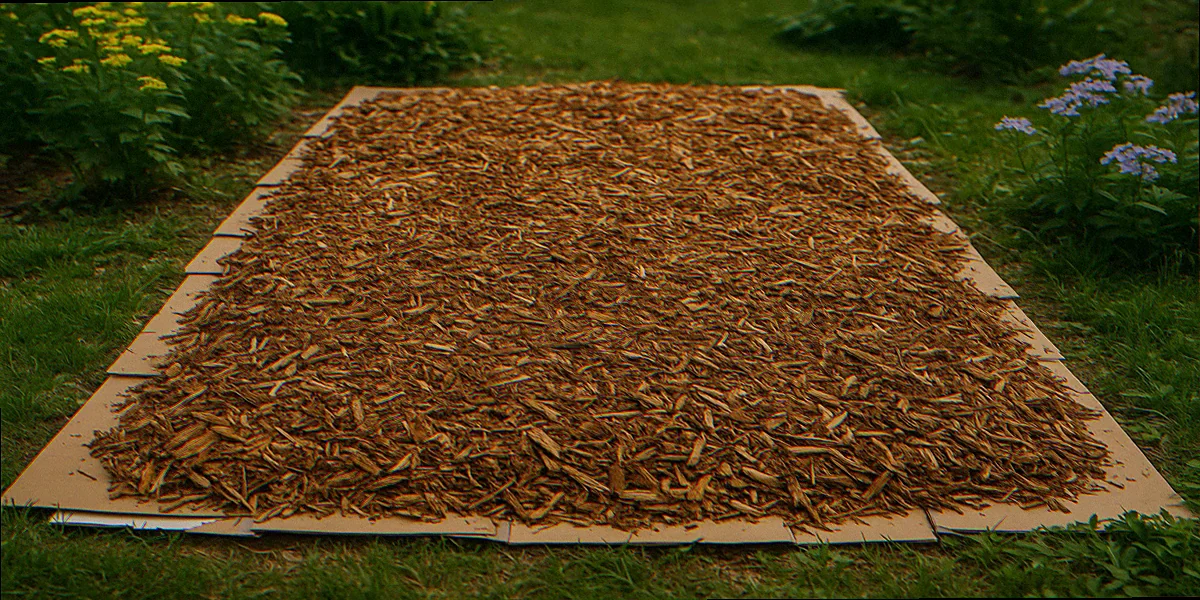
- Lay six layers of plain corrugated cardboard across the cut patch, extending at least eighteen inches past the visible vine margin on every side. Wet the cardboard thoroughly with a hose. The wet weight is what gets the layers to conform to the soil and seal against light.
- Top the cardboard with a minimum of eight inches of arborist wood chip mulch. Free chips from a local tree service or ChipDrop arborist program work as well as bagged box-store mulch, often better, because the larger chip size resists settling. The Almanac and CAES Extension both note that the depth matters more than the material: less than six inches lets shoots punch through; more than ten gets diminishing returns.
- Walk the perimeter every two weeks for the first three months looking for shoots emerging at the cardboard edge. New shoots will try to flank the smother by running rhizomes sideways. Cut and bag any flankers immediately. Extend the cardboard outward where flanking occurs.
- Leave the smother in place for at least twelve months. Eighteen is better. Do not plant into the patch during this period. Disturbance breaks the seal.
At the end of the smother period, the cardboard will have decomposed into the wood chip layer and the patch will be ready for native replanting. Soil under a year-long wood chip smother is typically darker, looser, and richer than the surrounding bed, because the chip fungus has been working the upper layer the whole time. The natives I plant back into former poison ivy patches (golden ragwort, wild geranium, woodland phlox) settle in faster than they do in fresh garden soil. A budget-friendly source list for replacement natives is worth bookmarking before you start, because you will want material ready when the smother lifts.
Method Two: Cut-Stump Painting for Mature Climbing Vines
Smothering does not work on mature climbing vines that have already reached the canopy of a tree. By the time the trunk has a wrist-thick poison ivy stem climbing it, the rhizome system is large enough that you cannot smother an effective area without burying everything else around the tree. For this case, cut-stump painting with concentrated triclopyr is the only method that works reliably in a single season without broadcast spray.
The method comes from invasive species management at state extension services and is the same technique used for multi-year buckthorn removal and English ivy reclamation. The mechanics are identical; the chemistry adjustment matters because poison ivy’s lateral rhizome behavior is more aggressive than either of those.
Tools and supplies:
- Bypass loppers or a small folding pruning saw (chain saws are overkill and increase the urushiol-aerosol risk)
- One small bottle of concentrated triclopyr formulated for cut-stump application (most state-extension-recommended brands work; check label for “cut-stump” in the directions)
- Disposable foam brushes, one per session
- A small jar to decant working solution (never paint from the master bottle)
- A contractor-grade trash bag for cut material
The sequence:
- Identify the main climbing trunk at the base of the tree. There may be several smaller stems near it. You want to cut every stem within six inches of soil level.
- Cut each stem cleanly with the loppers, leaving a stub of two to three inches above the soil. The fresh cut surface is what receives the chemical.
- Within fifteen minutes of cutting, paint the cut surface with the foam brush. The triclopyr translocates down into the root system through the still-active vascular tissue. After fifteen minutes the cut surface seals and translocation stops.
- Bag every cut piece of vine. Pull what is dangling above your head out of the tree only after the bottom is severed and painted, and only after putting on a clean second pair of gloves. The aerial portion will brown and die in place within three weeks, then can be removed cleanly when dry.
- Mark the tree with flagging tape and inspect monthly for the next year. Some root systems push up a single follow-up shoot in the second season, generally a foot or two from the original stem. Repeat cut-stump on these as they appear.
Critical detail people miss: do not paint the bark of the host tree, ever. Triclopyr will damage thin-barked species (especially young oaks, maples, and ironwood) if it touches living bark tissue. The foam brush goes only on the freshly cut poison ivy stub. Wipe drips immediately.

What to Wear So Urushiol Never Reaches Skin
The PPE setup is non-negotiable on this project, and the gear lasts for years if you store it correctly. The CDC NIOSH recommendation for outdoor workers is the baseline, with adjustments for residential work where you do not have access to a full decontamination shower.
The minimum kit:
- Disposable nitrile gloves under elbow-length rubber dishwashing gloves. The double layer matters: nitrile alone tears on twigs, and rubber alone wicks urushiol through to skin if it gets pinholed. Stretch the rubber sleeve up over your forearm sleeve before starting. Cheap kitchen gloves from any box store work as well as expensive PPE-rated ones; what matters is that the cuff overlaps the shirt.
- Long-sleeve shirt and long pants in fabric you will discard or wash separately. Tight weave is better than loose. Cotton is fine. Tuck the shirt into the pants and the pants into the boots.
- Sealed leather or rubber boots high enough to tuck pant legs into. Sneakers and ankle socks will not protect from incidental brush.
- A boonie-style hat or any brimmed hat that keeps leaves and vines off the face when you cut overhead.
- Safety glasses. Eye splash from a flexing stem is real and contact dermatitis around the eyelids is the worst version of this rash.
- Bentoquatam barrier cream on any uncovered skin (back of neck, jawline). Apply fifteen minutes before starting. It is not perfect but it buys you a meaningful window.
The cleanup matters as much as the work. Strip the gloves last, turning them inside out as you pull them off, and drop them straight into a sealed trash bag. Boots get rinsed with cold water before they come into the garage. Clothes go into the washing machine on hot, by themselves, with detergent and a second rinse cycle. Shower with cold water first to keep skin pores closed, then warm water with grease-cutting dish soap (the kind designed for engine grime) on every exposed area. Hot water alone will spread urushiol that has not yet bound to skin proteins, which is why the cold-first sequence matters.
If you suspect exposure, the first hour is critical. Wash the contact area with cold water and dish soap as fast as possible. If a rash develops over the following day or two, your local Cornell Cooperative Extension fact sheet covers identification and basic care; for anything beyond mild itching, contact a healthcare provider rather than guessing. This article is not medical advice and is not a substitute for it.
If a Neighbor Demands It Gone This Weekend
This is the question that comes up every spring, and the honest answer is uncomfortable. There is no method that removes a mature poison ivy infestation from a native yard in a single weekend without collateral damage. Anyone who tells you otherwise is selling either glyphosate or a chainsaw service that will leave you with a worse problem in twelve weeks. What you can do, and what tends to satisfy a worried neighbor, is make the visible portion of the patch disappear immediately while the slower root work continues underneath.
The fast-cosmetic sequence:
- Cut every visible leaf and stem within line of sight from the neighbor’s yard. Bag everything.
- Lay the smother layer (cardboard + eight inches of clean wood chip mulch) on the cut patch.
- Plant a temporary native ground cover that establishes fast and signals intentional management. Wild strawberry, golden ragwort, or pennsylvania sedge fill in within one season and read as “tended garden” rather than “abandoned corner”.
- Put a small wooden sign with a Wild Ones or NWF wildlife habitat designation at the edge of the patch. The signage signals that the area is managed habitat, not neglect. The same cues-of-care principles that protect from HOA violations also defuse neighbor pressure.
You will still be doing root work for the next twelve to eighteen months under the smother. That is invisible from the property line. What the neighbor sees is a tidy mulched bed with a sign on it, planted with green ground cover, exactly the look they were missing. The pragmatic compromise: the urgent social problem gets a one-week fix, and the slow ecological problem gets the time it actually needs.
If the pressure is from a household member rather than a neighbor, the same compromise applies. Native gardening pace is what makes the work sustainable. Trying to finish in a weekend is what makes people quit by July.
Year Three: What a Resolved Poison Ivy Patch Looks Like
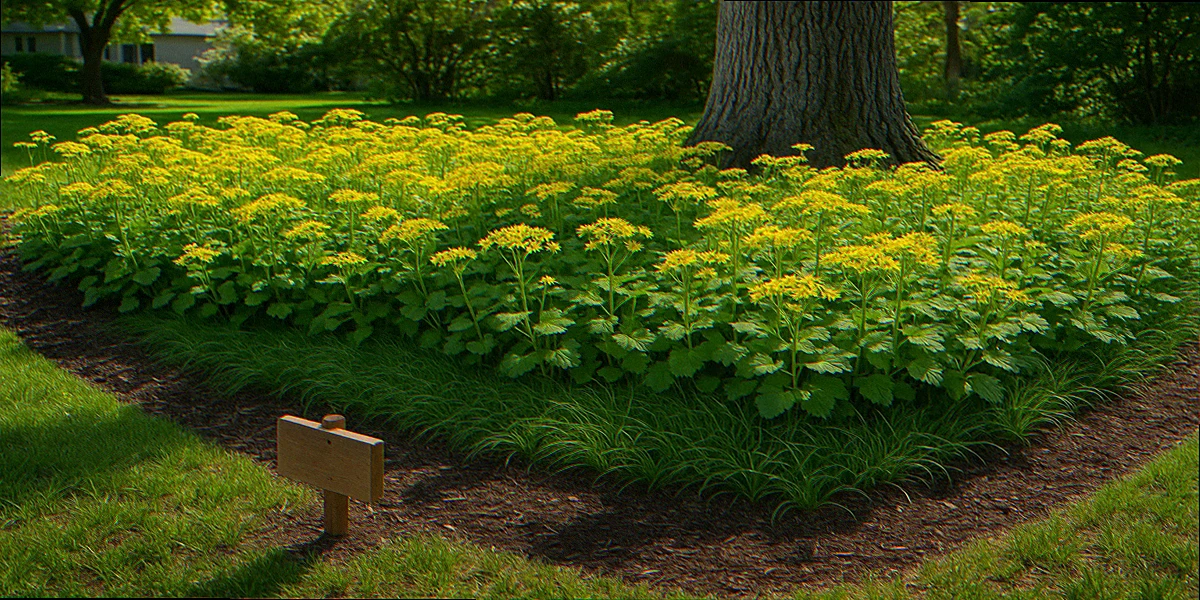
By the third growing season after a smother + cut-stump campaign, the patch should be functionally clear. Functionally clear does not mean a final zero count of stems; it means the patch produces fewer than five new shoots per year, each of them a single tender stem easy to cut and paint in under five minutes, and the surrounding native bed has expanded into the recovered space without any further intervention from you.
What I see in my own yard, three years out from the original treatment of that white oak: zero climbing stems on the trunk, a sparse handful of seedlings each May from the seed bank in the duff layer, and a closed canopy of golden ragwort and woodland sedge across what used to be solid poison ivy. The ragwort flowers for three weeks in spring before the rest of the bed wakes up, the sedge holds the soil through summer storms, and the small native bees that were probably there all along are visibly more numerous because there is now floral resource where there was only vine.
The mason bees from the cleanable house on the back fence work the ragwort first thing each morning. The wood thrush nest in the oak above the former patch fledged two broods last summer. None of that happens in year one. All of it shows up in year three, but only if you start with the right method in year one.
The most common version of failure I see in other native yards is not method selection. It is impatience. People start with cut-stump on a moderate patch, see no immediate result in two weeks, decide it did not work, and switch to broadcast glyphosate by week four. The kill happened. It just happened underground where they could not see it. By the time the next season’s shoots would have failed to appear, the milkweed and the asclepias and half the woodland understory are already gone, and the only thing growing in the patch is fresh poison ivy seedlings from the disturbed seed bank.
Stay on method, mark your dates, leave the smother alone for a full year, and let the root system do the dying it has already started. The discipline pays off in the third spring, and the patch never comes back the way it was.
Common questions readers send me
Can goats actually clear a poison ivy patch?
Yes, but only on rural lots with the fencing infrastructure to contain them. A small herd of two or three goats will browse a fenced patch down to bare stems in roughly two weeks, and the urushiol does not affect them. The complication for suburban native gardeners is that goats are non-selective: they will eat your native saplings, asters, and milkweed with the same enthusiasm. Penn State and several land-grant universities have studied targeted goat browse for invasive control, and the published guidance always emphasizes containment fencing and a willingness to lose the broadleaves you wanted to keep. For most residential yards, the cardboard smother is a closer fit.
Does the salt-vinegar-dish-soap home brew work?
It kills the leaf tissue it touches, including any native broadleaf in the spray path. It does not reach the root system. The salt component also accumulates in the soil and damages soil biology, making the patch harder to plant back into native. Skip it. The smother method is no slower and leaves the soil viable.
Is there a window when broadcast herbicide is acceptable in a native bed?
For most homeowners, no. The only context where I would consider it is a heavily infested patch with zero remaining natives in the kill zone, applied in late summer (when the plant is translocating sugars downward into the root), in still air, with a low-volatility formulation, and with at least six feet of clearance to the nearest native. Even then, cut-stump painting accomplishes the same goal with less collateral damage. The broadcast option exists in the toolkit; it almost never makes sense to deploy.
How do I dispose of the bagged poison ivy material?
Sealed contractor-grade trash bags go in the household trash for landfill disposal in most municipalities. Do not compost it (urushiol does not break down in a home pile). Do not burn it. Burning aerosolizes urushiol into the smoke and can cause severe respiratory reactions in anyone downwind. Many county extension services have specific local disposal guidance; if you are unsure, call your county extension office before the work.
How long does urushiol stay active on tools and clothes?
On smooth metal tools (loppers, pruners), urushiol can remain active for one to five years if not cleaned off. Wipe blades with rubbing alcohol or grease-cutting dish soap after every session, with gloves still on. Clothes worn during poison ivy work should be washed by themselves immediately and not left in the laundry hamper near other clothes. The USDA Forest Service publication “Outsmarting Poison Ivy” has the canonical reference numbers on tool and fabric persistence.
Closing Note
Poison ivy is the one native plant in eastern US yards that every native gardener has permission to remove without ecological guilt. It is not a keystone species. The seventy bird species that eat the berries also eat dozens of alternative native fruits. The leaves are not a host plant for any specialist butterfly or moth in the way that milkweeds or oaks are. Removing it from your yard is a defensible choice and does not put you on the wrong side of the native plant ethic.
What is not defensible is using the urgency of poison ivy removal as a justification for blowing up everything else in the bed. The whole point of building a native yard is that it produces a result you cannot get from a chemical-managed lawn: a closed plant community that supports insects and birds and small mammals across an entire season. A glyphosate spray that takes out the poison ivy along with the milkweed reverts the bed to bare ground, which is exactly the disturbed condition that poison ivy preferentially recolonizes. The fast method recreates the original problem. The slow method actually resolves it.
Mark your calendar for next May to walk the patch and count new shoots. Take a photo of the smother area the week you install it, and another from the same spot every six months. The visual record is what makes the second and third years tolerable, because the change is real but slow enough that day-to-day you will not see it. You will see it across the photos. By year three, you will be looking at a native bed where the most aggressive plant in eastern US woodland has quietly stopped winning, and the bed itself is doing the rest of the work for you.
Related reading
- Add Water for Backyard Wildlife Without Mosquito Issues
- Ground Nesting Bees in Your Yard: Identify and Protect
Authoritative sources referenced in this article: UGA Extension CAES Field Report on Controlling Poison Ivy and USDA Forest Service: Outsmarting Poison Ivy.
Want More Wildlife Garden Tips?
Join 5,000+ nature lovers getting our weekly tips on creating wildlife-friendly gardens.
No spam, unsubscribe anytime. Privacy Policy
Emma Harrington
Emma Harrington is a wildlife habitat researcher and content editor with a passion for backyard conservation. She has spent over a decade translating ecological science into practical tips anyone can follow — from selecting native plants to building wildlife-friendly habitats. Her work focuses on helping homeowners transform ordinary yards into thriving ecosystems for bees, butterflies, hummingbirds, and other beneficial wildlife.