There is a specific kind of quiet that only gardeners over forty know. The kind where you sit on the porch with a second cup of coffee and actually notice things. A hummingbird is one of those things that demands the noticing. They arrive without warning, hover for three seconds over whatever you’ve planted, and leave before your brain has finished cataloging what just happened. For a lot of us, that first hummingbird visit is what starts the obsession. You put up a feeder. You wait. And then, somehow, a whole summer organizes itself around that small red glass bottle by the window.
But hummingbird feeders, like birdbaths, are deceptively simple objects that most people get wrong. Wrong nectar recipe. Wrong feeder design. Wrong cleaning schedule. Wrong placement. Each mistake on its own is small. The birds are forgiving. But stacked together they turn what should be a guaranteed source of daily joy into an abandoned, ant-infested, algae-clouded bottle that the hummingbirds stopped visiting in June. This guide is for fixing all of that.
What follows is the complete picture: the nectar recipe (it’s simpler than you’ve been told), the feeder styles worth buying, the cleaning schedule that actually matters, the placement rules, and the handful of myths. Especially the red dye myth and the migration myth. That still get repeated even though the science has been settled for years. If you read this once and implement it, you’ll have hummingbirds visiting multiple times a day, all season long, for the rest of your gardening life.
FREE: Wildlife Garden Starter Guide
Get our 12-page PDF with the 25 best plants for pollinators, simple habitat tips, and a printable checklist — all 100% free.
No spam. Read our Privacy Policy.The Nectar Recipe: Simpler Than You Think

There is exactly one correct hummingbird nectar recipe, and it has been the correct recipe for decades. Four parts water, one part plain white granulated sugar. That is the entire formula. Boil the water briefly (to slow fermentation, not to sterilize the sugar), dissolve the sugar completely, cool to room temperature, fill the feeder. Store leftovers in the refrigerator for up to two weeks.
The ratio matters because it approximates the sugar concentration of the natural flower nectar hummingbirds evolved to drink. Roughly 20 to 25 percent sugar by weight. Any sweeter and you risk dehydrating the birds (sugar concentrations that high pull water from their tissues); any weaker and they burn calories faster than they can replace them. Four-to-one is the ratio that lines up with their physiology.
What you absolutely do not use is equally important. Hummingbirds are small. Three to four grams, about the weight of a penny. And what would be a mild dietary inconvenience for a human can be fatal for them.
- Never use honey. Honey ferments much faster than sugar water and grows a fungus (Candida) that causes a fatal tongue infection in hummingbirds. There is no safe honey recipe. None.
- Never use brown sugar, raw sugar, or turbinado. These contain iron and other minerals that hummingbirds cannot process in quantity. Iron toxicity in hummingbirds is well documented and it is cruel.
- Never use artificial sweeteners. No calories means no fuel. A hummingbird that fills up on zero-calorie nectar will starve while flying. Sometimes within hours.
- Never use powdered sugar. The cornstarch added to powdered sugar ferments and grows mold rapidly.
- Never use red dye. More on this below.
Plain white granulated sugar. The cheapest bag at the grocery store. Is the only correct ingredient. Organic, non-GMO, cane, beet, it doesn’t matter; all of them work identically once refined to white granulated form.
The Red Dye Myth
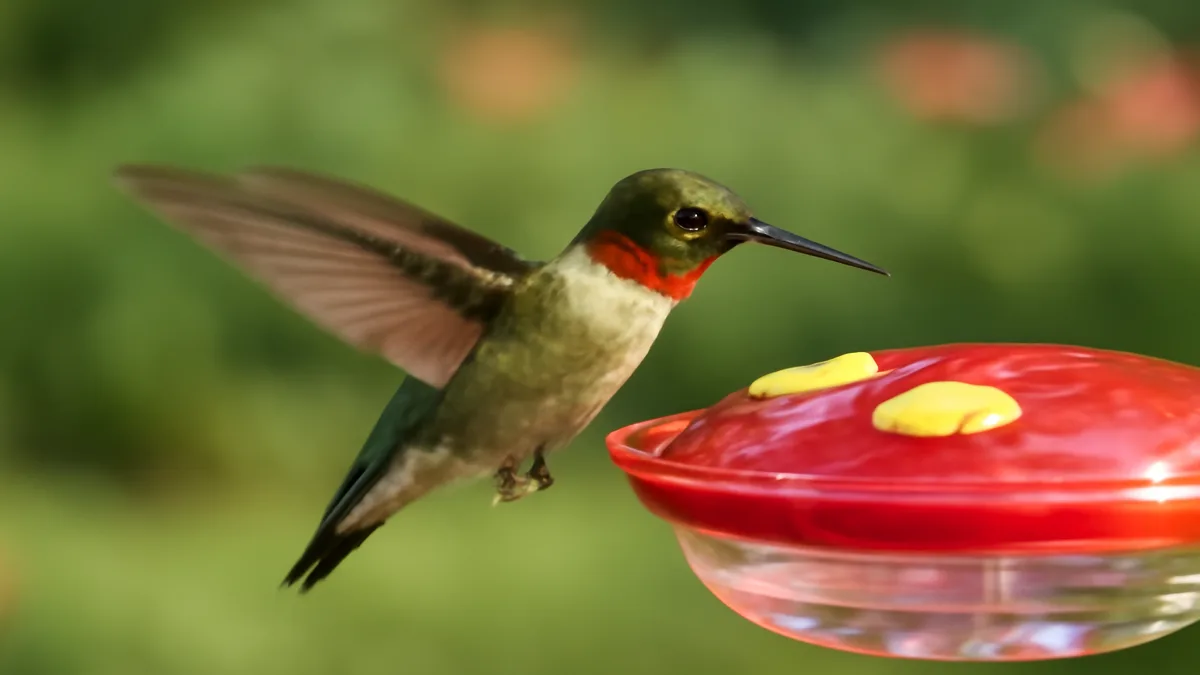
You do not need red dye in hummingbird nectar. You have never needed red dye. The feeder itself is red, and that is enough.
This myth is responsible for a huge amount of unnecessary harm. The reasoning feels sensible at first. Hummingbirds are attracted to red, so red nectar must work better, right? In practice, every commercial hummingbird feeder on the market has red parts built into it. The plastic flowers around the feeding ports are red. The base is red. The top cap is often red. A hummingbird flying past sees the red of the feeder from sixty feet away. Adding red dye to the clear sugar water inside adds nothing to the visual signal and potentially adds a lot of harm.
The dye in question is Red 40, and while its safety in human food is well established, the doses a hummingbird consumes relative to body weight are enormous. A three-gram bird drinking twice its body weight in nectar per day adds up to a chemical load that would be unthinkable in human terms. The studies we have suggest liver and kidney issues in birds with long-term high exposure. The studies we don’t have are the ones that would make us completely confident, which is exactly why the entire serious hummingbird community. The Hummingbird Society, the Audubon chapters, Cornell. Recommends clear sugar water only.
If you’ve been using red nectar for years and your hummingbirds look fine, they probably are. Switch to clear today and you’re doing the responsible thing going forward. The birds won’t notice any drop in visits; the feeder’s red plastic is what pulls them in.
Feeder Types: What Actually Works
There are four categories of hummingbird feeder on the market, and they are not equivalent. Some are much easier to clean than others, some prevent bees better than others, and some are essentially decorative objects sold to humans rather than tools designed for birds.
| Type | Price Range | Bee/Ant Resistance | Ease of Cleaning | Best For |
|---|---|---|---|---|
| Saucer (flat dish) | $15, $30 | Excellent | Excellent | Most people. The best all-around choice |
| Inverted bottle | $10, $25 | Fair | Good | Budget setups, classic look |
| Window-mount | $15, $25 | Fair | Good | Close-up viewing, apartments |
| Decorative hand-blown glass | $30, $80 | Variable | Poor to fair | Gift purchases, aesthetic priority |
Saucer feeders are the clear winner for most people. The design is a flat, shallow dish of nectar with feeding ports on the top. Because the nectar level is below the ports rather than pressed against them, bees and wasps. Which cannot reach down into the dish. Simply cannot feed. Hummingbirds, with their extendable tongues, reach in easily. Saucers also disassemble completely into two or three flat pieces, which makes cleaning ten times faster than any bottle-style feeder. The Aspects HummZinger is the category leader here and has been for years.
Inverted bottle feeders are the classic design. A glass or plastic bottle with feeding ports around a reservoir. They hold more nectar, which feels like an advantage but is usually a trap: hummingbirds can’t drink sixteen ounces before it ferments in summer heat, so you’re just throwing away most of every fill. They also leak in heat (as the air in the bottle expands it forces nectar out through the ports), which attracts ants and bees. First Nature and More Birds make the most reliable inverted bottle designs in the budget range.
Window-mount feeders are small saucer or inverted feeders that suction-cup directly to a window pane. The close-up viewing experience is unbeatable. You will literally be inches from a hovering hummingbird. And they work especially well for apartment dwellers or anyone without a yard. The trade-offs are lower capacity and the suction cups, which can fail in extreme temperatures. Use the freshest cups, clean the glass before mounting, and expect to re-mount once or twice per season.
Decorative hand-blown glass feeders are beautiful objects. They are rarely good feeders. The sealed glass construction usually prevents full disassembly for cleaning, which means you can’t scrub the inside of the bottle properly, which means mold grows where you can’t see it. Buy one as a gift for the experience; don’t rely on it as your primary feeder.
Brands Worth the Money
Not all feeders are built equally, even within the same category. A few brands have earned their reputation over decades of actual backyard use.
Aspects HummZinger. The gold standard saucer feeder. Made in the USA, dishwasher-safe on the top rack, lifetime guarantee, integrated ant moat on some models, bright red saucer design that birds spot immediately. The HummZinger Ultra (12-ounce) and the HummZinger Excel (16-ounce) are the two models most people end up with. If you buy one feeder and stop, buy this one.
First Nature. The budget king of inverted bottle feeders. The red 32-ounce bottle feeder is under fifteen dollars and is, objectively, fine. It leaks more than a saucer, attracts more bees, and holds more nectar than you’ll use, but it also works reliably and is trivial to replace if it breaks. A good starter.
More Birds. Makes the mid-range “Ruby” and “Elegance” glass bottle feeders, which split the difference between the cheap plastic of First Nature and the expensive fragility of decorative hand-blown glass. Glass bottle, metal base, reasonable price, holds up for multiple seasons.
You’ll see Perky-Pet feeders at every big-box store. They work, but the quality control is inconsistent. Some models leak badly from day one. If budget is the primary concern, go First Nature instead.
The Cleaning Schedule That Actually Matters
This is the section where most of the at-home mistakes happen. Hummingbird nectar is sugar water. Sugar water ferments. Fermented nectar grows yeast and black mold, and both of them harm hummingbirds. The cleaning schedule is not optional and it is not flexible.
When temperatures are above 80°F: change the nectar and clean the feeder every 2 to 3 days. Not once a week. Not when it looks cloudy. Every 2 to 3 days. In hot, humid climates. The Gulf Coast, the Southeast, the Southwest in late summer. Fermentation can start within 48 hours.
When temperatures are between 60°F and 80°F: every 4 to 5 days.
When temperatures are below 60°F: every 5 to 7 days.
If the nectar is cloudy, has black spots along the inside of the feeder, or has visible floating material, toss it immediately and do a deep clean regardless of how long it’s been since the last one. Cloudy nectar is yeast blooming; black spots are mold. Neither is acceptable.
How to Clean a Hummingbird Feeder
Cleaning is quick if you do it right. The steps, in order:
- Dump out any remaining old nectar. Don’t pour it onto garden soil. It attracts ants and wasps to the area around the feeder.
- Disassemble the feeder completely. If it doesn’t fully disassemble, you bought the wrong feeder; replace at next opportunity.
- Rinse all parts in hot water to remove the bulk of the sugar residue.
- For the feeding ports. Which is where mold hides. Use a port brush or a pipe cleaner. These are two-dollar tools that make the entire difference.
- For the main reservoir, hot water and white vinegar (50/50) handles light cleaning. For deep cleaning every 2 to 4 weeks, use a weak bleach solution (one part bleach to nine parts water), soak for five minutes, rinse thoroughly.
- Rinse everything at least three times in clean water until no vinegar or bleach smell remains.
- Air-dry completely before refilling.
Never use dish soap. Even a careful rinse leaves surfactant residue that coats the inside of the feeder and can transfer to the hummingbird’s tongue. Soap residue is not fatal but it’s unnecessary. Vinegar and bleach do a better job and rinse completely clean. Skip the soap.
Ants, Bees, and Wasps
The uninvited guests. Every hummingbird feeder will eventually attract ants, bees, or wasps, and once they establish a feeding pattern they will dominate the feeder and drive the hummingbirds away. Both problems have simple, cheap solutions.
For ants: an ant moat. This is a small plastic or metal cup that hangs between the feeder and its hook, with a hole in the center for the hanging wire. You fill the moat with plain water, and ants. Which cannot swim or cross significant water. Get stopped at the barrier. Ant moats cost five to ten dollars and they solve the ant problem completely. Some premium feeders (the HummZinger, for instance) build the moat into the top of the feeder itself.
Do not use petroleum jelly, Vaseline, or any other sticky substance on the feeder hanger to stop ants. Hummingbirds occasionally land on the hanger and can get the substance on their feathers, which compromises flight. Water moats only.
For bees and wasps: switch to a saucer feeder. The bee problem essentially disappears because their mouthparts can’t reach the nectar level. If you’re committed to an inverted bottle design, look for models with built-in bee guards (small mesh inserts over the ports), First Nature and Perky-Pet both make these. The bee guards work okay but not as well as just using a saucer.
Placement
The placement rules for hummingbird feeders are similar to birdbath rules but with a few twists specific to hummingbirds.
- Shaded location. Nectar ferments far faster in direct sun. A feeder hanging in morning shade or filtered light will stay fresh two to three times longer than one in full afternoon sun. Under a porch eave, beneath a tree, or on the east-facing side of the house are all good options.
- Near flowers. Hummingbirds cruise the neighborhood for flower clusters first and feeders second. If your feeder is in the middle of a bed of flowers for hummingbirds. Salvia, bee balm, trumpet vine, cardinal flower. You’ll get discovered within days.
- Away from cats. Hummingbirds are vulnerable when hovering at a feeder. Keep the feeder at least five feet off the ground and at least six feet from any launch point a cat could use (fence top, railing, tree limb).
- Visible from where you sit. This one is for you, not the birds. A feeder you can see from the kitchen window or the porch gets watched, and a feeder that gets watched teaches you the rhythms of your local hummingbird population. Who arrives first in the morning, who’s territorial, who migrates through.
For broader guidance on building hummingbird-friendly gardens with the right native species, see our full list of plants for hummingbirds, which covers regional selections, bloom timing, and color preferences.
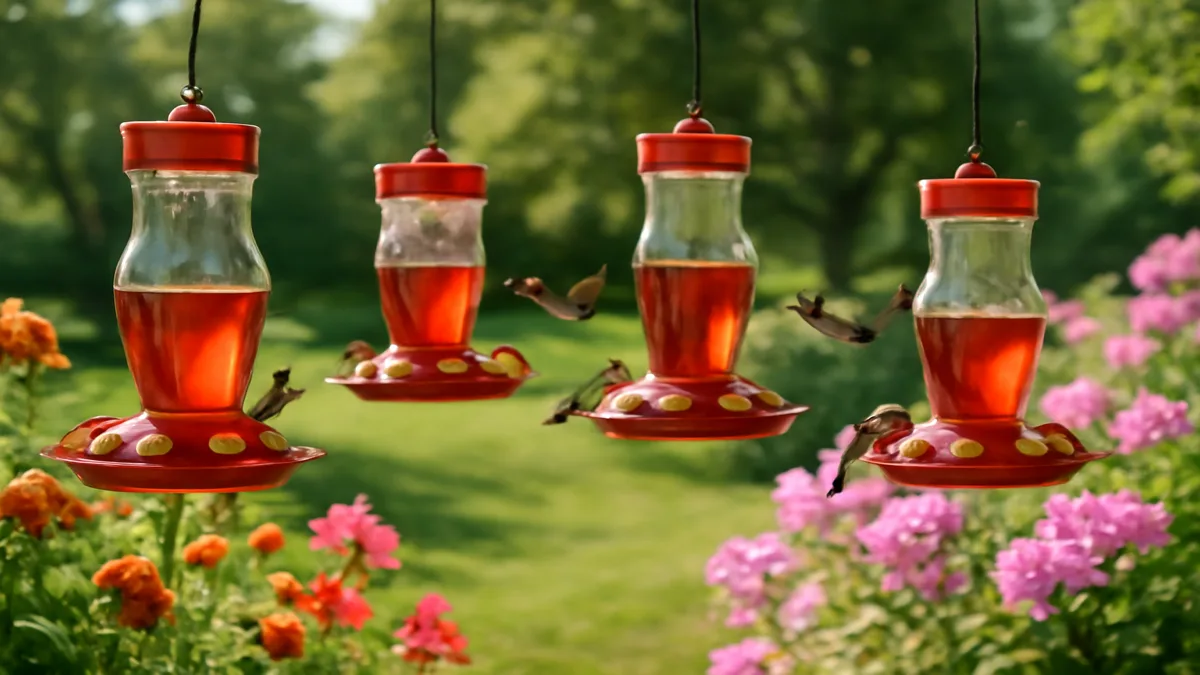
Territorial Fights and the Two-Feeder Solution
Hummingbirds are famously territorial. A single dominant male will claim a feeder as his own and spend enormous amounts of energy chasing every other hummingbird away. Often so successfully that you end up with one hummingbird instead of ten. You’ll watch the same bird for weeks and wonder why the migration numbers seem so low.
The fix is almost absurdly simple. Put up a second feeder, at least fifteen feet from the first, ideally around a corner of the house or behind a tree so the two feeders are not visible from the same hovering position. The dominant male cannot defend what he cannot see, and suddenly a second, third, fourth hummingbird shows up at the “hidden” feeder. Three feeders spread around the yard effectively breaks the territorial bottleneck entirely.
This is the single best upgrade after the initial feeder purchase. It costs fifteen to thirty dollars and usually triples the number of individual birds you see daily.
When to Put Out Feeders and When to Take Them Down
Timing depends on your latitude, and the wrong timing costs you the early and late migrants.
Spring arrival dates (approximate):
- USDA zone 8 (Gulf Coast, southern Texas, northern Florida): March 1
- USDA zone 7 (mid-Atlantic, Tennessee, Oklahoma): March 20, April 1
- USDA zone 6 (Ohio, southern New England, Missouri): April 1, April 15
- USDA zone 5 (upper Midwest, northern New England): April 15, May 1
- USDA zone 4 (northern tier): May 1, May 15
Put feeders up two weeks before the average arrival date for your zone. Early migrants are often exhausted and will remember a reliable feeder from year to year. Late is worse than early; an empty yard on March 15 in zone 7 tells the first few arriving birds to move on.
In fall, leave feeders up until two weeks after you see your last hummingbird. This catches stragglers, juvenile birds on their first migration, and occasionally rare visitors from western species that sometimes appear in the East in late fall. Contrary to what many people believe, leaving feeders up will not delay migration. See the next section.
The Migration Myth, Finally Put to Rest
You’ve probably heard this one: “Take your feeders down by Labor Day or you’ll keep the hummingbirds from migrating.” It is completely false, and it causes real harm when well-meaning people remove feeders just as tired migrants are passing through.
Hummingbird migration is triggered by photoperiod. The length of daylight. Not by food availability. As the days shorten in late summer, hummingbirds experience hormonal changes that drive them to eat more, store fat, and ultimately head south. A feeder hanging in your yard does not override millions of years of evolutionary programming. The bird that visits your feeder on September 20 is going to migrate on its biological schedule regardless of what’s hanging in the tree.
What your feeder does is save lives during migration. A late migrant. Often a juvenile or an injured adult. Can travel further and survive harder weather with a reliable nectar source along the route. Keep feeders up and filled until two weeks after your last sighting. You are not delaying anything; you are refueling exhausted travelers.
For the most authoritative sources on all of this. Nectar chemistry, migration timing, feeder design, and species identification. The Hummingbird Society publishes detailed guides and runs a migration tracker that’s updated in real time each spring and fall. The Cornell Lab of Ornithology covers every North American hummingbird species with range maps, song recordings, and behavioral notes that will help you identify exactly who’s visiting your yard.
Pulling It All Together
If you’ve made it this far, you have everything you need to run a hummingbird feeding setup that outperforms ninety percent of the yards on your street. The checklist is short. Four-to-one sugar water, no red dye, no honey, no substitutes. A saucer-style feeder from a reputable brand. Two to three feeders spread apart to defeat territorial behavior. Cleaning every two to three days in summer heat. Placement in morning shade near flowering plants. An ant moat to keep insects off. Feeders up two weeks before the first arrivals and down two weeks after the last departure. With no worries about delaying migration.
If you’re just getting into backyard birding more broadly and you want to build a yard that works for hummingbirds, songbirds, and everything in between, our overview on how to attract birds walks through cover, food, water, and nesting habitat in one place. Combining a good feeder setup with a thoughtful plant selection and a reliable water source turns a yard into an actual habitat. The kind that fills with motion every morning and quiets down at dusk in exactly the way you remember a real backyard being supposed to feel.
Frequently Asked Questions
What is the correct hummingbird nectar recipe?
Four parts water to one part plain white granulated sugar. Bring the water to a brief boil, dissolve the sugar fully, cool to room temperature, and fill the feeder. Store leftover nectar in the refrigerator for up to two weeks. Never use honey, brown sugar, artificial sweeteners, or red dye.
How often should I clean my hummingbird feeder?
Every 2 to 3 days when temperatures are above 80°F, every 4 to 5 days in moderate weather, and every 5 to 7 days when temperatures are below 60°F. If the nectar looks cloudy or you see any black spots inside the feeder, clean it immediately regardless of the schedule.
Do I need red dye in hummingbird nectar?
No. The feeder itself has red parts that attract hummingbirds from a distance. Red dye adds nothing to the visual signal and may cause long-term harm. Clear sugar water is the correct and only recommendation from every major hummingbird research organization.
Will leaving my feeder up in fall delay hummingbird migration?
No. This is a myth. Hummingbird migration is triggered by day length, not food availability. Leaving feeders up late actually helps exhausted migrating birds refuel along their route. Keep feeders up until two weeks after you see your last hummingbird of the season.
Why do I only see one hummingbird at my feeder?
You almost certainly have a territorial male defending the feeder against all other hummingbirds. Put up a second feeder at least 15 feet away, ideally around a corner so the two feeders aren’t visible from the same position. The dominant male can’t defend what he can’t see, and you’ll immediately start seeing multiple birds.
Want More Wildlife Garden Tips?
Join 5,000+ nature lovers getting our weekly tips on creating wildlife-friendly gardens.
No spam, unsubscribe anytime. Privacy Policy
Emma Harrington
Emma Harrington is a wildlife habitat researcher and content editor with a passion for backyard conservation. She has spent over a decade translating ecological science into practical tips anyone can follow — from selecting native plants to building wildlife-friendly habitats. Her work focuses on helping homeowners transform ordinary yards into thriving ecosystems for bees, butterflies, hummingbirds, and other beneficial wildlife.