Learning how to build a birdhouse is one of those weekend projects that sounds simple until you realize a bluebird needs completely different dimensions than a wren, and a robin won’t even look at an enclosed box. I’ve been putting up nest boxes in my backyard for close to two decades now, and I can tell you the difference between a birdhouse that sits empty year after year and one that hosts successful broods every spring comes down to getting a handful of specifications exactly right. A quarter-inch off on the entrance hole and you either lock out your target species or invite every starling and house sparrow in the neighborhood.
The good news is that once you understand the principles, building species-specific nest boxes is genuinely straightforward. You need basic tools, a single cedar board, and about two hours per house. You do not need fancy joinery, expensive hardware, or any of the decorative nonsense sold at big box stores. In fact, most of the cute painted birdhouses you see at garden centers are actively harmful to the birds they claim to serve. Real nest boxes are plain, functional, and built to mimic the natural tree cavities these birds evolved to use.
In this guide I’ll walk you through complete plans for four of the most common and rewarding backyard birds: Eastern and Western Bluebirds, House and Carolina Wrens, Chickadees, and American Robins. You’ll get exact dimensions, mounting heights, placement rules, and a universal construction method that applies to all of them. By the end, you’ll know enough to build a small neighborhood of nest boxes that actually get used.
FREE: Wildlife Garden Starter Guide
Get our 12-page PDF with the 25 best plants for pollinators, simple habitat tips, and a printable checklist — all 100% free.
No spam. Read our Privacy Policy.Why Species-Specific Dimensions Matter More Than You Think
Here’s something most backyard bird books gloss over: a birdhouse is not generic housing. It’s a very specific replacement for a very specific type of natural cavity. A chickadee excavates a rotted aspen snag with a tight 1 1/8 inch opening. A bluebird takes over an abandoned woodpecker hole in a fencepost along an open meadow. A robin builds on a horizontal branch under a dense canopy. When you put up the wrong box in the wrong place, you’re essentially building a vacation rental in a neighborhood where your target guest doesn’t live.
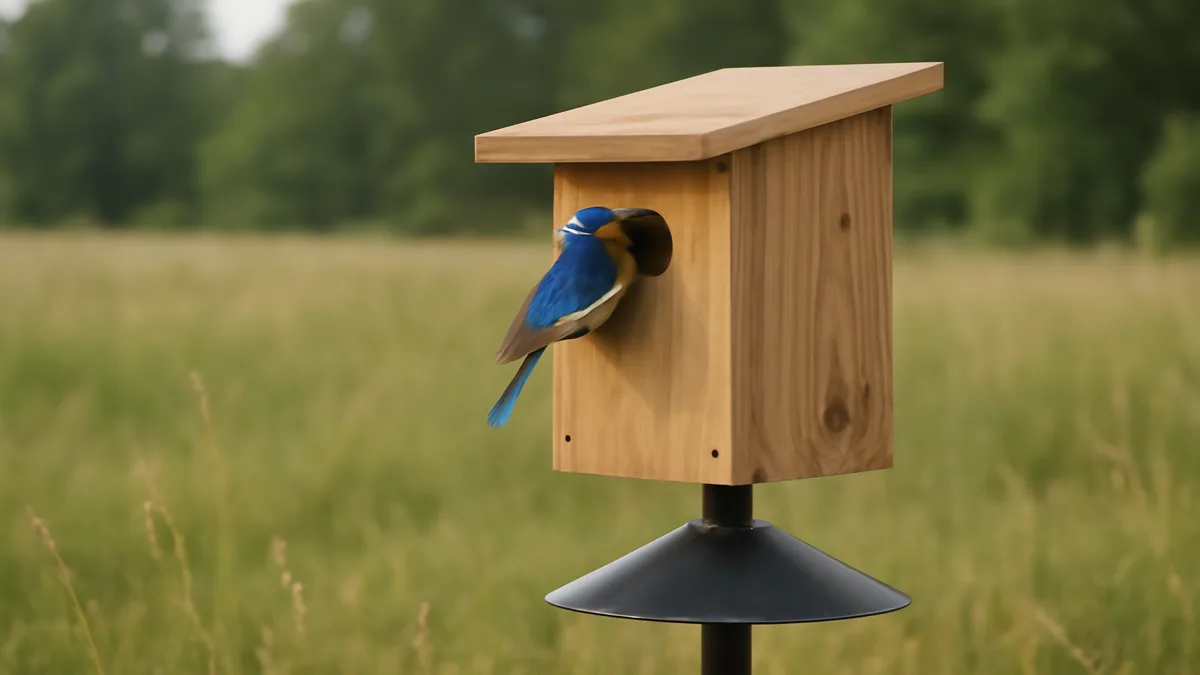
The entrance hole is the single most important dimension. It acts as a selective filter. Make the hole too big, and larger aggressive species, starlings in particular, will evict your target birds or kill their chicks. Make it too small and the birds can’t even enter. The difference between a successful bluebird box and a starling nightmare is sometimes as little as 1/8 inch on the entrance diameter.
A birdhouse without species-specific dimensions is just decoration. The birds that find it either can’t use it or will be displaced by something that can. Build for one species, build it right, and you’ll have tenants within a single nesting season.
Mounting height, orientation, and surrounding habitat matter almost as much. Bluebirds want open fields and a clear flight path. Chickadees want the dappled edge of woodland. Wrens want sheltered thickets. Get the habitat wrong and even a perfectly-built box will sit empty. This is also true for other wildlife projects like bat house plans, where placement rules are just as unforgiving.
The Bluebird Box: Specifications for Eastern, Western, and Mountain
Bluebirds are the gateway drug of backyard birding. Watching a pair raise two or three broods in a box you built yourself is genuinely addictive. All three North American bluebird species use similar boxes, but the dimensions vary slightly by region. The Eastern Bluebird covers most of the country east of the Rockies. The Western and Mountain Bluebirds share most of the western half, with Mountain Bluebirds reaching higher elevations.
| Specification | Eastern Bluebird | Western & Mountain |
|---|---|---|
| Floor dimensions | 5″ x 5″ | 5.5″ x 5.5″ |
| Interior depth | 8″ to 12″ | 8″ to 12″ |
| Entrance hole diameter | 1.5″ | 1 9/16″ |
| Hole height above floor | 6″ to 10″ | 6″ to 10″ |
| Mounting height | 4 to 6 ft (up to 10) | 4 to 6 ft (up to 10) |
| Entrance orientation | East or South | East or South |
Bluebirds want open, grassy habitat. Think pastures, large lawns, cemeteries, golf course edges, and hayfields. They hunt insects by watching from a perch and swooping down to the ground, so they need a clear view and short grass. Avoid putting bluebird boxes near dense brush or woodland edges, that’s wren and chickadee territory, and House Wrens in particular will destroy bluebird eggs if the boxes are too close.
Mount the box 4 to 6 feet off the ground on a smooth metal pole, not a tree or wooden fencepost. This is non-negotiable. Raccoons, cats, and snakes climb trees and wooden posts with ease, and an unprotected box becomes a buffet. Add a predator baffle, a cone or stovepipe-style guard, below the box. Face the entrance East or South, away from prevailing wind and driving rain. Space boxes 100 to 150 yards apart because bluebirds are territorial and won’t tolerate neighbors any closer.
Wren Houses: House Wren vs Carolina Wren
Wrens are the loudmouths of the backyard. For a five-inch bird, a House Wren can sing loud enough to fill a suburban lot. Both House Wrens and Carolina Wrens readily use nest boxes, but they have very different preferences about how the box is mounted and where it sits in the landscape.
The basic box dimensions are the same for both: a 4 by 4 inch floor and an interior depth of 6 to 8 inches. The entrance hole is where things get specific. House Wrens will use a 1 inch or 1 1/8 inch hole, and smaller is actually better because it excludes House Sparrows. Carolina Wrens are larger birds and need 1 1/8 to 1.5 inch openings. Place the hole 4 to 6 inches above the floor.
Here’s the interesting difference: House Wrens actually prefer boxes that swing freely from a branch or eave. They seem to enjoy the motion and will choose a hanging box over a fixed one. Carolina Wrens want exactly the opposite, a firmly mounted box that doesn’t move. So if you’re not sure which species you have, put up one of each style. Both species want shaded, sheltered locations with thick underbrush nearby, mounted 5 to 10 feet off the ground.
Wrens fit beautifully into a landscaped yard with mixed plantings, especially if you’ve already put in a pollinator garden with layered shrubs and flowering plants. The insects drawn to those plantings feed the wren chicks, and the dense vegetation gives the adults cover from hawks.
Chickadee Boxes: The One with the Sawdust Trick

Black-capped, Carolina, and Mountain Chickadees all use the same box design. These are small acrobatic birds that in the wild excavate their own cavities in soft rotted wood. That natural behavior is the reason for one of the most overlooked tricks in nest box construction: you need to add wood shavings to the floor before the birds will move in.
Floor dimensions are 4 by 4 inches with an interior depth of 8 to 10 inches. The entrance hole is 1 1/8 inches, placed 6 to 8 inches above the floor. Mount the box 5 to 15 feet high on a tree trunk or sturdy post at the edge of a wooded area with roughly 40 to 60 percent sunlight. Chickadees want dappled light, not full sun and not deep shade.
Now the critical step almost nobody mentions: add about 1 inch of dry wood shavings or clean sawdust to the floor of the box before the nesting season starts. Chickadees expect to excavate. When they find a box already full of material they can remove and rearrange, it triggers their nest-building instinct. An empty box reads as unfinished to them. I’ve had chickadee boxes sit vacant for three seasons and then get occupied the first spring after I started adding shavings. Space chickadee boxes 20 to 30 feet apart, which is much closer than bluebirds tolerate.
Robin Platforms: Why Enclosed Boxes Don’t Work
Here’s where a lot of beginners go wrong. American Robins do not use enclosed cavity boxes. They’re not cavity nesters at all. They build open cup nests on horizontal surfaces, so what they need is a nesting platform, essentially a small roofed shelf with one to three open sides.
Build the platform with a 6 by 8 inch floor and an 8 inch overall height. Leave the front completely open and optionally the sides as well, leaving only a back wall and a roof. Mount it 6 to 15 feet off the ground under the eaves of a house, on the side of a garage, under a porch overhang, or attached flat against a tree trunk. Robins like some overhead protection from rain and sun but they want a wide open view and easy flight access.
Robins are also one of the few species that will happily nest within arm’s reach of human activity. A platform above a frequently-used doorway is often chosen over a quieter location, probably because the human foot traffic discourages predators. If you enjoy watching hummingbirds as well, pair your robin platform with flowers for hummingbirds near the same structure and you’ll have bird activity all season.
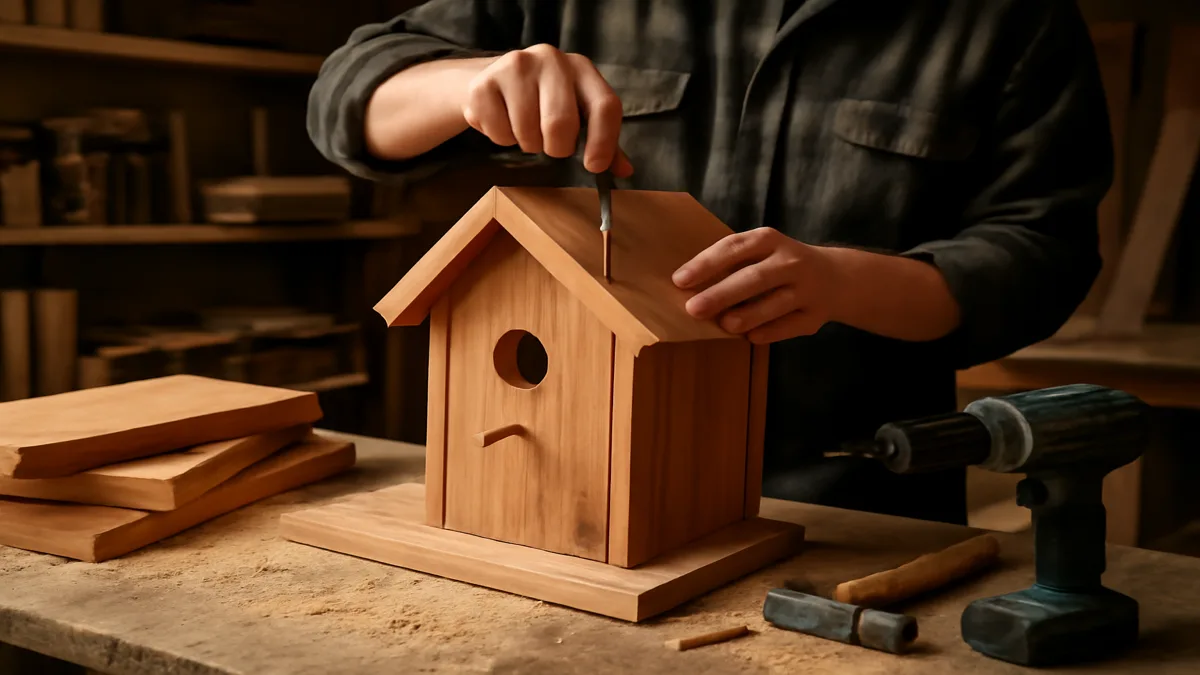
Universal Construction: Materials, Cuts, and Assembly
Every box in this guide uses the same construction method. Once you’ve built one, you can build any of them. The key is choosing the right materials and paying attention to a few details that separate a box that lasts 15 years from one that rots out in 3.
Use untreated wood, 3/4 inch to 1 inch thick. Cedar, redwood, and bald cypress are the three best choices because they naturally resist rot and insects without chemical treatment. Never, ever use pressure-treated lumber. The chemicals leach into the cavity and poison the chicks. A single 1 by 6 board about 5 to 6 feet long is enough to build most cavity boxes, which is part of why this is such a beginner-friendly project.
Here is the construction sequence that works for all four species:
- Cut all six pieces from a single 1 by 6 cedar board using the species-specific dimensions above. Make the back panel 4 to 6 inches longer than the sides so it can extend past the roof and floor for mounting.
- Cut the roof at a 15-degree angle so rain runs off cleanly. The roof should overhang the front by 2 to 4 inches to shield the entrance and 2 inches on each side.
- Drill the entrance hole to exact specification using a spade bit or hole saw. Do this before assembly, it’s much easier. Center the hole horizontally on the front panel.
- Roughen the interior face of the front panel below the entrance hole, or cut horizontal grooves every 1/4 inch. This is the fledgling escape ladder and it is absolutely essential. Without it chicks can’t climb out and will die in the box.
- Drill four 1/4 inch drainage holes in the corners of the floor so any water that gets inside can escape.
- Leave small gaps under the roof for ventilation, or drill several 1/4 inch holes near the top of the side panels. Heat buildup kills chicks in summer.
- Assemble with galvanized or stainless steel screws, never nails. Screws let you take the box apart for repairs and won’t work loose over the years.
- Make one side panel hinged using two screws at the top as a pivot and one latch screw at the bottom. This is your cleaning access. You’ll need to empty the box between broods and after each season.
- Do not paint or stain the interior under any circumstances. The outside can be left natural or given a light coat of water-based exterior stain in a dull earth tone, but inside must stay raw wood.
Keeping Predators Out and Avoiding Beginner Errors
A birdhouse without predator protection is a death trap. I cannot stress this enough. More chicks die to raccoons, snakes, cats, and squirrels than to any other cause combined. If you can only do one thing to improve nesting success, put a predator baffle on every pole-mounted box.
Here are the mistakes I see most often and how to avoid them:
- Wrong entrance hole size. Off by 1/8 inch and you either exclude the target species or invite predators and competitors. Use a hole saw, not a freehand drill.
- No predator baffle. A smooth metal pole is not enough. Add a cone or stovepipe baffle mounted below the box.
- Pressure-treated wood. The chemicals kill chicks. Use only cedar, redwood, or bald cypress.
- No drainage or ventilation. Boxes without drainage drown chicks in spring storms, and boxes without ventilation cook them in summer heat.
- Mounted too low. Anything under 4 feet is accessible to most ground predators. Follow the species-specific height ranges.
- Painted interior. Even water-based paint off-gasses in a hot cavity. The inside stays bare wood, always.
- No fledgling ladder. Smooth interior walls trap chicks. Roughen the wood or cut grooves below the entrance.
- Boxes too close together. Most species are territorial. Follow the spacing recommendations or your boxes will stay empty.
For data-driven placement guidance and to contribute your observations to ongoing research, check the Cornell Lab of Ornithology’s NestWatch program, which tracks nest box success across North America. The National Audubon Society also publishes region-specific nest box plans updated annually.
Seasonal Maintenance and Monitoring
Putting up the box is the beginning, not the end. A well-maintained nest box will host successful broods for 15 or 20 years. A neglected one becomes a disease vector and predator magnet within a couple of seasons.
Clean each box at the end of the nesting season in late fall. Open the hinged side, scrape out the old nest, and brush out debris. Some people wash the interior with a diluted bleach solution, rinse thoroughly, and let it dry for several days before closing it up. Between broods within a single season, you can also pull the old nest if you see the first brood has fledged and no new eggs have been laid.
Check your boxes weekly during nesting season. Peek inside briefly, the parents tolerate short disturbances, and look for problems: wasps building nests, mice taking over in late season, blowfly larvae on chicks, or predator damage. Catching problems early is the difference between a successful season and a lost brood.
Conclusion: From One Box to a Backyard Network
Once you build your first successful box and watch a brood fledge, you’ll understand why this hobby is so satisfying. Start with one species that matches your habitat, get the dimensions right, mount it properly, and add predator protection. Within a year or two you’ll want a bluebird trail across the back fence, a wren box on the shed, a chickadee box in the side yard, and a robin shelf under the porch eave.
The plans in this guide will give you everything you need to build species-appropriate housing that actually gets used. Remember, the birds aren’t picky about appearance. They’re picky about dimensions, materials, and placement. Get those right and the rest takes care of itself.
Found this guide helpful? Share it with the backyard birder in your life and help more people put up nest boxes that actually work. Every well-built box is one more successful brood, and that adds up fast across a neighborhood.
Birdhouse Placement by US Climate Region
The same wildlife garden technique can thrive in one region and fail in another, not because the method is wrong but because climate, soil, and native species vary dramatically across the country. Use your USDA Hardiness Zone as a starting point, then adjust for humidity, rainfall patterns, and local pest pressure. The guidance below outlines the most common regional shifts gardeners need to make.
- Northeast (Zones 3 to 7): Short growing season and cold winters mean you should plant by Memorial Day, mulch heavily before Thanksgiving, and favor cold-hardy natives like serviceberry, winterberry holly, and New England aster. Expect heavy deer pressure in suburbs and plan fencing or repellents from the start.
- Southeast (Zones 7 to 10): High humidity invites fungal disease, so space plants generously and water at the base rather than overhead. Summer heat stops many birds from nesting in July and August, so keep shaded water sources available. Choose heat-tolerant natives like beautyberry, native azalea, and passionvine.
- Midwest (Zones 3 to 6): Temperature swings between seasons are extreme, and late spring frosts routinely kill early buds. Delay pruning until April, mulch with 3 to 4 inches of wood chips for insulation, and lean on prairie natives such as purple coneflower, little bluestem, and compass plant. Tornado-damaged trees often become excellent snag habitat if left in place safely.
- Southwest (Zones 6 to 10): Water is the limiting factor. Group plants by water need, install drip irrigation on a timer, and add a shallow dripper-style water feature that attracts more wildlife than any feeder. Native penstemon, desert willow, and chuparosa outperform thirsty ornamentals. Watch for scorpions when moving rocks or logs.
- West Coast (Zones 7 to 10): Wet winters and dry summers reverse the Eastern rhythm. Plant in October so roots establish during the rainy season, then let plants go semi-dormant in July and August. Coastal fog belts support ferns and huckleberry; inland valleys need fire-wise spacing and hardscape buffers within 30 feet of structures.
Whatever your region, check your exact zone at the USDA Plant Hardiness Zone Map before buying plants, and cross-reference with your state extension service for pest alerts and invasive species to avoid. A 20-minute visit to a local native plant nursery will teach you more about what actually works in your soil than any national guide.
Frequently Asked Questions
What time of year should I put up a new birdhouse?
Install new nest boxes in late winter, ideally February in the South and early March in northern regions, so they are weathered and in place before birds begin scouting nest sites. Boxes put up during nesting season can still be used, especially for second broods, but established boxes are always chosen first. Cleaning and repairing existing boxes should also happen during this same late winter window.
How do I stop house sparrows from taking over my bluebird box?
House sparrows are invasive and will kill native birds to claim a box. The most effective defense is correct entrance hole sizing, keeping it at exactly 1.5 inches for Eastern Bluebirds. Monitor boxes weekly and remove any sparrow nests immediately before eggs are laid. Some bluebirders also use sparrow spookers, simple hanging strips above the entrance, which bluebirds tolerate but sparrows avoid.
Can I put multiple birdhouses close together?
It depends on the species. Chickadees tolerate boxes spaced just 20 to 30 feet apart, while bluebirds demand 100 to 150 yards between boxes because they defend large territories. You can mix species in the same yard as long as each box meets its own spacing requirement. Pairing a bluebird box with a wren box within 50 feet often leads to wrens destroying bluebird eggs.
Do I need to add nesting material inside the box?
Only for chickadees, which expect to excavate and need about 1 inch of dry wood shavings or clean sawdust on the floor to trigger nesting behavior. Bluebirds, wrens, and robins all bring their own material and will actively remove anything you put inside. Never add cotton, yarn, or synthetic fibers to any nest box because they can entangle chicks and cause fatal injuries.
How long does a cedar birdhouse last outdoors?
A properly built cedar nest box with stainless steel screws, adequate drainage, and annual cleaning will last 15 to 20 years with no treatment at all. Leaving the wood natural lets it weather to a silver-gray that birds actually prefer over stained or painted finishes. Replace any box when the floor softens, the walls split through, or the entrance hole wears oval, because worn holes no longer exclude predators correctly.
Want More Wildlife Garden Tips?
Join 5,000+ nature lovers getting our weekly tips on creating wildlife-friendly gardens.
No spam, unsubscribe anytime. Privacy Policy
Emma Harrington
Emma Harrington is a wildlife habitat researcher and content editor with a passion for backyard conservation. She has spent over a decade translating ecological science into practical tips anyone can follow — from selecting native plants to building wildlife-friendly habitats. Her work focuses on helping homeowners transform ordinary yards into thriving ecosystems for bees, butterflies, hummingbirds, and other beneficial wildlife.